

Bottlebrush trees are a Christmas classic that never goes out of style. As a matter of fact, I think recently they’ve been more in style than ever. The past few years we have seen creatives sharing colorful bottle brush tree projects everywhere making me love them even more as a total sucker for color! Last year I thought I would try my hand at bringing the bottle brush tree trends to cookies, you can see my original attempt here.
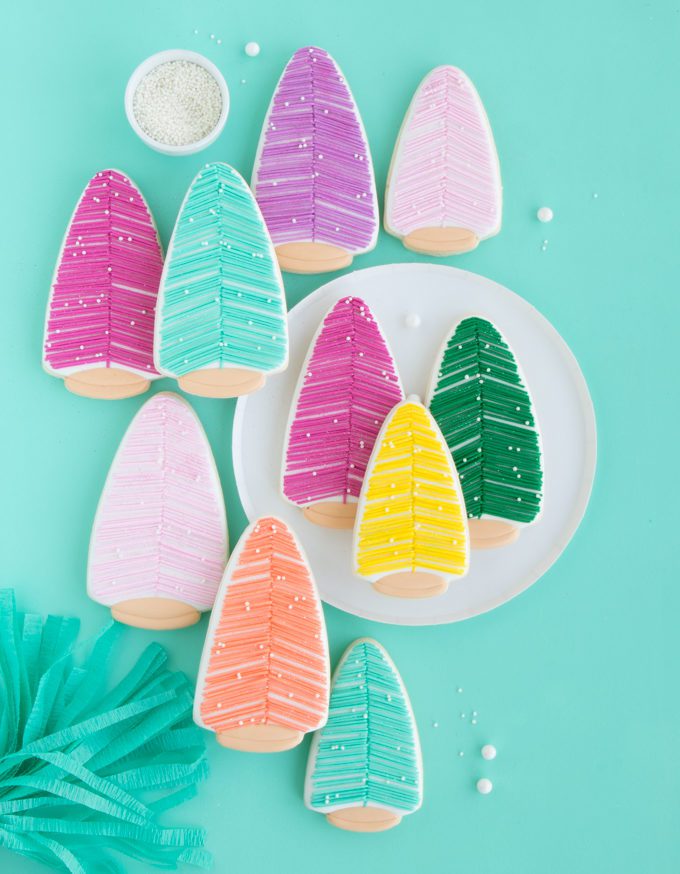
[HERO SHOT]
They were cute, but they weren’t exactly what I had in mind. For the original set, I had to make do with a cutter + cutter hack. But the real challenge was how to bring the look of an actual bottle brush tree to a cookie! My first attempt I simply pimped straight lines across the tree shape. Again cute, but I wasn’t quite ready to give up quite yet. Fast forward a year and I find myself unboxing my new Silhouette Alta just before Christmas. While visions of sugarplum cookie cutters danced in my head I knew it was going to be a journey to learn to use this new magical cookie cutter machine, kinda like mastering a set of bottle brush tree cookies. I’ll be sharing tons more on the new Alta machine and
Not even kidding guys. I drew up this shape in Silhouette Design studio, opened it in the Silhouette Alta 3D studio and TADA! My very own bottle brush tree cookie cutter! With this new shape, I was ready to take on bottle brush tree cookies take 2. It’s safe to say I’m digging this edition. It’s super hard to see in the photos but these bottle brush tree
HOW TO MAKE BOTTLE BRUSH TREE COOKIES
NEW TO COOKIES? BE SURE TO CHECK OUT THESE POSTS FOR THE BASICS:
ROLLED COOKIES 101+ ROYAL ICING 101+DECORATING COOKIES 101
TOOLS
SUPPLIES
- white outline icing + white flood icing
- light brown/tan colored outline + flood icing
- outline icing in whatever tree colors you would like
- white nonpareil sprinkles
- edible jewel dust
- dust pump
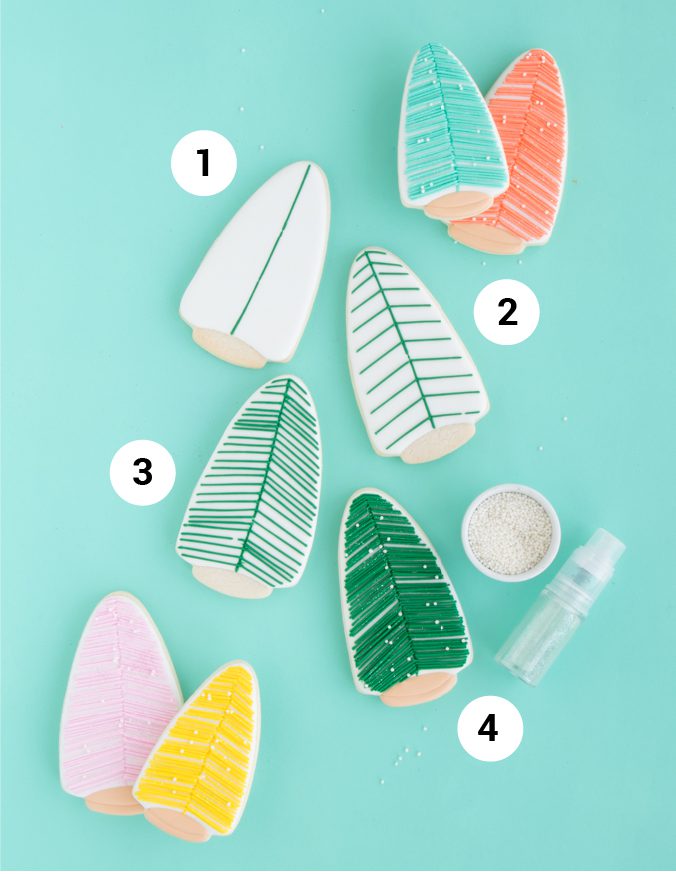
Step 1: Outline and flood bottle brush tree cookies with white icing. When outlining at the bottom used a curved line to leave an oblong space for the bottle brush base. While white icing is still wet use colored outline icing + tip #1.5 (PME is my jam). This last part is optional BUT I found the overall look of the bottle brush tree cookies were so much better with that “hidden” seam below all of the lines. Another idea here would be to wait until the white is completely dry and use a marker to create the line.
Step 2: Once the white icing has crusted over you can begin the tree lines. Starting from the bottom up, space the lines out about 1/4 of an inch. Keeping a bigger gap from the beginning will help the lines straight.
Step 3: Begin filling in the gaps by piping additional lines in the middle of each gap. Let these crust a bit over before moving on to the last layer to prevent
Step 4: Fill in the rest of the tree with additional straight lines. You can make them as empty or as full as you want. I mixed it up a bit and left a few small gaps of white icing but also layered a few lines on top of others. Add a few sprinkles for “snow” on top, then finish with edible glitter. I used a dust pump to apply the glitter evenly. So easy!
Step 5: To create the tree base, I first outlined the bottom of the base shape and then added a line to separate the two spaces. Chose 1 of the spaces to fill, let crust over, then fill the second space.
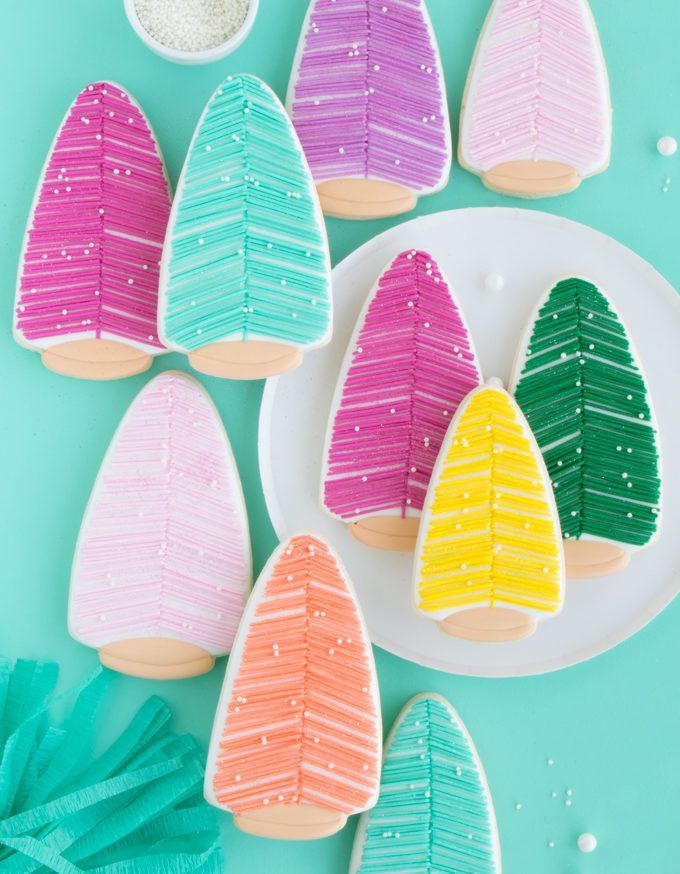
And that’s it guys, my updated version of bottle brush tree cookies! I love this new edition and I can’t wait to see all of you try this out.
WANT MORE CHRISTMAS COOKIE TUTORIALS?
- Cozy Christmas Mice Cookies
- Santa + Mrs. Claus Cookies From A Candy Corn Cutter
- Elf Cookies From A Candy Corn Cookie Cutter
- Funfetti Sugar Cookie Village
Heads up! To keep those legal gurus of the world happy, I need to inform you that some of the links in this post are affiliate links. In short – I may earn a small commission from the use of said link with no cost to you. But don’t worry I only link to stuff I use, love, and know you will too!


