

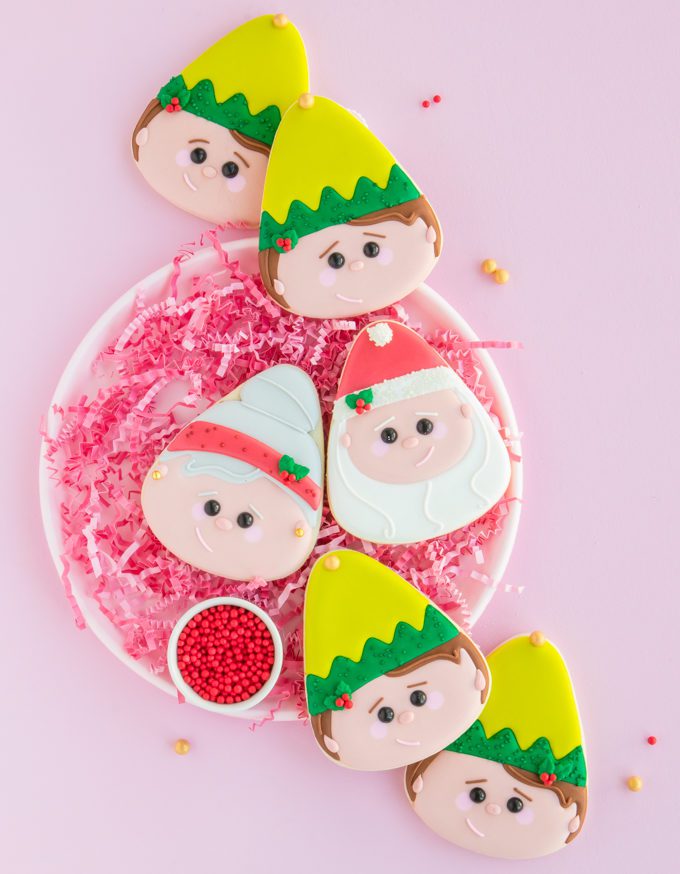
Can you believe Christmas is just around the corner? With Santa getting his list checked, probably twice, I thought this would be a great time to pop in and reveal the last little friendly face I haven’t yet shared from my Santa & Mrs. Claus candy corn cutter cookies – elf cookies! Which is totally appropriate because you know the elves putting in those long extra hours right now…
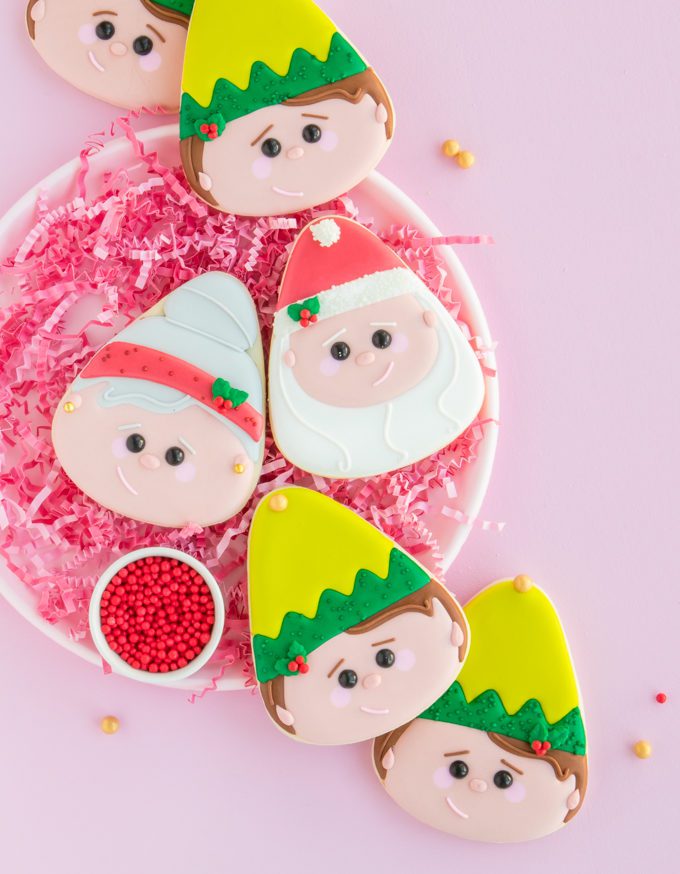
I just love how the little Christmas elf cookies came out! They just might even be my favorite. With the Santa & Mrs. Claus cookies, I stuck to traditional Christmas colors which meant the elves gave me a little wiggle room to play with color. You guys know I can resist a good color palette. The bright green/yellow hat gives the entire set a bright modern POP!
You can find the full tutorial + decorating
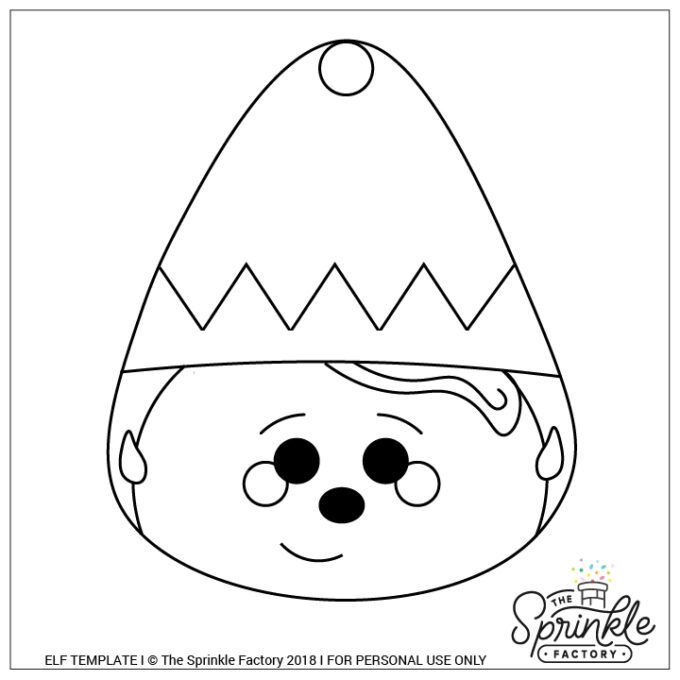
Have a cookie decorating projector? Great news! Here’s a projector template to make these cookies a breeze. Just click, save, project!
HOW TO MAKE ELF COOKIES
NEW TO COOKIES? BE SURE TO CHECK OUT THESE POSTS FOR THE BASICS:
ROLLED COOKIES 101+ ROYAL ICING 101+DECORATING COOKIES 101
TOOLS
- candy corn cutter
- edible marker
- piping bags
- couplers
- #1 tips
- #2 tips
- icing bottles
- icing scribe
- tweezers
- fan
SUPPLIES
- hair color outline icing + hair color flood icing
- skin tone outline icing + skin tone flood icing
- light pink outline icing + light pink flood icing
- bright green outline icing + bright green flood icing
- dark green outline icing + dark green flood icing
- black sugar pearls
- gold sugar pearls
- red small sugar pearls
- sprinkles
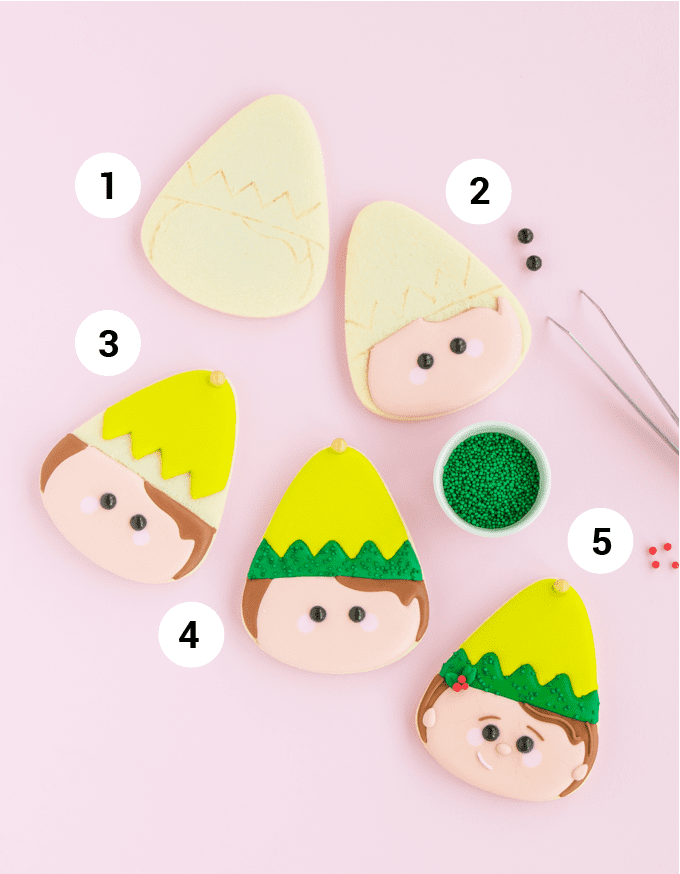
Step 1: Use printable template/projector image to trace the elf cookies face, hair, and hat lines onto cookies using an edible marker.
Step 2: Outline and flood the face using skin tone outline + flood icing. Immediately place two small dots of pink flood icing for cheeks. (I love to use my projector to project the template image right onto the icing, this keeps everything consistent) Use the tweezers to place a black sugar pearl for the eyes. To prevent bleeding, place cookies in front of a fan to dry immediately until the icing has crusted over. Without this step, you may risk the black pearl bleeding.
Step 3: Once the face has crusted over, or dried completely, it is safe to move on to the next step. Outline and flood hair using hair color outline+ flood icing. Next outline and flood the top of the hat with green/yellow outline + flood icing. Add a gold sugar pearl for the bell at the top!
Step 3: Once step 3 has completely crusted over, outline and flood the trim of the elf cookie hat. Sprinkle on a few green sprinkles for texture if you’d like.
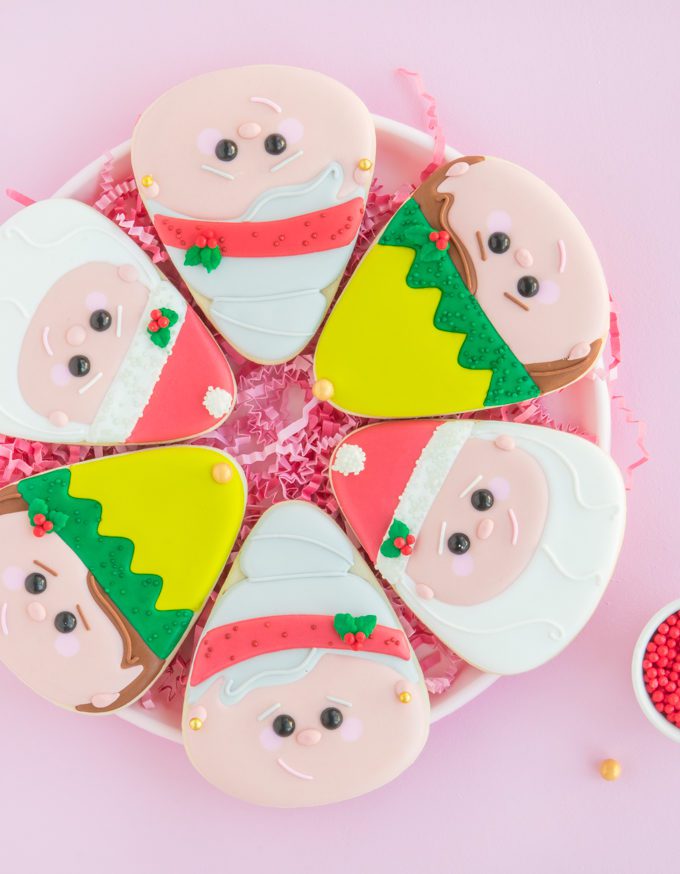
Step 4: For Santa fill use white outline + flood icing to fill in his hat fur and ball. Top with white sprinkles for texture. For Mrs. Claus outline and flood her headband with red icing, finish we a few sprinkles if you would like. Once her headband is sprinkled, you can outline and flood her bun.
Step 5: Once all previous steps have crusted over it’s time for final details! Add ears and nose (skin tone flood icing), hair details (hair color outline + tip #1.5, mouths (pink outline + tip #1.5), and little holly details (green outline icing + small leaf tip + red pearl sprinkles). Use a cookie scribe to pull the ears to a tiny point!
I hope these sweet little
WANT MORE CHRISTMAS COOKIE TUTORIALS?
- Santa & Mrs. Clause From A Candy Corn Cutter
- Cozy Christmas Mice Cookies
- Funfetti Sugar Cookie Village
Heads up! To keep those legal gurus of the world happy, I need to inform you that some of the links in this post are affiliate links. In short – I may earn a small commission from the use of said link with no cost to you. But don’t worry I only link to stuff I use, love, and know you will too!


