

For the record, because I don’t want to be the one who goes down in cookie history for ruining Christmas for like ever, I told Mr. Gingy it was a bad idea to uproot his entire gingerbread family and move them all to a Funfetti Gingerbread Village. Because in reality these are gingerbread at all and he’s practically turning an age old Christmas tradition out the window. But who am I to argue with a man and his dream of beautiful funfetti cookie suburbia? Plus he made me a deal on demolition I just could not pass up – YUM!
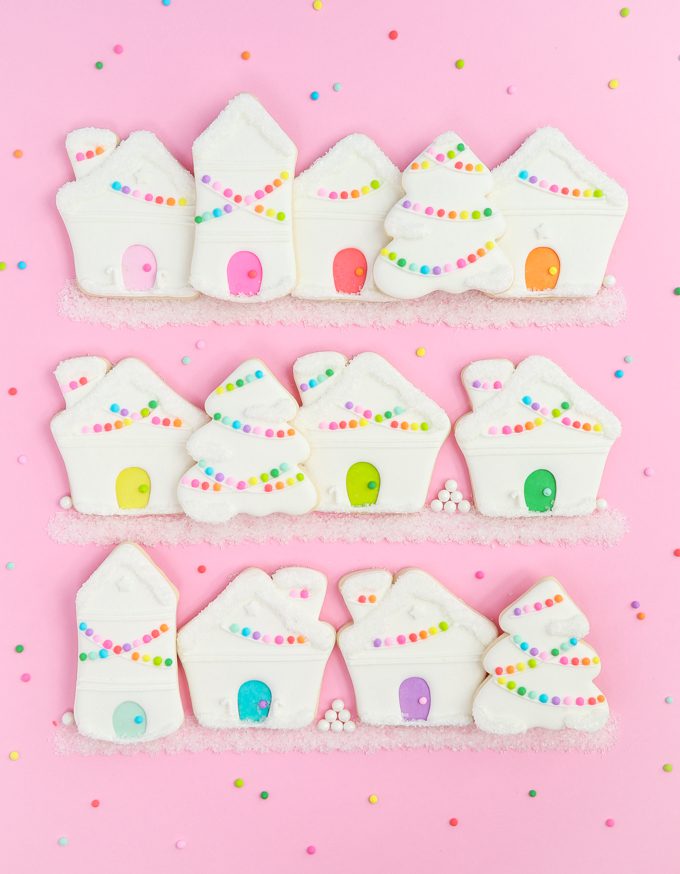
So here we are with this all white + rainbow sugar cookie not-so- gingerbread village. Complete with sugar pearl snow mounds, rainbow icing lights, and even a little sprinkle snow. A staple in gingerbread land of course. These cookies actually give a little nod to our own little German village as we’re spending another Christmas in Germany this year. Though our village might be stacked just the same, they are a little less colorful then these funfetti gingerbread village! Ah if only.
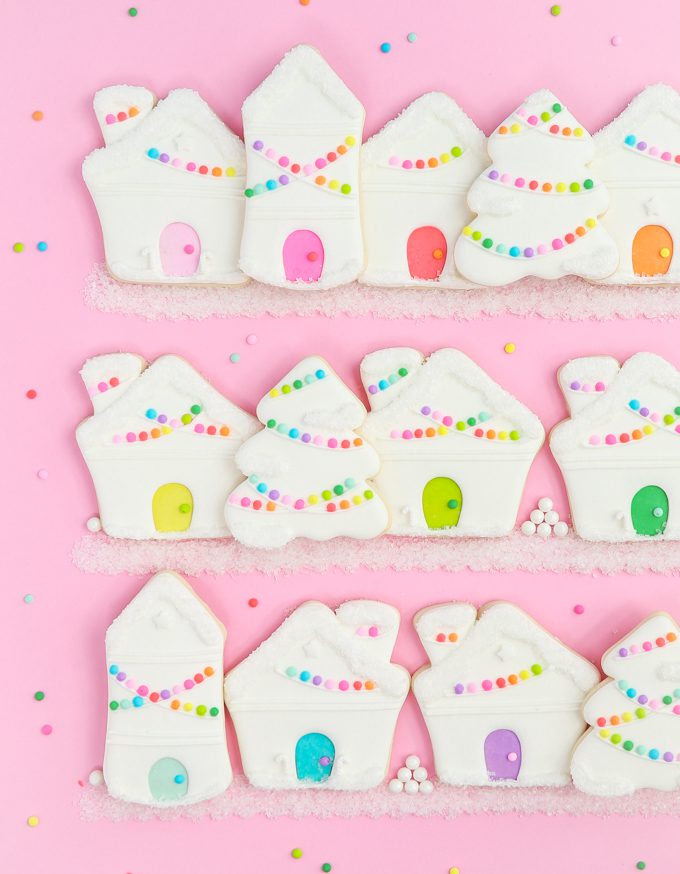
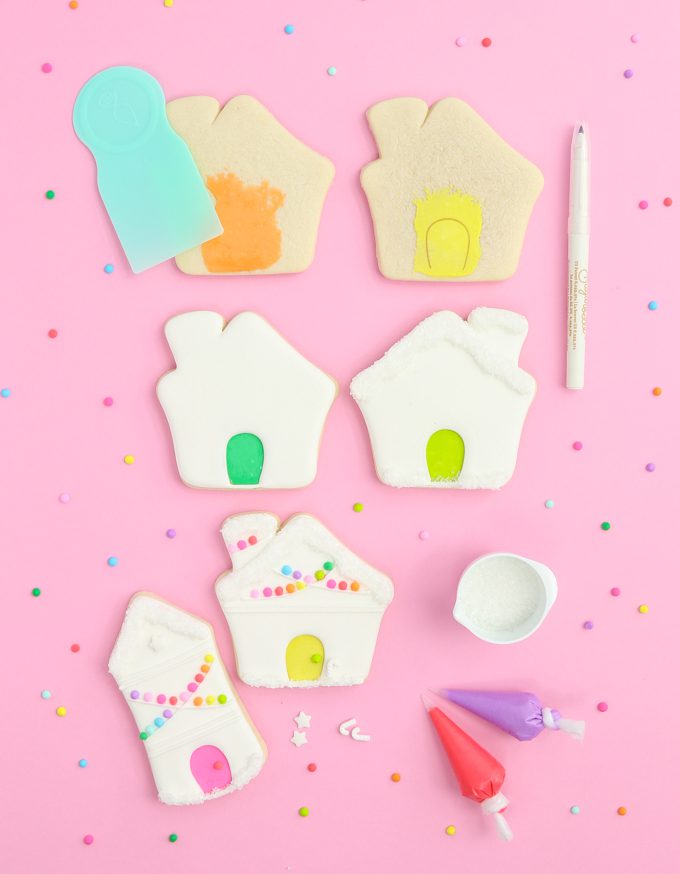
My absolute favorite part about making these, besides all the colors of course, was the rainbow doors. If you look closely each door is inset with icing! I love that layered look. Wanna make some sugar cookie suburbia of your own?
RECIPES
SUPPLIES
- white outline + flood icing
- white sugar crystal sprinkles
- rainbow colors of 20 second icing
TOOLS
- gingerbread house cookie cutter
- tree cookie cutter
- food coloring marker + template that came with the cutter (optional)
- spatula or plastic frosting smoother
BAKE THE COOKIES
Step 1: I used this sugar cookie recipe baked at 375 for 8-10 minutes. For the cutters I used the tree cutter in this set, the house from this set, and the pencil cutter for the towers from this set. These cutters can always be switched up for ones you already have. Gingerbread houses and trees are so common you probably own a few of your own.
DECORATE THE FUNFETTI GINGERBREAD VILLAGE
Step 2: To make the inset doors smooth a little 20 second icing on to the cookie in the area where the door should be. Make sure to cover a big enough area for a door. I did a door in each of the rainbow colors. All you have to do is put a little icing on a flat smooth tool and gently spread it out across the cookie. Let the icing dry well before moving on to the next step. It was about 30 minutes for me yours will depend on how much you used and the humidity.
Step 3: Use the edible marker to mark out your doors. I used the template that came with the cookie cutter but you can use a tool you find around your kitchen, even part of another cutter. This step is of course option but it really helps to keep the doors the same throughout the funfetti cookie village.
Step 4: Outline + flood the rest of the cookie in white icing and let dry completely. This will take several hours, or you can leave them overnight. I simply set a fan near them to help the top crust really well so I can finish them in a few hours.
Step 5: Pipe on some snow spots with your outline + white icing then cover in your sugar crystals to make the snow. Use your white outline icing to make the cords to the lights as well.
Step 6: Finish up by using your rainbow colors to make door handles and lights.
And just like that, you have a Funfetti Cookie Village cute enough to impress Santa, and Mr Gingy!
Heads up! To keep those legal gurus of the world happy, I need to inform you that some of the links in this post are affiliate links. In short – I may earn a small commission from the use of said link with no cost to you! But don’t worry I only link to stuff I use, love, and know you will too!


