

[et_pb_section][et_pb_row][et_pb_column type=”4_4″][et_pb_text]Lately, I’ve been on a serious candy corn cookie cutter kick. I’m trying to convince the world you can make anything with a candy corn cookie cutter, no really Toucan! My latest exhibit: Toucan cookies. That’s right, toucan cookies from a candy corn cookie cutter! This idea came to me while working on my flamingo cookies, also from a candy corn cookie cutter. So basically – no bird cookie cutter? No problem! Toucan really turn a candy corn cutter into birds of all feathers. So let’s dig right in and take a look…all cookie puns aside. For now…
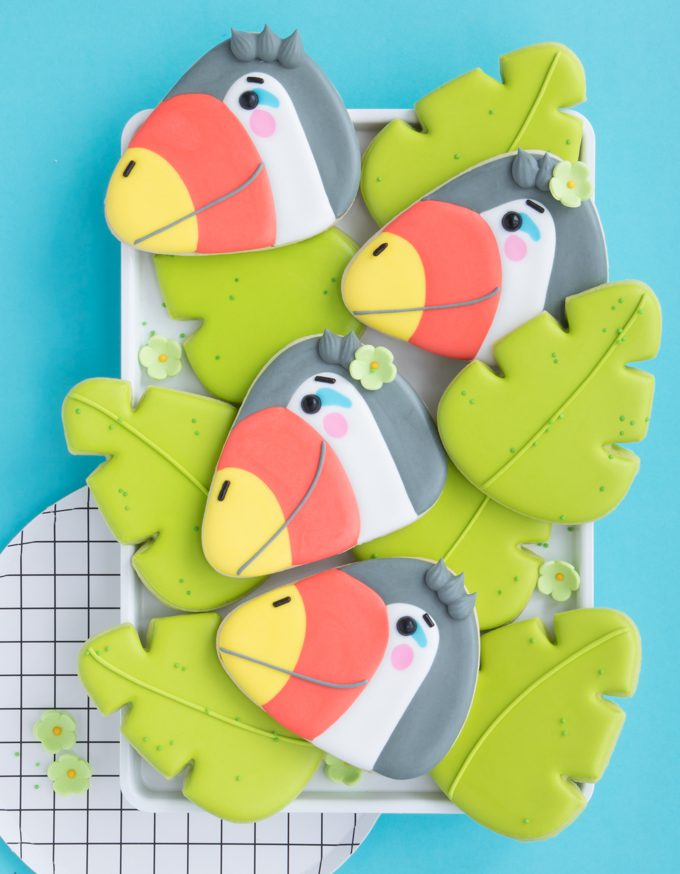
 See guys. I told you toucan! These toucan cookies are so darn cute. I love that I can make not only these toucans but practically any bird I can think of, without a single bird cutter. Wouldn’t these toucan cookies be freakin’ adorable with some palm trees and flowers? Speaking of palm tree cookies. The palm leaf cookies that I made along with these toucans were also made from the same candy corn cookie cutter (my fav candy corn cutter comes from the original Sugarbelle Shape Shifters Set here). Just as I did with the flamingo palm leaf cookies, I used the top of an Eifle Tower cookie cutter to make small cuts out of the candy corn shape before baking. Super simple palm leaves! Don’t forget to pin these so you can steal these palm leaves later on because they are so darn versatile. That’s a hint that you’ll be seeing more on the blog soon. They are perfect for summer cookies or tropical cookies which are so super popular right now.
 Alright, let’s get down to business with this cookie tutorial. The best part is my little secret for making them all uniform yet keeping them all super simple. Want to see?
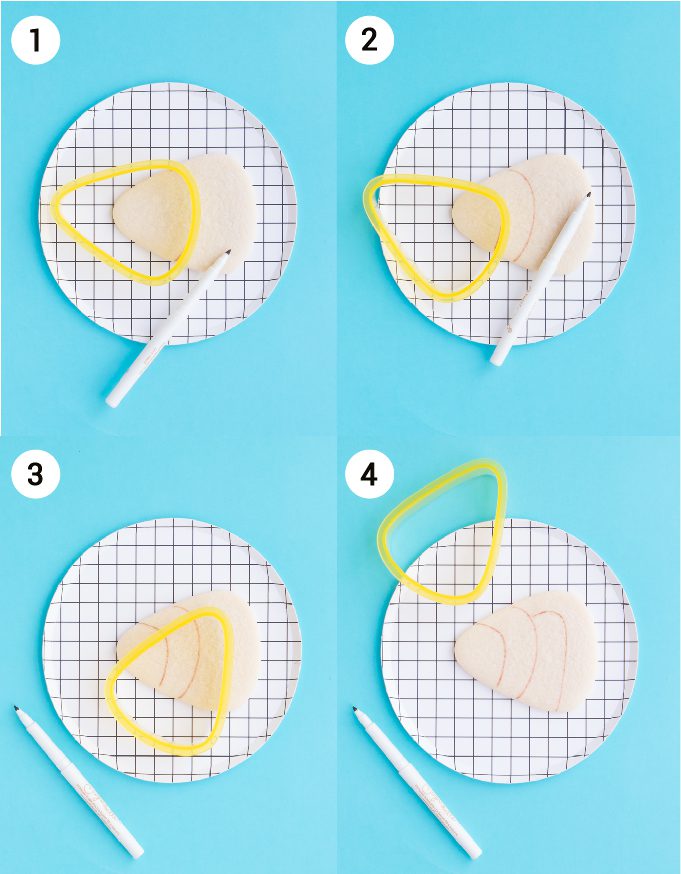
I use the same candy corn cutter I made the cookies with to actually trace all of the main lines on the toucan’s face. First I use one of the round bottom “corners” of the candy corn cutter + an edible marker to mark out the main beak and line where the beak will change colors. Then I flip the cutter to use the top “point” to draw the space where the toucan’s face will be white. Guys, it doesn’t get any easier than that!
Alright, let’s get down to business with this cookie tutorial. The best part is my little secret for making them all uniform yet keeping them all super simple. Want to see?
I use the same candy corn cutter I made the cookies with to actually trace all of the main lines on the toucan’s face. First I use one of the round bottom “corners” of the candy corn cutter + an edible marker to mark out the main beak and line where the beak will change colors. Then I flip the cutter to use the top “point” to draw the space where the toucan’s face will be white. Guys, it doesn’t get any easier than that!
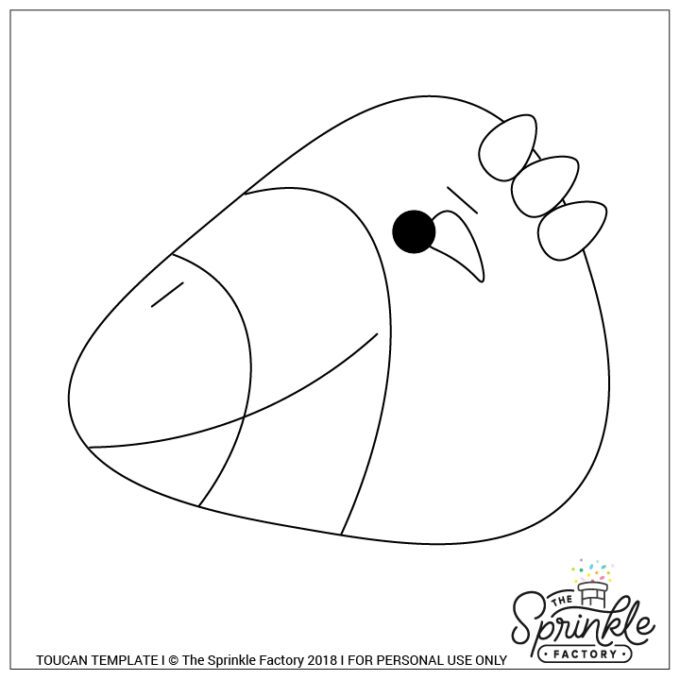
 Actully I lied, it can get easier then that! I now have this cookie design available as a projector template!
Have a cookie decorating projector? Great news! Here’s a projector template to make these cookies a breeze. Just click, save, project!
Actully I lied, it can get easier then that! I now have this cookie design available as a projector template!
Have a cookie decorating projector? Great news! Here’s a projector template to make these cookies a breeze. Just click, save, project!
 Step 1: Follow the previous photo to draw guidelines on the toucan cookie using the edible marker.
Step 2: Outline the white part of the toucan’s face with white outline icing then flood with white flood icing. Pipe a small bit of blue icing where you would like the eye to go. Pipe a small dot of pink for the cheeks under the blue eye spot. Next, use the tweezers to place a black sugar pearl and a black jimmie sprinkle for the eye and the eyebrow. Place cookies in front of a fan to dry immediately until the white has crusted over. Without this step, you may risk the black pearl bleeding into the white.
Step 3: Once the white has crusted over, or dried completely it is safe to move on to the next step. Outline and fill the grey part of the toucan face with grey outline + flood icing.
Step 4: Outline and flood the orange section of the beak, then outline and flood the yellow section of the beak. Add one more sprinkle to the beak as a nostril. Let entire cookie dry.
Step 5: Use grey outline icing + tip #1 to pipe a smile down the center of the beak. Use tip #18 + grey outline icing to pipe the hair details + glue on any edible flowers if you would like.
Step 1: Follow the previous photo to draw guidelines on the toucan cookie using the edible marker.
Step 2: Outline the white part of the toucan’s face with white outline icing then flood with white flood icing. Pipe a small bit of blue icing where you would like the eye to go. Pipe a small dot of pink for the cheeks under the blue eye spot. Next, use the tweezers to place a black sugar pearl and a black jimmie sprinkle for the eye and the eyebrow. Place cookies in front of a fan to dry immediately until the white has crusted over. Without this step, you may risk the black pearl bleeding into the white.
Step 3: Once the white has crusted over, or dried completely it is safe to move on to the next step. Outline and fill the grey part of the toucan face with grey outline + flood icing.
Step 4: Outline and flood the orange section of the beak, then outline and flood the yellow section of the beak. Add one more sprinkle to the beak as a nostril. Let entire cookie dry.
Step 5: Use grey outline icing + tip #1 to pipe a smile down the center of the beak. Use tip #18 + grey outline icing to pipe the hair details + glue on any edible flowers if you would like.
See guys. I told you toucan! These toucan cookies are so darn cute. I love that I can make not only these toucans but practically any bird I can think of, without a single bird cutter. Wouldn’t these toucan cookies be freakin’ adorable with some palm trees and flowers? Speaking of palm tree cookies. The palm leaf cookies that I made along with these toucans were also made from the same candy corn cookie cutter (my fav candy corn cutter comes from the original Sugarbelle Shape Shifters Set here). Just as I did with the flamingo palm leaf cookies, I used the top of an Eifle Tower cookie cutter to make small cuts out of the candy corn shape before baking. Super simple palm leaves! Don’t forget to pin these so you can steal these palm leaves later on because they are so darn versatile. That’s a hint that you’ll be seeing more on the blog soon. They are perfect for summer cookies or tropical cookies which are so super popular right now.
Alright, let’s get down to business with this cookie tutorial. The best part is my little secret for making them all uniform yet keeping them all super simple. Want to see?
I use the same candy corn cutter I made the cookies with to actually trace all of the main lines on the toucan’s face. First I use one of the round bottom “corners” of the candy corn cutter + an edible marker to mark out the main beak and line where the beak will change colors. Then I flip the cutter to use the top “point” to draw the space where the toucan’s face will be white. Guys, it doesn’t get any easier than that!
Actully I lied, it can get easier then that! I now have this cookie design available as a projector template!
Have a cookie decorating projector? Great news! Here’s a projector template to make these cookies a breeze. Just click, save, project!
HOW TO MAKE TOUCAN COOKIES WITHOUT A BIRD COOKIE CUTTER!
NEW TO COOKIES? BE SURE TO CHECK OUT THESE POSTS FOR THE BASICS:
ROLLED COOKIES 101 + ROYAL ICING 101
TOOLS- candy corn cutter
- edible marker
- tweezers
- piping bags
- #1 tips
- #2 tips
- 1 tip #18
- icing bottles
- coupler (use with grey outline icing)
- white outline icing + white flood icing
- black sugar pearls
- black jimmies (sprinkles)
- light pink flood icing
- blue flood icing
- grey outline icing + grey flood icing
- orange outline icing + orange flood icing
- yellow outline icing + yellow flood icing
- edible decorative flowers (optional)
- light pink – AmeriColor Deep Pink
- blue – AmeriColor Sky Blue
- grey – AmeriColor Stone
- orange – AmeriColor Coral Reef + AmeriColor Orange
- yellow – AmeriColor Electric Yellow
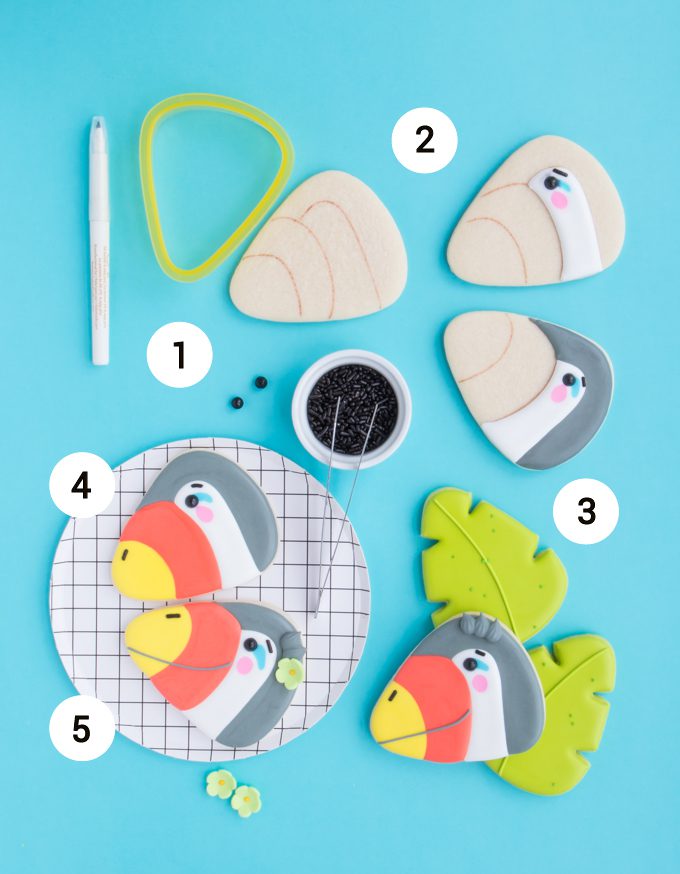
Step 1: Follow the previous photo to draw guidelines on the toucan cookie using the edible marker.
Step 2: Outline the white part of the toucan’s face with white outline icing then flood with white flood icing. Pipe a small bit of blue icing where you would like the eye to go. Pipe a small dot of pink for the cheeks under the blue eye spot. Next, use the tweezers to place a black sugar pearl and a black jimmie sprinkle for the eye and the eyebrow. Place cookies in front of a fan to dry immediately until the white has crusted over. Without this step, you may risk the black pearl bleeding into the white.
Step 3: Once the white has crusted over, or dried completely it is safe to move on to the next step. Outline and fill the grey part of the toucan face with grey outline + flood icing.
Step 4: Outline and flood the orange section of the beak, then outline and flood the yellow section of the beak. Add one more sprinkle to the beak as a nostril. Let entire cookie dry.
Step 5: Use grey outline icing + tip #1 to pipe a smile down the center of the beak. Use tip #18 + grey outline icing to pipe the hair details + glue on any edible flowers if you would like.


