

Seriously. These gymnastics cookies really are easy, so flipping easy their proof cookies don’t have to be super complex to be a perfect 10! Ah…I love a good cookie pun or two in the morning. But you probably already knew that…
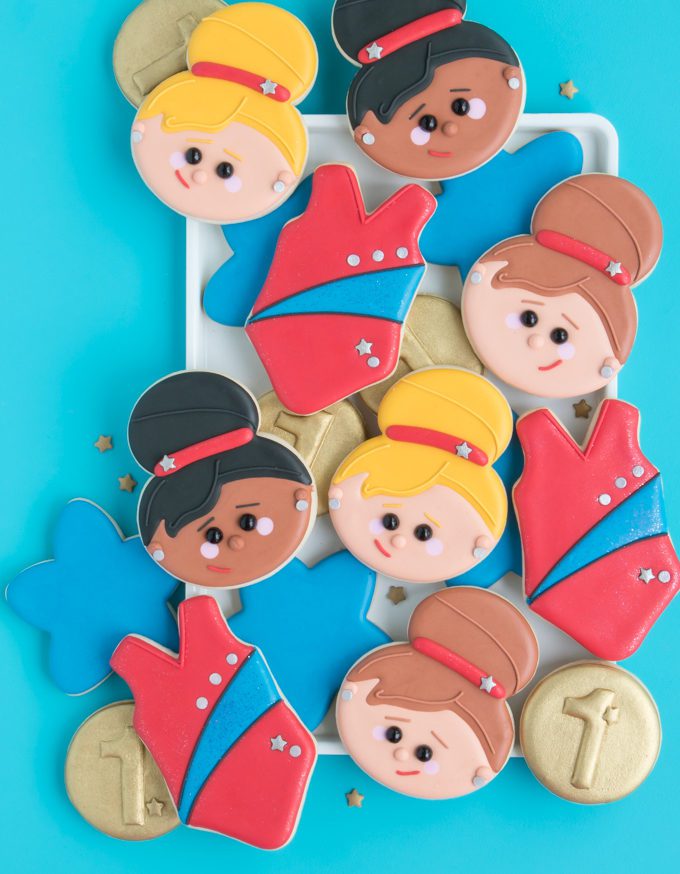
Something you may or may not know is I have 4, yes 4 little girls. 3 of which take part in gymnastics. I may complain about the practices and the driving but in reality, I can hardly wait to see our tiny tot wiggling around in a leotard. Cuteness over load. Last year when asked to make gymnastics cookies for the home comp I was a little stumped. Frosting little tiny gymnasts are no easy task so I took the “easy” route. The easy route for a cookie that is. The real easy route would have been a drop cookie! Blasted creativity. Gets me everytime.
After making a few quick stencils with my Silhouette I airbrushed gymnasts silhouettes on a plain royal iced square and added sprinkle boarders. I didn’t even post them here because they just weren’t a person win for me. But since they sold out in less then 15 minutes I’d say they were a win for the gym. Fast forward to this year and my oldest daughter was invited to her first team Christmas party. Time to redeem myself! How could I simplify gymnasts and keep them to my own style? Then it occurred to me my recent Mrs. Claus cookies could totally be gymnasts! But just as I was reaching for my candy corn cutter I came across this eyeball/
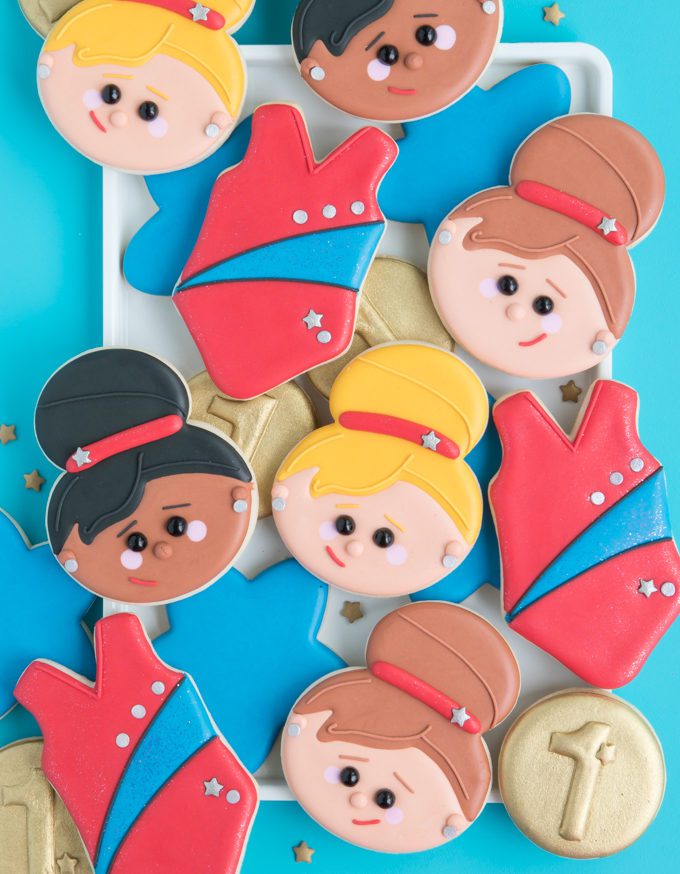
Can we talk about those leotard cookies for a sec? They may seem so simple but they were truly one of my favorite cookies this year (and I can’t stand red!) I used silver sprinkles for the “gemstones” on wet icing and a PME #1.5 tip for the black details. They were finished off with edible glitter! In person they sparkled and shined like a real
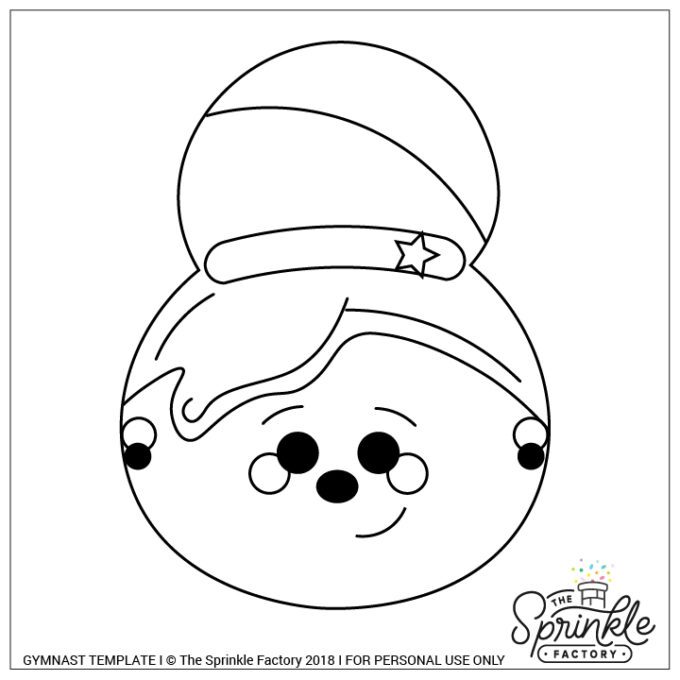
Have a cookie decorating projector? Great news! Here’s a projector template to make these cookies a breeze. Just click, save, project!
HOW TO MAKE GYMNASTICS COOKIES
NEW TO COOKIES? BE SURE TO CHECK OUT THESE POSTS FOR THE BASICS:
ROLLED COOKIES 101+ ROYAL ICING 101+DECORATING COOKIES 101
TOOLS
- snowman/eyeballs cookie cutter
- edible marker
- piping bags
- couplers
- #1 tips
- #2 tips
- icing bottles
- icing scribe
- tweezers
- fan
SUPPLIES
- skin tone outline icing + skin tone flood icing
- hair outline icing + hair flood icing
- red outline icing + red flood icing (a little on the thick side)
- pink flood icing for cheeks
- black sugar pearls
- silver/gold earring sprinkles
- silver/gold star sprinkles
Step 1: Use printable template/projector image to trace hairline onto the gymnast cookies using an edible marker. Outline and flood the face using skin tone outline + flood icing. Immediately place two small dots of pink flood icing for cheeks. (I love to use my projector to project the template image right onto the icing, this keeps everything consistent) Use the tweezers to place a black sugar pearl for the eyes. To prevent bleeding, place cookies in front of a fan to dry immediately until the icing has crusted over. Without this step, you may risk the black pearl bleeding.
Step 2: Once the face has crusted over it’s safe to move on. Outline and flood the hair using hair colored outline + flood icing. Let crust over once move before moving on.
Step 3: Time to put the details on these gymnastics cookies already! I like to start with the hair + eyebrow details using hair color outline icing + tip #1. Second is the ears and nose, don’t forget the earrings! Last pipe on a cute little mouth and the scrunchy. Fill in the scrunch with thick red flood icing being careful not to overfill. After placing a little sprinkle star embellishment move these directly under a fan to prevent and caving on the scrunchy.
Although I made
WANT MORE FUN COOKIE TUTORIALS?
- Toucan Cookies From A Candy Corn Cutter
- Giant Circus Animal Cookies
- Double Scoop Ice Cream Cone Cookies
- Build Your Own Burger Cookies
Heads up! To keep those legal gurus of the world happy, I need to inform you that some of the links in this post are affiliate links. In short – I may earn a small commission from the use of said link with no cost to you. But don’t worry I only link to stuff I use, love, and know you will too!


