

I think it’s time I just own up to something right here, right now. I have a problem, a candy corn cookie cutter problem. There I said it. What started over a year ago with a few sparks of imagination and a candy corn cutter has grown into a full-on obsession. I think it started with these easy flamingo cookies and every time I sketch out a new candy corn cookie cutter design I see one more design that has to be made particularly birds. Every time I see another new bird and this spring I wanted to add spring chick cookies to my candy corn cutter
BIRD BEAK ICING TRANSFER PRINTABLE TEMPLATE
DOWNLOAD FREE ROYAL ICING BEAK TRANSFER PRINTABLE – HERE!
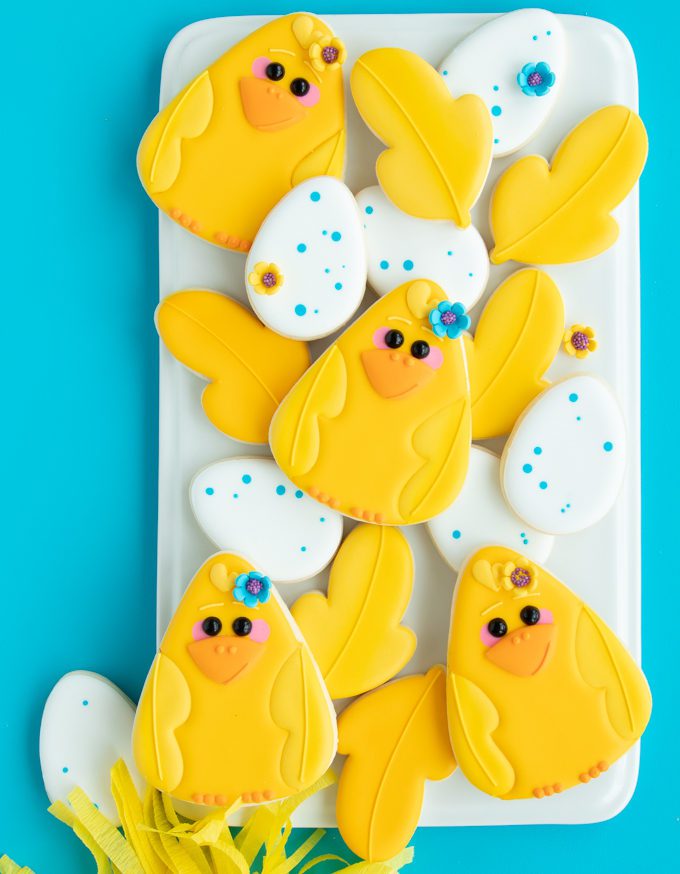
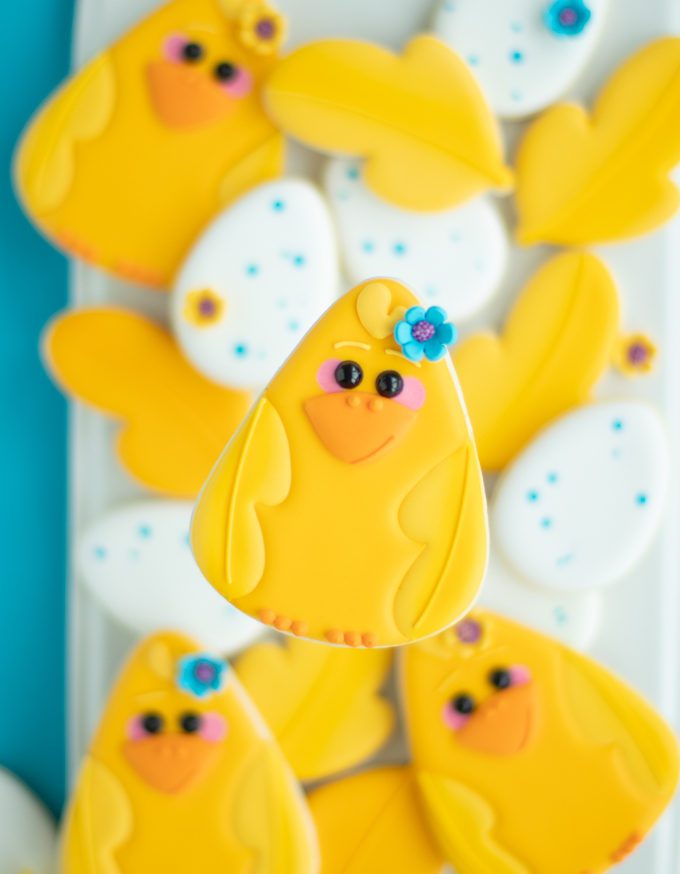
I mean guys, how cute are these spring chick cookies? I love their chubby little bottoms! As always don’t let those cute little eyes fool you these chick cookies come together fast. One way I really sped things up is by making royal icing transfers for the beaks. If you aren’t using royal icing transfer when it comes to birds you’re missing out big time. Those little beak shapes can be a pain to pipe on a finished bird cookie and they are prone to cratering. To help you say no to cratering and speed up your spring chick cookies go ahead and steal my template below. If you’re new to royal icing transfers is super simple! Print out the template and tape it to the bottom side of a cookie sheet (so your not working with the lips). Then tape a piece of parchment paper over the template. You can now pipe on your bird beaks. Let them dry with a fan for several hours and then will be ready to use, remove using booboo stick.

SPRING CHICK COOKIES PROJECTOR TEMPLATE
Have a cookie decorating projector? Great news! Here’s a projector template to make these cookies a breeze. Just click, save, project!

HOW TO MAKE CHICK COOKIES WITH A CANDY CORN COOKIE CUTTER!
NEW TO COOKIES? BE SURE TO CHECK OUT THESE POSTS FOR THE BASICS:
ROLLED COOKIES 101 + ROYAL ICING 101
TOOLS
- candy corn cutter
- edible marker
- tweezers
- piping bags
- #1 tips
- #2 tips
- icing bottles
- couplers
- chick cookies template
- airbrush (optional)
SUPPLIES
- yellow outline icing + yellow flood icing
- light yellow outline icing + light yellow flood icing
- orange outline icing + orange flood icing
- light pink flood icing
- black sugar pearls
- edible decorative flowers (optional)
- yellow airbrush color (optional)
COLORS
- yellow – AmeriColor Electric Yellow + AmeriColor Egg Yellow
- light pink – AmeriColor Deep Pink
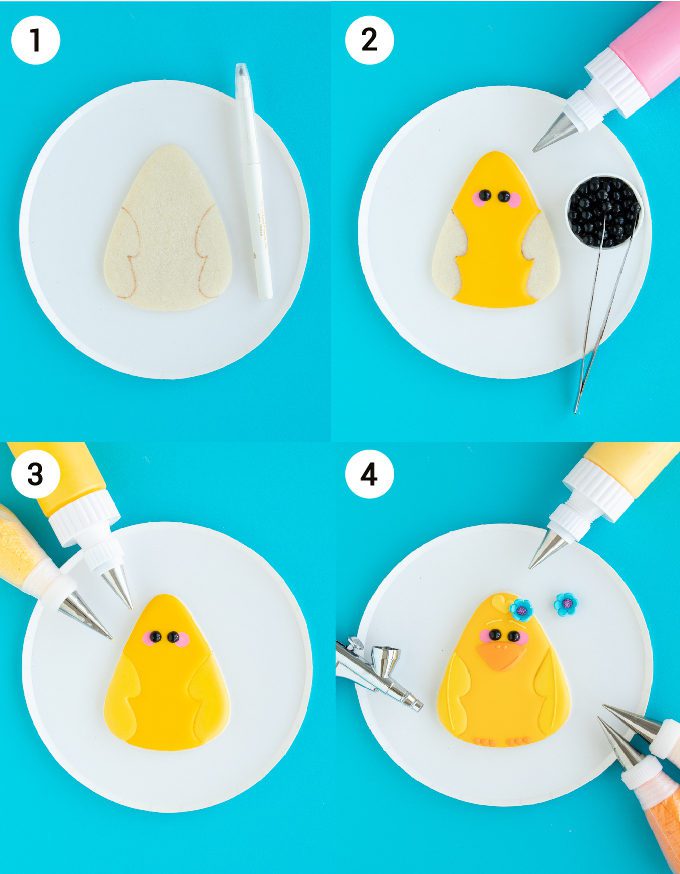
Step 1: Using the edible marker + chick cookies template trace on the wings.
Step 2: Outline the body of the chick cookies with the darker yellow outline icing then flood with yellow flood icing. Pipe two small dots of pink for the cheeks. Next, use the tweezers to place black sugar pearls for the eyes. I like to keep my projector on to place all of my cheeks and eyes, it makes the process super fast and keeps my chick cookies consistent. Place cookies in front of a fan to dry immediately until the white has crusted over. Without this step, you may risk the black pearl bleeding into the white.
Step 3: Once the yellow body has crusted over, or dried completely it is safe to move on to the next step. Outline and fill the wings of the chick with light yellow outline + flood icing
Step 4: Time for the details! Use yellow outline icing to add lines to the wings and eyebrows as well as the shape of the hair at the top. Fill in the hair with just a tiny bit of yellow flood icing. Glue on your sugar flowers. Next use your orange outline icing to glue on your royal icing transfer beaks, add beak details, and little toes to your chick cookies. I added a little shot of yellow airbrush to the line on my wings, optional but it gave the final look a nice pop of shading.
That’s all for today chicks! I hope you guys are digging these little guys because I have a few more
WANT TO CHECK OUT A FEW MORE CANDY CORN CUTTER TUTORIALS?
Heads up! To keep those legal gurus of the world happy, I need to inform you that some of the links in this post are affiliate links. In short – I may earn a small commission from the use of said link with no cost to you! But don’t worry I only link to stuff I use, love, and know you will too!


