

It’s just one day away from Valentine’s Day and this cheesy pun lover is in heaven! You guys know how much I love a good pun all year long. So seeing all of your Valentine cookie puns is literally giving me life right now. I practically have to tear myself away from Instagram. I love that you guys love a good cookie pun which totally makes up for the fact that the kiddos call them “mom jokes” and roll their eyes at every punny cookie I make. (Please, they secretly love it.) Although I have about a million cookie puns I want to share with you guys I wanted to take a moment to indulge in my other major cookie love, my candy corn cookie cutter, with some easy rose cookies!

You guys know my love for my candy corn cookie cutter runs deep, like obsession level deep. As a matter of

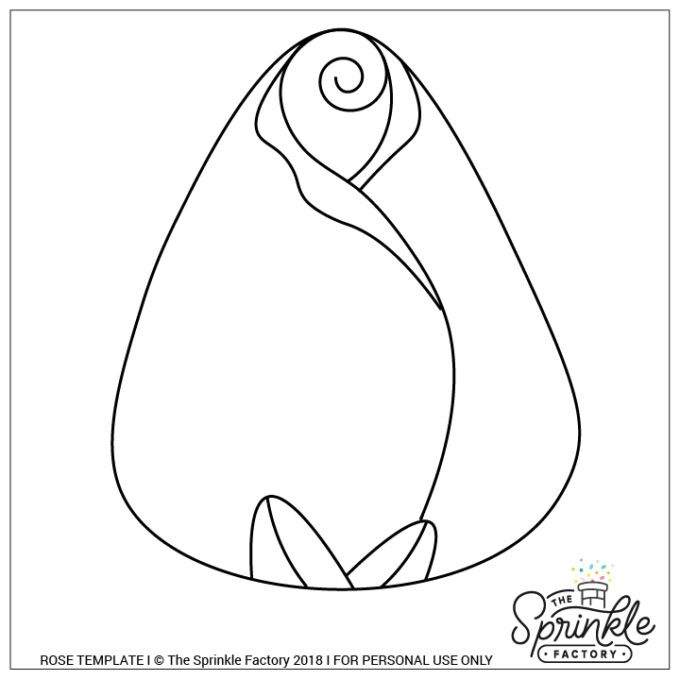
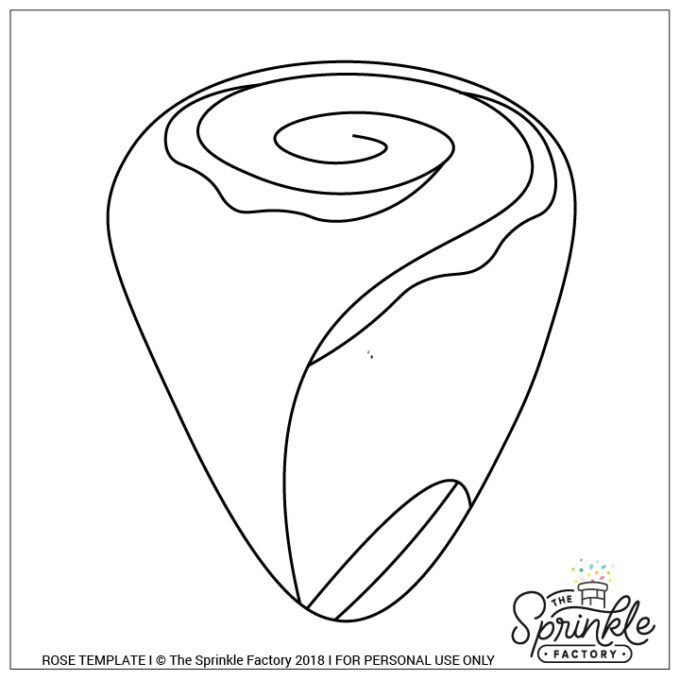
Have a cookie decorating projector? Great news! Here’s a projector template to make these cookies a breeze. Just click, save, project!
HOW TO MAKE EASY ROSE COOKIES FROM A CANDY CORN CUTTER
NEW TO COOKIES? BE SURE TO CHECK OUT THESE POSTS FOR THE BASICS:
ROLLED COOKIES 101+ ROYAL ICING 101+DECORATING COOKIES 101
TOOLS
- candy corn cutter
- edible marker
- piping bags
- couplers
- #1.5 tips
- #2 tips
- icing bottles
- icing scribe
SUPPLIES
- outline + flood icing in any rose color you would like
- green outline + flood icing
- sprinkles (optional)
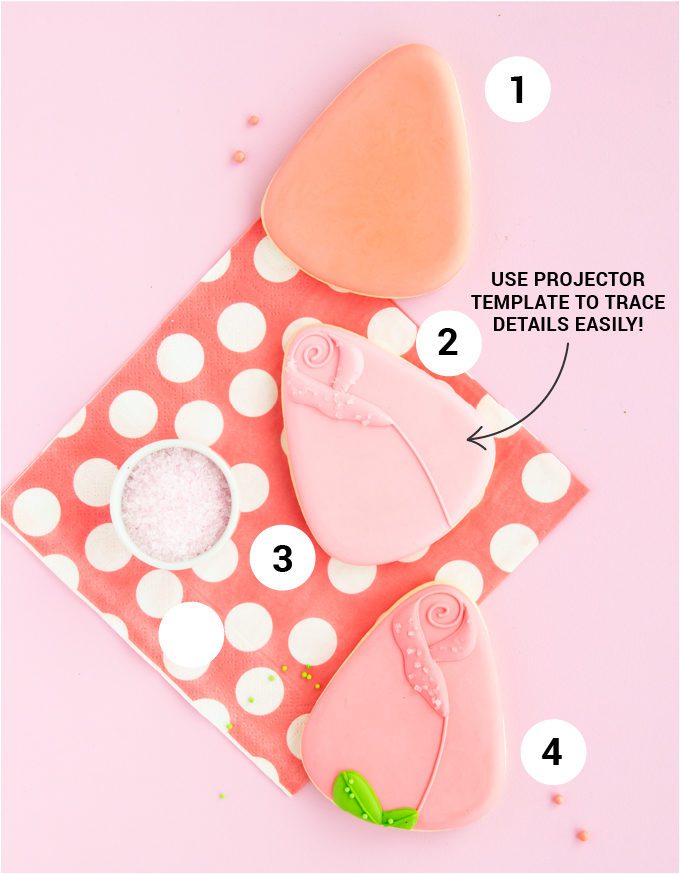
Step 1: Outline + flood cookies in pretty rose colored royal icing.
Step 2: Let the first layer completely crust over, preferably a few hours. Next use a projector + the rose templates to trace on the rose and leaf details. This step is optional if you just want to go freehand, you do you! I’m a bit obsessive so I like to trace on the details first. A thin edible marker works great, however, I like to use a scribe and very lightly “scratch” my lines on to the cookie. This keeps my lines super subtle and I don’t have to worry about any marker lines peaking out below any less than perfect icing lines.
Step 3: Pipe on the rose lines using your rose-colored outline icing. I used a #1.5 PME tip because I love a fine line! Fill in the two petal spots for dimension using your flood icing. Add sprinkles if you would like!
Step 4: Outline and flood leaves, let crust for 15-30 minutes then add the vein lines + sprinkles on the leaves.
And just like that your easy rose cookies are done! I really love how simple these rose cookies came together, yet they are so beautiful. I won’t even pretend I wasn’t completely swooning over this color palette too and I can’t wait to see what you guys come up with. Don’t forget, as always, tag me in your treats!
WANT MORE FUN COOKIE TUTORIALS?
- Toucan Cookies From A Candy Corn Cutter
- Giant Circus Animal Cookies
- Double Scoop Ice Cream Cone Cookies
- Build Your Own Burger Cookies
Heads up! To keep those legal gurus of the world happy, I need to inform you that some of the links in this post are affiliate links. In short – I may earn a small commission from the use of said link with no cost to you. But don’t worry I only link to stuff I use, love, and know you will too!


