

A few weeks ago I shared my very first 3D cookie flower bouquet on my Instagram feed asking #teamsprinkle if they would like to see more cookie flowers bouquets this year. The answer was a pretty clear yes. As a matter of fact I’ve been getting dozens of messages asking for the links on how to create them. Lucky enough, I’ve actually made so many of these already in the past I have more then enough info to go around. And even better I shared this on my Thursday night Instagram live! (Did you know I go live with a treat every other Thursday?!) It doesn’t matter how many 3D cookie flower bouquets I create though, I love every one even more! Today I’m sharing a Whimsical Spring Cookie Flower Bouquet version. Because I am in a serious need of some spring time and sunshine around here.
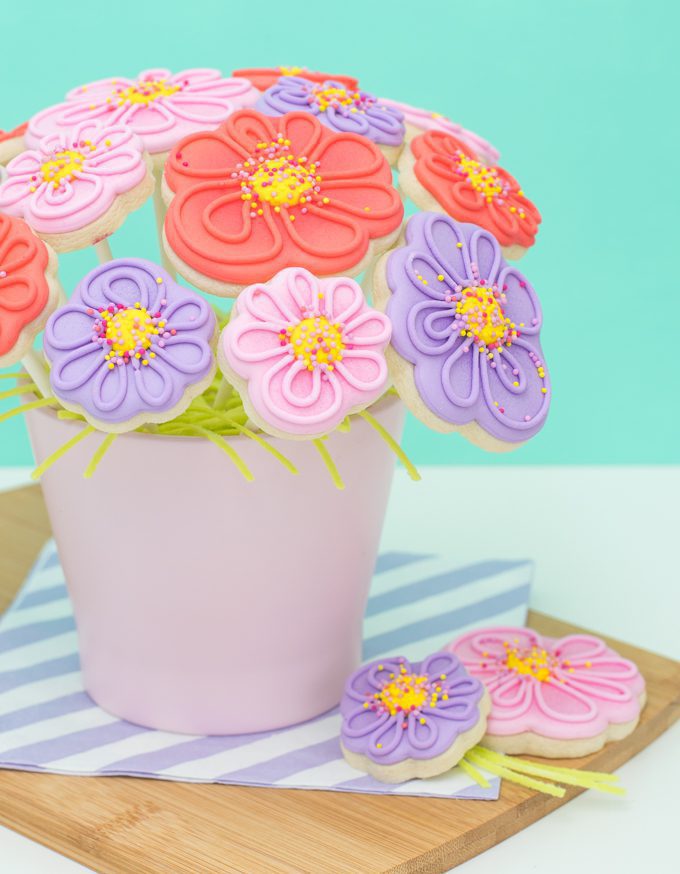
Perfect to welcome spring. Perfect for gifting (mama’s day is COMING!), and perfect for well…eating. Obvi.

Below is a blueprint of how my 3D cookie flower bouquets are made with the steps listed out below as well. Before you get into the step by step process I want to point out exactly what makes these guys possible. That’s these little cookie bases you see above. These little bases are going to be “glued” on to the bottom of your cookie. And then a lollipop stick. I’ll cover specifics below but I thought it was fairly important to take a close look at these guys.
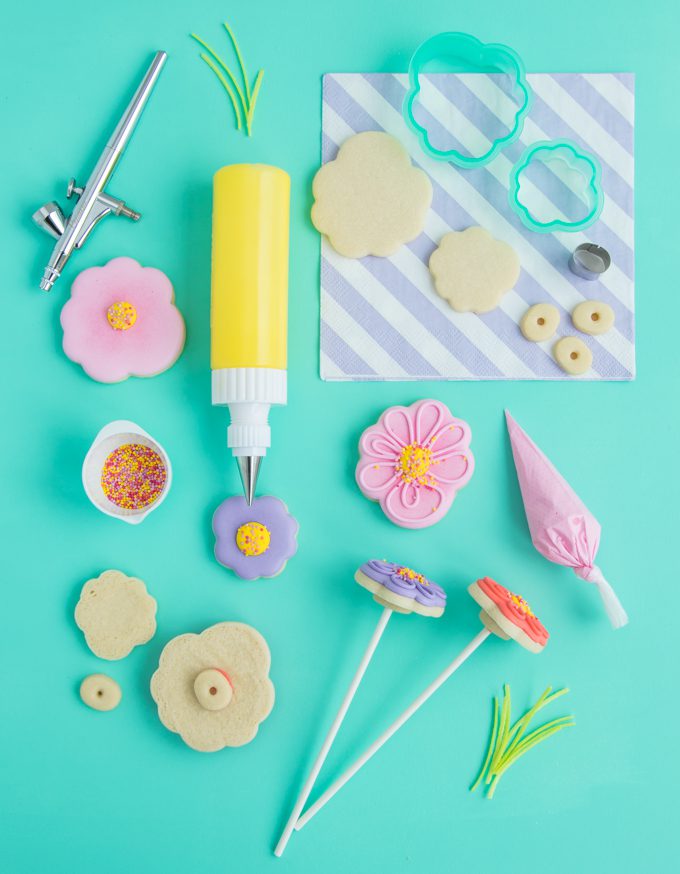
How to make a 3D cookie flower bouquet.
Recipes
Supplies
- colored outline icings
- colored flood icings
- airbrush coloring (optional)
- yellow 20 second icing for flower centers
- sprinkles
- lollipop sticks
- small pot or bucket
- rice or beans
- paper shred
Tools
- flower cookie cutters
- small round or oval cutter
- cake pop stand or something to prop cookies in while they dry
- airbrush (optional)
Step 1: Bake your cookies & cookie bases. For these whimsical flowers I used the two medium cutters from this set. As I mentioned above the little cookie bases are what makes this cookies 3D. You will want to find a small circle or oval cutter about 3/4in wide (No cutter? Try a piping tip!). Bake several more cookie bases then actual cookies just incase you have any breaks. Just before putting the cookie bases in the oven take a lollipop stick and gently poke a hole in the center, bake for 7-9 minutes. Just after taking the little cookie bases out of the oven, while they are still hot, use your lollipop stick to gently press the lollipop back into the hole. This will reshape the hole again after spreading so that your stick will fit in when ready. This step is the KEY to success.
Step 2: Decorate your cookies however you would like! I outlined, flooded, let dry, airbrushed, then piped on a yellow center, and added sprinkles! Once the center had dried a bit I added the whimsical petals and a little more sprinkles!
If you’re new to cookies, don’t worry! I have lots of info on royal icing and how to decorate cookies. Here and here.
Step 3: Once your cookie has been decorated you can glue on the cookie bases by adding a little icing to the base and sticking it right on to the center of the cookie back. Set the cookies back down on the base and let these dry for several hours minimum. This is the second key to success! I actually prefer to let mine set overnight prior to gluing the sticks on.
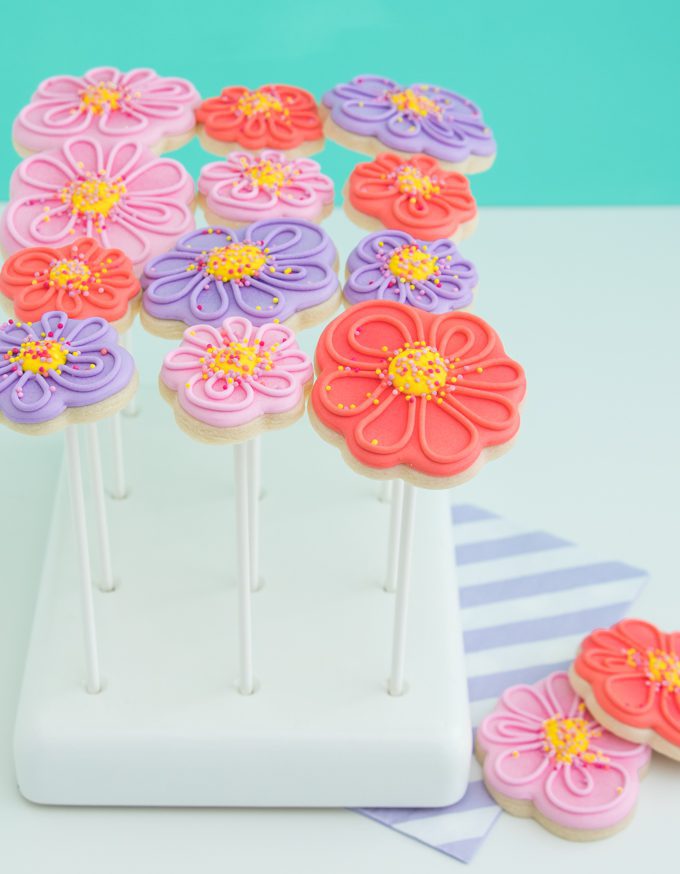
Step 4: At this point both your flower decorations and your cookie base has dried. You can now gently turn the cookie over and add a little bit of icing into the empty cookie base hole. Press the lollipop stick into the hole and prop the cookie up in a cake pop holder, a pot of rice, or even a piece of styrofoam.
Let those pretty piped 3d flower cookies dry!
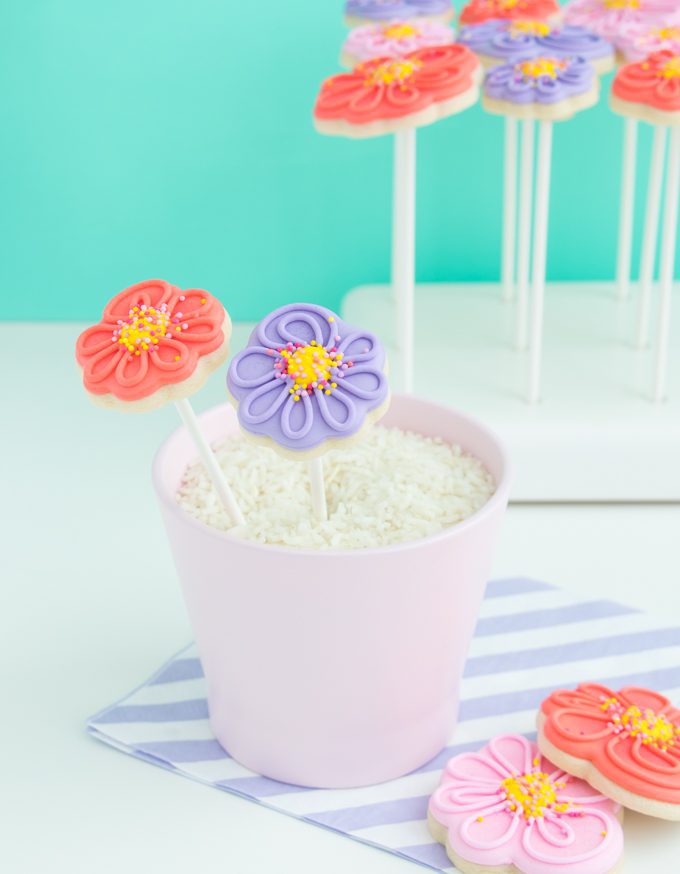
Now on to the fun part. Assembly! Unlike when I make cupcake bouquets, I highly discourage you from using a styrofoam ball here. Instead I would use a filler like beans or rice to fill your pot with. This allows you to gently arrange the cookies however you would like. Pressing cookies into styrofoam can be risky, and very hard to move if needed.
Once I’m about half way through I add paper shred or in this case, edible grass, to the flower pot to cover the not to pretty rice. Once I’m finished I then add the rest of the shred from the top and the outside.
If you would like to see more examples of 3D cookie flower bouquets, here are a few I’m made!
- Spooky Cookie Flower Bouquet
- Daisy Cookie Flower Bouquet
- Daisy Cookie Flower Cake


