

Ever have so much to say about one thing…you don’t even know where to start? That’s totally me with this Stain Glass Cookie Platter, so many things to say! First. I am SO gosh darn excited to finally be able to get back to cookie-ing all the things. Now that our year long project (The Library) is alive and creeping out of the sleepless-night newborn stage I’m pretty freaking stoked to get to actually cookie the content we’re adding. Ya know, the original plan…like before you become parents and you think you’re going to have baby on the perfect scheduled routine, HA!.
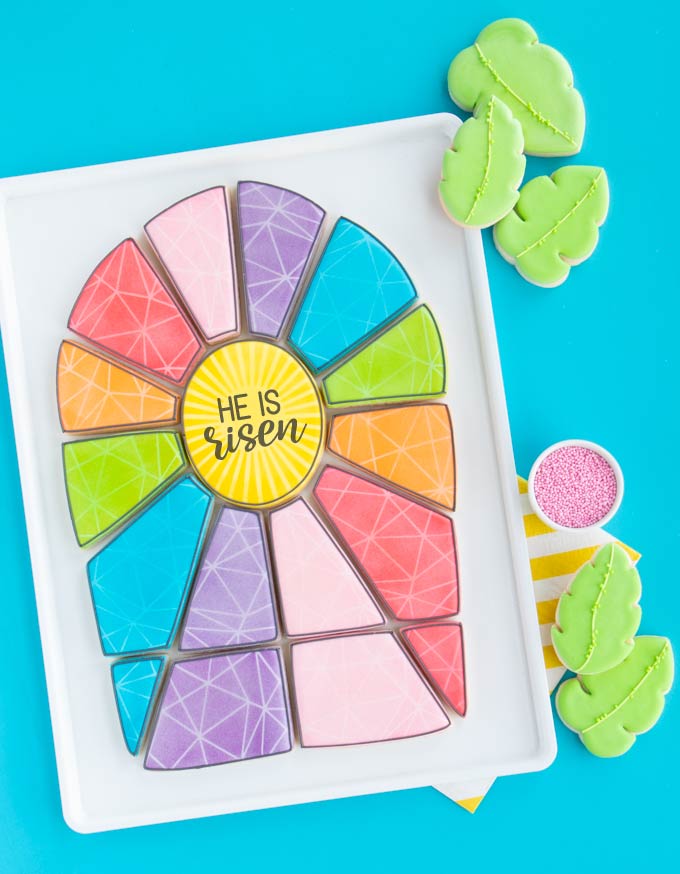
As a matter of fact, this week I cookied our VERY FIRST, Library + Cookie Collaboration, this amazing Stain Glass Cookie Platter Set Design by the amazingly talented (and crazy sweet) Kim – The Partiologist.
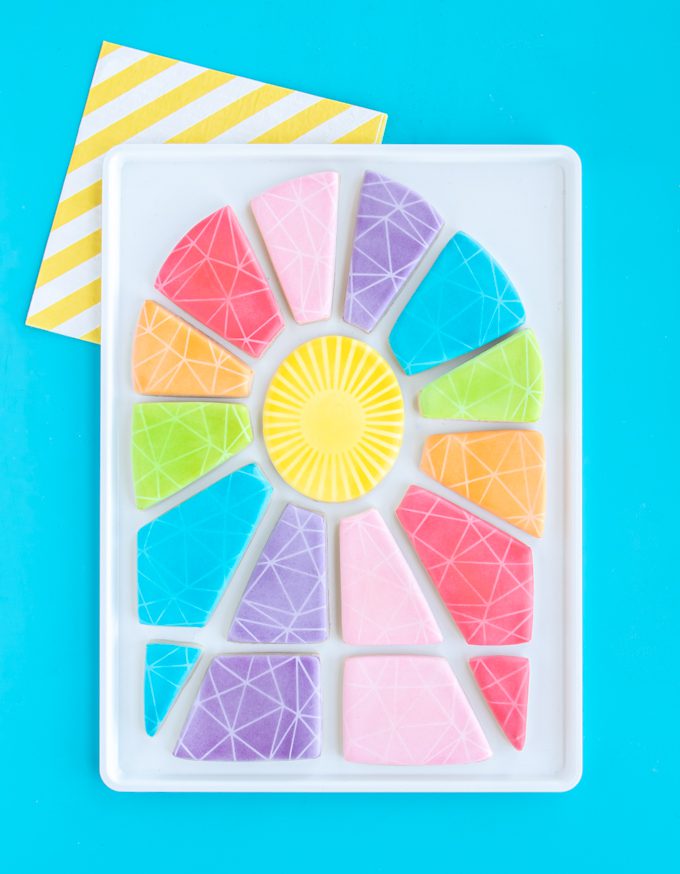
I have SO many goals and dreams for the Library. But one of them has been to be able to allow other cookie creatives like me to share their own amazing ideas with you at home instantly as well – and be fairly compensated for it! IMO a long time issue in the cookie industry. YAY! This cookie set was originally a hand cut design created by The Partiologist, shared on another one of our cookie friends sites, Lisa The Bearfoot Baker. Now our Library Crew can download + print their own Stain Glass Cookie Cutter Platter and cut stencils to match! To celebrate I wanted to recreate this classic design here! You KNOW how much I love it when simple design elements come together to create something amazing. Well this one does not disappoint! The only small change I really made to Kim’s design was to layer on our Facet Stencil on each piece. And I couldn’t be happier with the outcome! (Kim added a glaze on top instead, check it out for sure!)
Just a side note: You’ll notice below that I didn’t use our “He Is Risen” Stencil on the center cookie. I actually photoshopped it on the cookie above. The morning I woke up to add the airbrushing and details to these cookies, my sweet grandmother passed away. I finished the cookies as something to keep my hands busy…and I realized how ironic it was that I was working on this set at this time. I decided to leave the wording off the cookies…and take the cookies to share with family as we gathered to honor my grandmother. In hindsight I realized how much of a difference it made on the final set, and I wanted to give you all a visual!
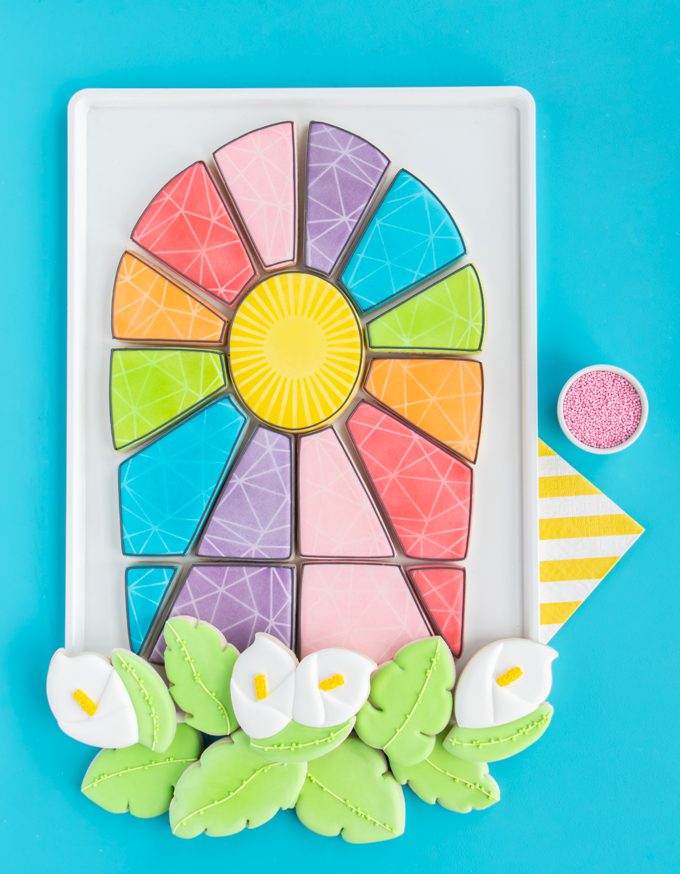
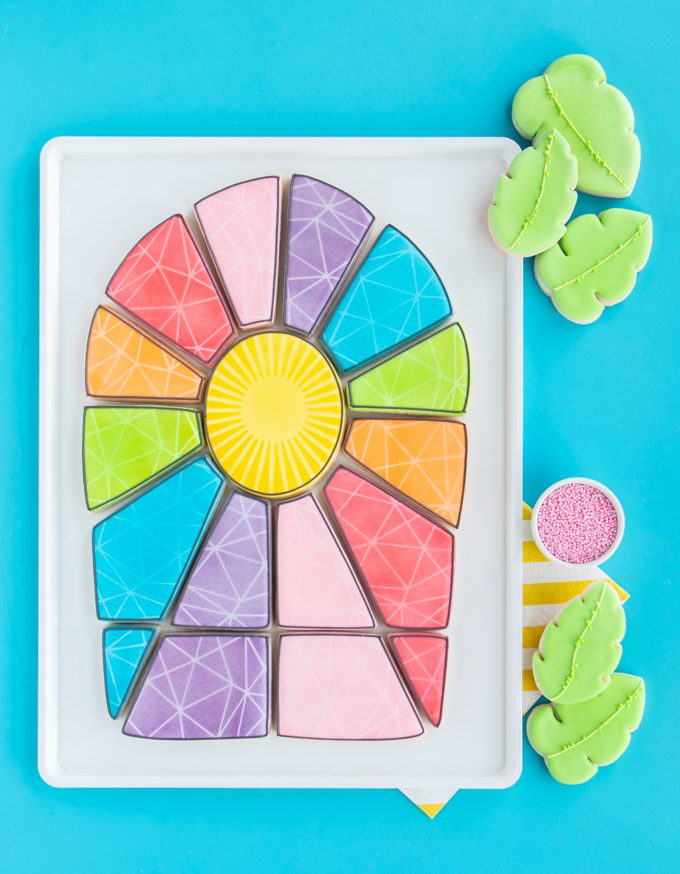
Then for the cookie fun of it I added some back up cookies! See how just a few palm leaves and lilies take this simple platter to a whole new level? Even though it’s mean’t for Easter…I believe it’s also a beautiful set to gift a grieving soul – a request I’ve actually seen quite often in cookielandia.
HOW TO STAIN GLASS COOKIE PLATTER
TOOLS
- The Library/Partiologist – Stain Glass Cookie Cutters
- The Library Palm Leaf Cutters (2.5in + 3in)
- The Library Wavy Palm Leaf Cutters (2.5in + 3in)
- The Library Peace Lily Cutter (3in)
- The Library Peace Lilies (3in)
- icing bottles/piping bags
- #2 tips
- #1.5 tip
- icing scribe
- airbrush
- The Library – Sunday Stencil
- The Library – Facet Stencil
- The Library – He Is Risen Stencil
- fine grater tool
SUPPLIES
- 6 Pastel Colors of 20-second icing
- black outline icing
- matching airbrush colors
Step 1: Bake your stain glass cookie platter cookies! When you download and print this cookie cutter set, we’ve included 2 different ovals. The smaller oval fit’s perfectly in the design, the second oval is slightly larger (3.5in). The reason for this is some cookiers use recipes/methods that will create perfectly shaped cookie. Others, like me, use a recipe that creates a little puff – I like the smooth shape a little puff gives! If your cookies spread even a little you may want to use the larger oval to compensate for the extra room it will create in the center. Also note that you will only have to print half of these shapes, half you will need to flip over before baking.
TIP: It also helps to have a grating tool on hand to straighten up the edges of your cookies to make them fit together better.
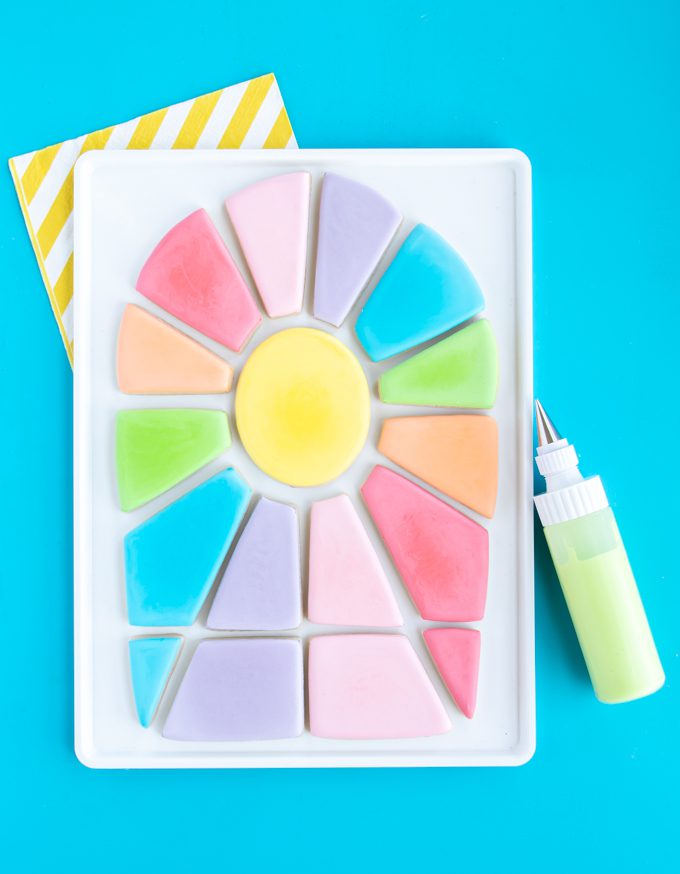
Step 2: Flood your cookies with pastel 20 second icing.
You might notice mine look a little eh, chalky? I did something a little reckless and covered my cookies too soon after icing them. I believe that is what caused this look, I wasn’t worried as I would be airbrushing anyway!
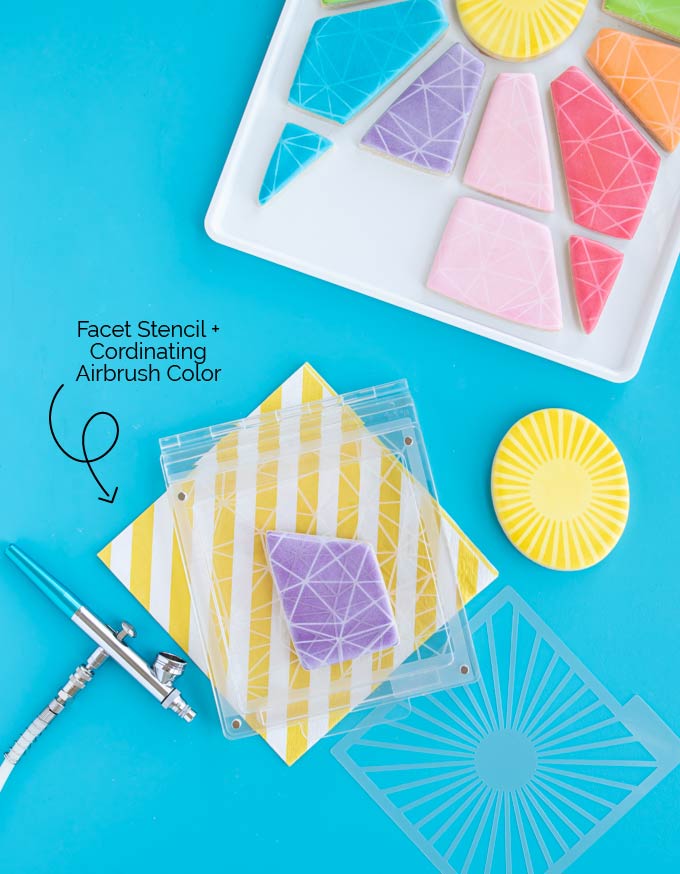
Step 3: First use the yellow airbrush color + the Sunray stencil on the center yellow cookie. Then use coordinating airbrush colors to airbrush a light covering with the facet stencil on each of the glass pieces. I still can’t believe how perfect this combination is! When you’re done you can add the He Is Risen if you would like.
TIP: I like to airbrush my colors in order of the rainbow so there’s not a whole to of cleaning out going on between colors.
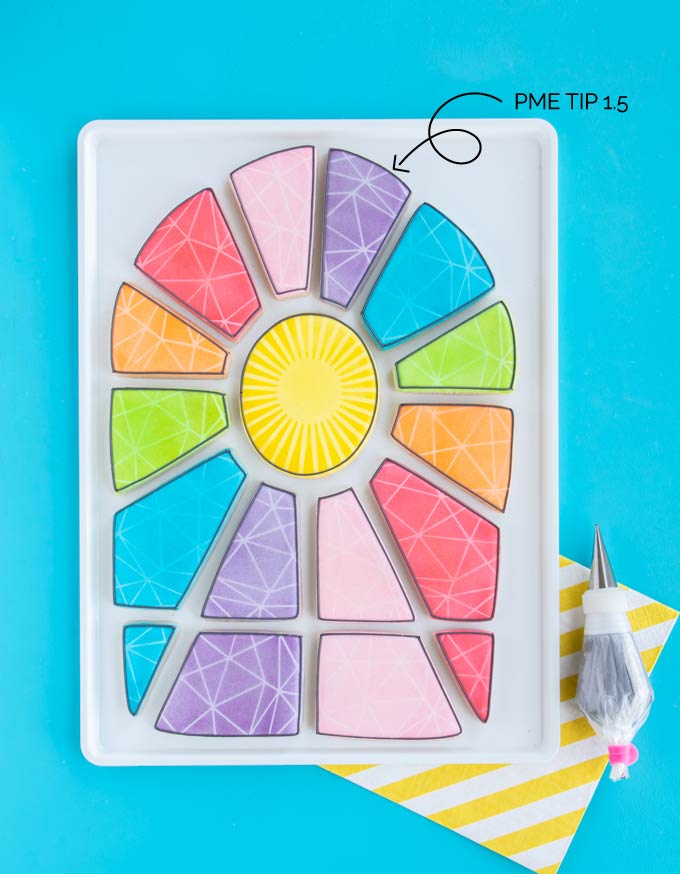
Step 4: Next add an outline of black outline icing. Tips 1-3 will do depending on the look you would like, I used a PME #1.5 here. Though honestly, I think next time I’d maybe use a #2 tip.
And that’s it guys! This set really is THAT easy. I had so much fun recreating this design, and BIG thanks to Kim, The Partiologist for collaborating with us to bring this design to you in The Library! If you loved this set from Kim, stay tuned because we already have a second one in the works for fall!
Heads up! To keep those legal gurus of the world happy, I need to inform you that some of the links in this post are affiliate links. In short – I may earn a small commission from the use of said link with no cost to you. But don’t worry I only link to stuff I use, love, and know you will too!


