

Last week I shared with you guys my first St. Patrick’s day version of my year-long quest to
I won’t keep you waiting, I get it you have rainbows to make! so let’s jump right in with the FREE projector templet and the tutorial!
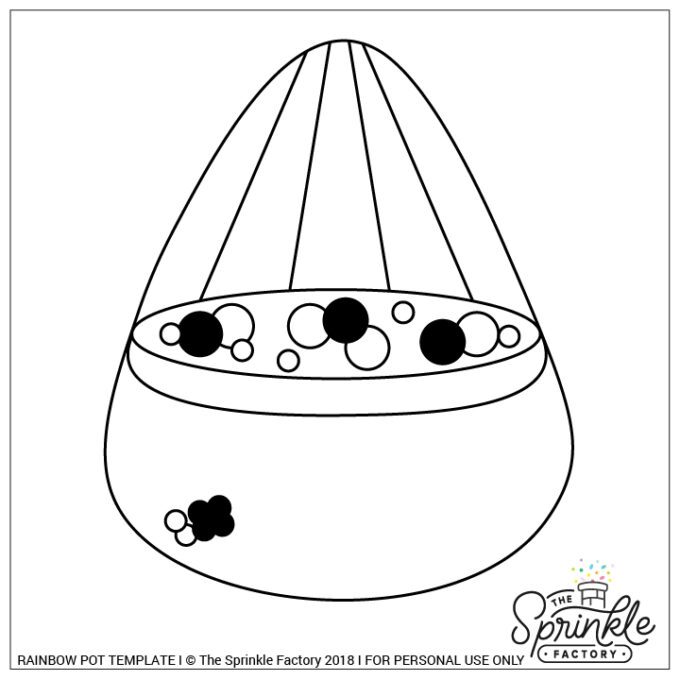
Have a cookie decorating projector? Great news! Here’s a projector template to make these paint palette cookies a breeze. Just click, save, project!
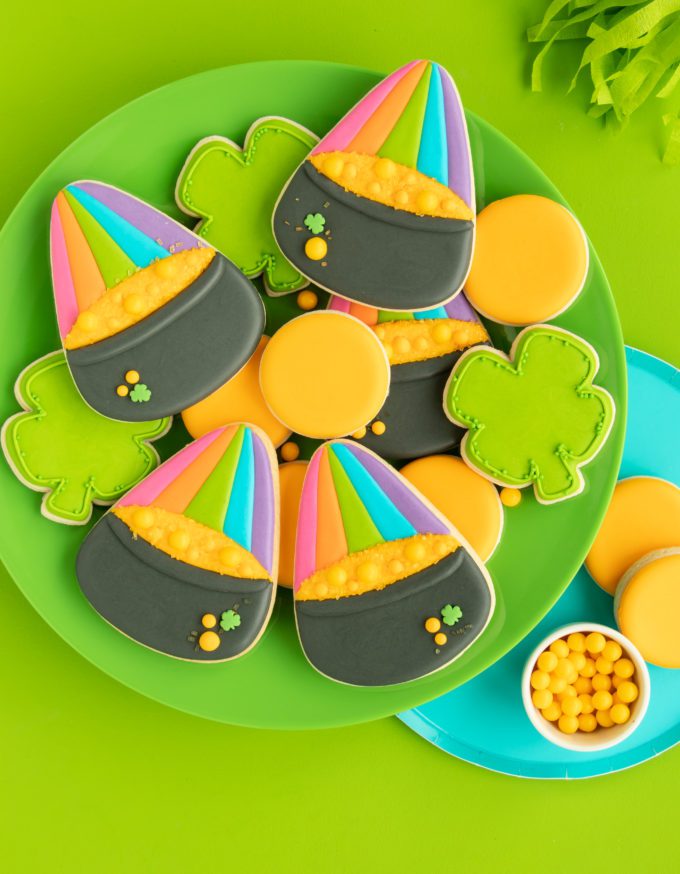
HOW TO MAKE POT OF GOLD COOKIE FROM A CANDY CORN CUTTER
TOOLS
- Candy corn cutter
- icing bottles/piping bags
- #2 tips
- icing scribe
- tweezers
- fan
SUPPLIES
- 20-second icing in pink, orange, green, blue, and purple
- yellow/gold 20-second icing
- dark grey/black outline + flood icing
- shamrock sprinkles
- yellow/gold sugar crystals
- yellow/gold sugar pearls

HOW TO MAKE POT OF GOLD COOKIES
Step 1: Start by tracing the pot of gold cookie design onto the candy corn cookie using an edible marker. The projector template makes this super simple!
Step 2: Using black icing, outline, and flood the pot. Add shamrock sprinkles while wet. Outline the gold on top of the pot using the yellow/gold icing and outline + fill in the center part (green) of the rainbow. Let the green crust over before moving on. I like to place them under a fan and they are ready to go in just a few minutes.
Step 3: Next outline and flood the orange and blue sections, let these crust over a few minutes as well.
Step 4: Finish your rainbow with both the pink and the purple section of icing.
Step 5: By this time your pot should also be nice and crusted over. You can now add the little lip of the pot on with black outline + flood icing. Let the pot crust + rainbow over completely before moving on.
Step 6: Fish your pot of gold cookie by flooding the leftover space with yellow/gold icing. Add sugar pearls, sugar crystals whatever sprinkly gold your heart desires!
And that’s a wrap on these pot of gold cookies, what do you guys think? Ready to try some of your own?
WANT MORE FUN ST. PATRICK’S COOKIE TUTORIALS?
Heads up! To keep those legal gurus of the world happy, I need to inform you that some of the links in this post are affiliate links. In short – I may earn a small commission from the use of said link with no cost to you. But don’t worry I only link to stuff I use, love, and know you will too!


