

Well hey, there Sweet friend! Remember a few months ago when I shared Part 1 of my Colorful Baking Studio Reveal? Today I am back to share Part 2! I know what you’re thinking…so soon? This has been possibly my most requested post like ever and yet it took me like forever. I anticipated sharing this post over the summer but man, putting together an entire studio while living abroad was far more tasking then I ever imagined. Being able to pop into a Target, Hobby Lobby or even Home Goods would have really made things simple. But hey where’s the fun in easy right? Hopefully, I can get to the third and final studio post by the end of the year, #goals right?
If you would like a quick refresher on Part 1 of the studio and overall information on it, I share lots of details in the Part 1 post. I’m going to pretty much dive right into this next section so be sure to head back and read that post if you’re craving more info about the overall space. To recap I’ve turned one long room into a multipurpose baking studio for my blog + product photography work. I broke the room up into sections to keep things flowing and organized. In Part 1 I shared with you one side of the front of the studio, the kitchen. Today I’m sharing what’s on the other side of the sprinkle covered floor: my photography styling station, decoration station, and dun dun dun…sprinkle storage – aka the sprinkle cabinet! Let’s start in the center and work our way forward.
THE “DECORATION STATION”
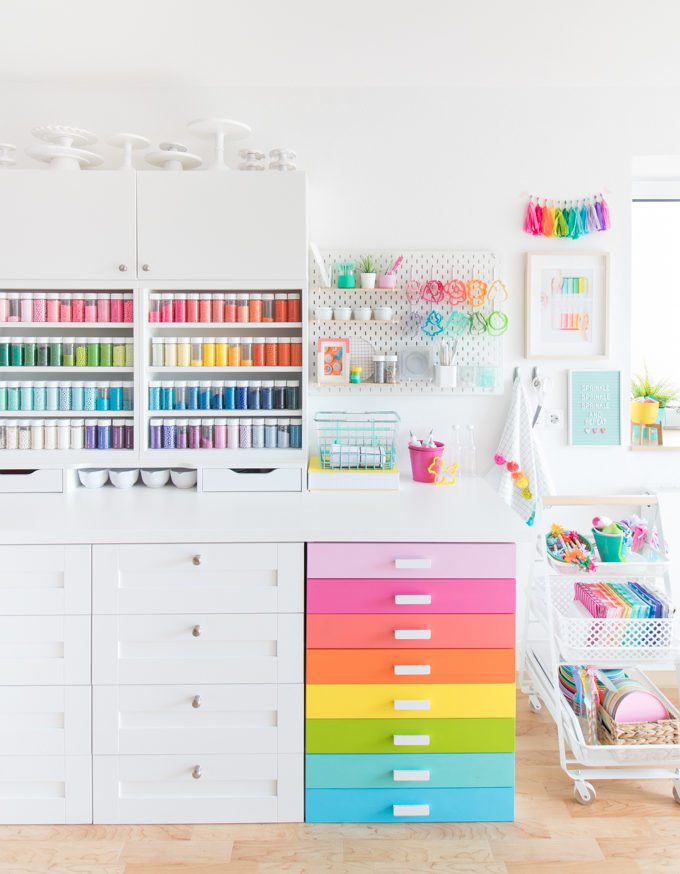
This area is right smack in the middle of the studio splitting the kitchen + photography space up the front and the office + craft area in back. It started with my plan for my ultimate sprinkle storage and evolved into a space I refer to as the “decoration station”. This area is home to my sprinkles, edible decorations, cupcake liners, toppers, paper straws, cookie cutters, cookie decorating tools, a few styling props and so on. Baking + decorating requires quite a few tools and supplies but when you add blogging + photography into the mix you add a whole new set of toys I mean tools and supplies. Many items become part of the process in a few different ways. This space allows me to have a main hub for my process after the baking + icing prep is complete.
THE ULTIMATE SPRINKLE STORAGE
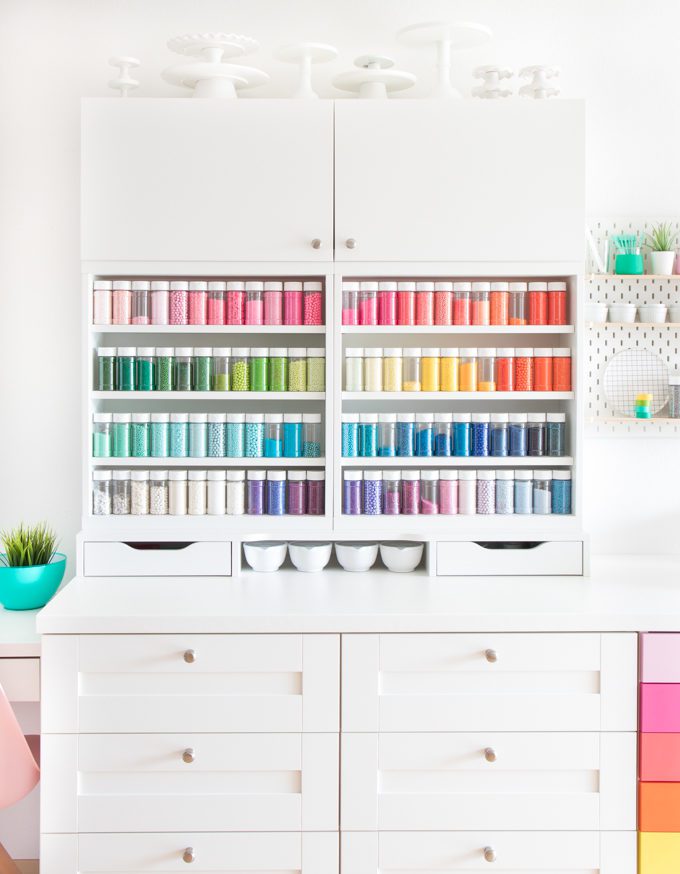
OK so ultimate is a little dramatic but guys, I’ve practically been dreaming up this sprinkle cabinet for a decade. They just don’t make storage furniture for 300+ bottles of sprinkles. Why I’ll never know. I mean this is totally normal, yes?
As the years have passed my content as a blogger has evolved but the one thing that has always remained consistent though is my love of sprinkles, which naturally results in my just-a-little-over-the-top-sprinkle collection. In the years where blogging was still fresh sprinkle mixes were not a thing. I would buy any and all sprinkle types + colors I could get my hands on and then mix my own sprinkle mixes as I needed. Even though sprinkle mixes are a “thing” now I still like to have all. the. colors. to use and mix. But to seal the deal, almost two years ago I officially joined the team over at Sweets & Treats. A huge part of my job requires me to be playing with, ahem, working with sprinkles + sprinkle mixes. Since Sweets & Treats carries hundreds of sprinkles now I have absolutely no choice but to have them on hand at all times. Or that’s what we tell the hubs ok?
Once I began to set up the new studio, an efficient sprinkle storage solution was a must. Over the years as we’ve moved from state to state with the military my sprinkle storage changed from a space in the kitchen cabinet, to a large wire shelf, to a custom slide out cabinet against the fridge. It seemed like there was never enough space, and they were never organized just right. Finally having my own baking studio allowed space for the sprinkles to have a proper place of their own. The question however, was how? How do you store 300+ sprinkles, without stacking, and making them look nice? The answer of course was Ikea! After a whole lot of time on their website and walking their showroom floor I figured out a combination that could get the job done plus look pretty darn cute.
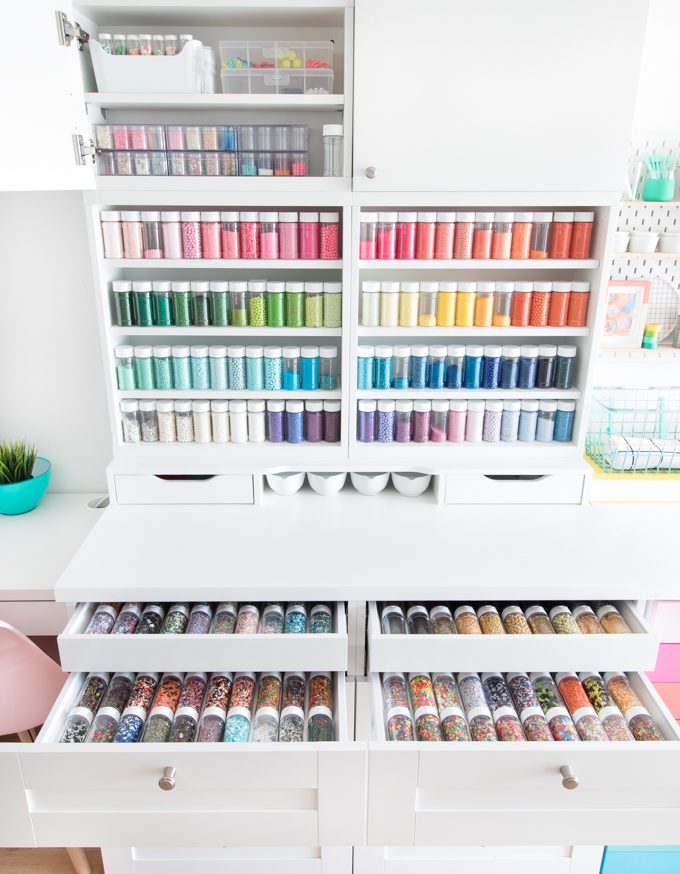
The bottom of the cabinet is regular Ikea 60cm X 60cm kitchen cabinets with drawers. The top two drawers have additional inset drawers inside them lined with spice trays. Each section holds over 40 bottles of sprinkles! I chose to keep all of my mixes, quins, holiday sprinkles, and red/black/silver/gold colors, in these drawers. Above on the counter, I used an Alex desktop piece from Ikea. This brought the top together from the bottom and holds my little mixing bowls, sprinkle tray, and a few others odds and ends I use when sprinklin’. The next layer is 2 shallow Besta cabinets which hold most of the rainbow of sprinkles. These cabinets were so perfect because they are not too deep and hold a ton of sprinkles. This section makes it really easy for me to chose and grab sprinkles as I make mixes. Also, they are just deep enough that I push them back under the ledge so I know the sun is not directly hitting them. If you’re going to display sprinkles out in the open, make sure they are not in direct sunlight or they will fade…especially purple! And the last part of my Frankenstein Ikea cabinet is an additional two shallow Besta cabinets, this time with doors. I store edible decorations and all of my sprinkle mix kits from Shop Sweets & Treats in one side, and cookie stencils, my projector, airbrush, etc in the other side.
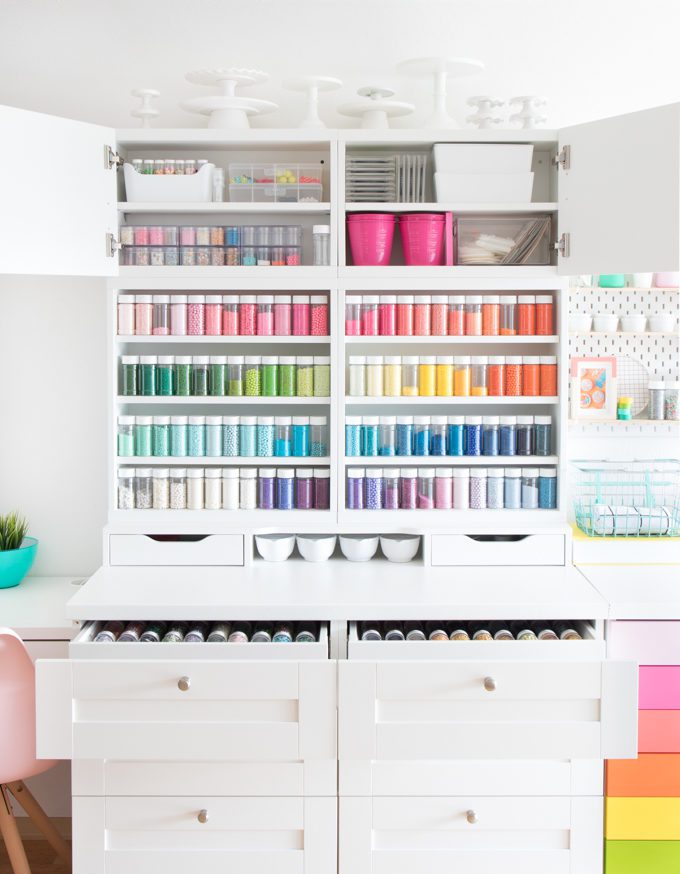
I know I seem to get everything from Ikea, but seriously guys this is why! I love that I can always piece things together, add shelves, add doors or whatever to make an area work. And best of all it’s super versatile in case it has to become something else later on down the sprinkle paved road.
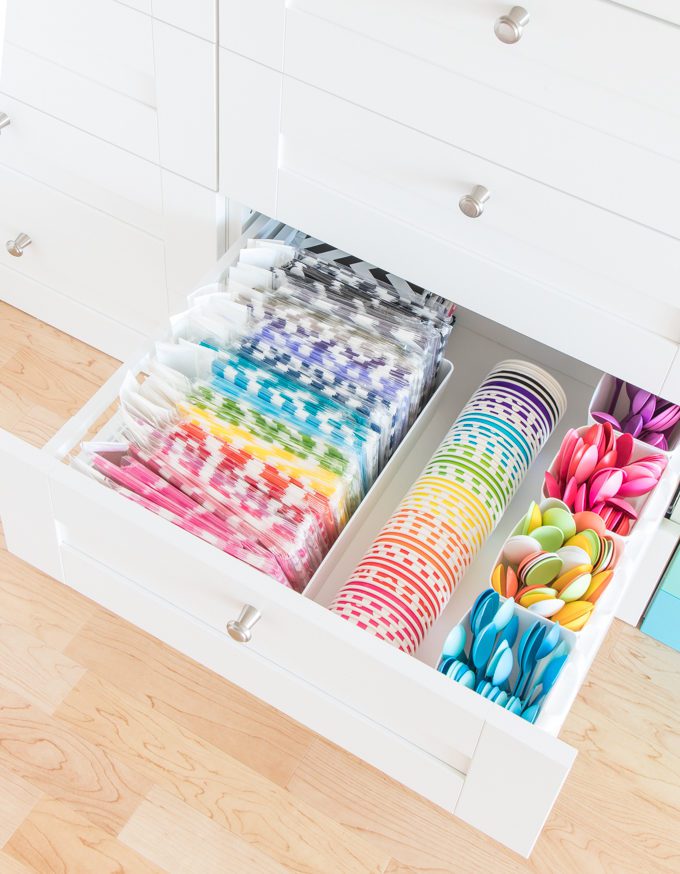
Below the sprinkles holds all the fun things I use to decorate or style most of my photos. This area also hold my very only little Sweets & Treats stock! As I’ve been working with this awesome shop for so long I joke I practically have my own store. One drawer is filled to the brim with paper party straws, another cupcake liners, and then of course some adorable party goodies. The truth is I use these for work and styling quiet often but let’s not deny the rainbowness just makes me happy.
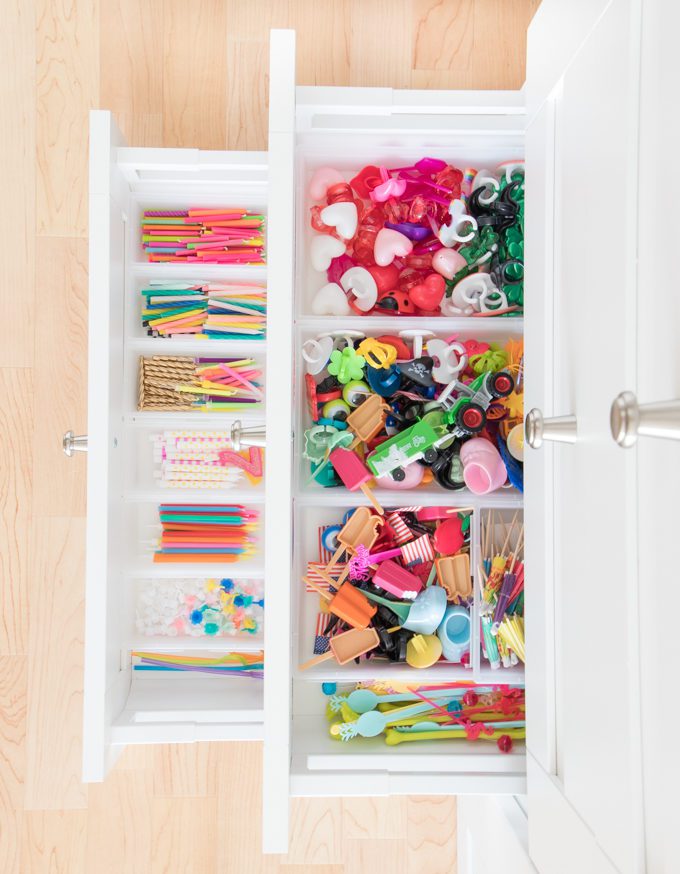
But then again so does candles, cupcake toppers, and drink stirrers. Man…it’s a tough job I have!
COOKIE CUTTER STORAGE
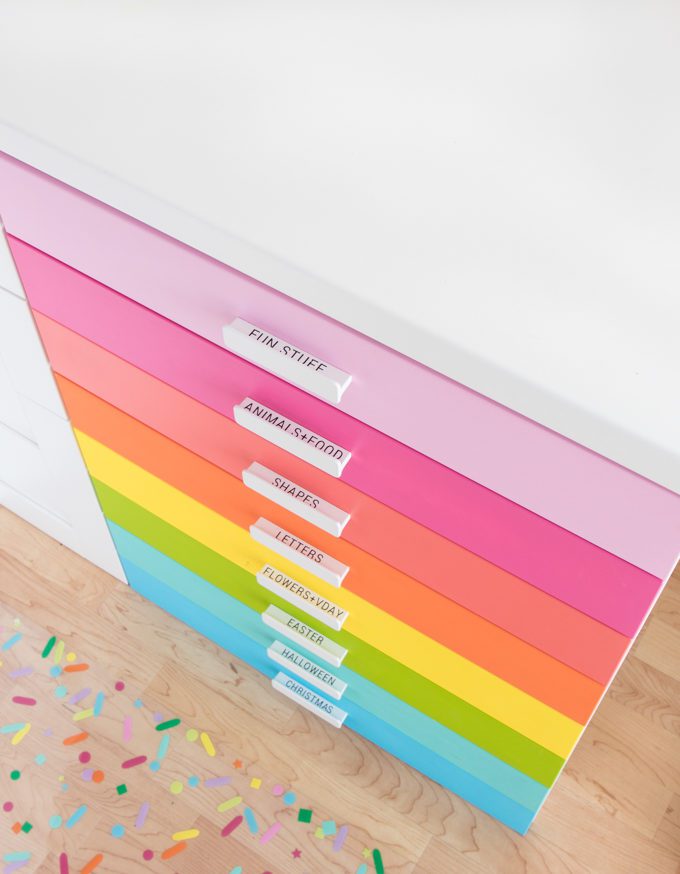
You guys. Let’s talk cookie cutter storage. This is probably one of the most asked about topic in the cookie community. For most cookiers, cookie cutters are like sprinkles are for me, they just can’t get enough. Soon enough you end up with hundreds of cutters…but how to store them?! I’ve seen some amazing cookie cutter storage ideas from walls of pegboard to organized shelves and labeled bins even categorizing apps! While all these things are totally swoon worthy, I have found for me they become just another thing to keep up with. Plus I actually try to keep my cutter collection kinda slim. I’m all about reusing shapes and getting creative + sticking to shapes I feel fit my brand. Since I don’t actually take cookie orders that’s pretty simple for me to keep up with. Prior to this cabinet, I had my cutters in labeled bins in a large wall cabinet. It was really nic, and super organized. But the truth…it wasn’t functional! Most of my cutters ended up simply being stored as moving containers and digging through cutters just seemed like a pain. But then putting them back after use? UGH! After a ton of thinking it through, and commitment to keep my stash semi-small I decided to purchase another Ikea cabinet and line it with 8 shallow drawers. Although the are the same line of drawers as the left side the cabinet they lack the detail due to the smaller size. I had a crazy idea to paint them rainbow so I grabbed a brush and never looked back. Eventually, I found some flat white handles which allowed me to place vinyl lables on the top of the handles! I love that each drawer is labeled but it doesn’t look overwhelming from the front.
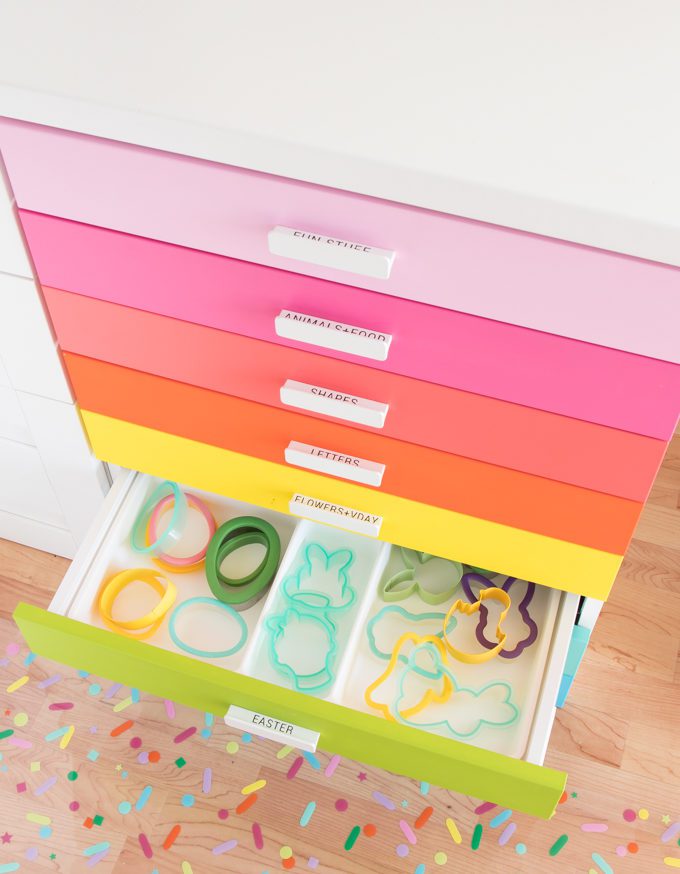
For now I’m using cheapy Ikea drawer dividers to help break up the sections a bit, but eventually, I’d like to make some of my own which would give me even more space. Although I know my space is limited this way I absolutely love this solution. I am able to quickly slide each drawer out and actually see what I have to work with. Not only is it easy to find what I need it is super easy to put them back away. I’m trying to stick to a cutter in cutter out rule to keep myself for overdoing the cutters. There is almost always a handful of cutters I’m hanging on to because I love but let’s face it – never ever use. Because I’m not a total monster I have a couple plastic bins of cookie cutters stored away in a cabinet, for those cutters I just can’t toss yet which I’ll probably end up giving away.
OK, we’ve gone over the good but now the bad. This cookie cutter storage setup was actually pretty costly. It took me months to make the commitment, but I knew it was something I would use over and over again and eventually install into a permant studio. You can cut the cost by 1/3 by selecting the cheaper drawers if that’s the route you would like to go. Below I’m sharing a few other options that will give you a similar feel.
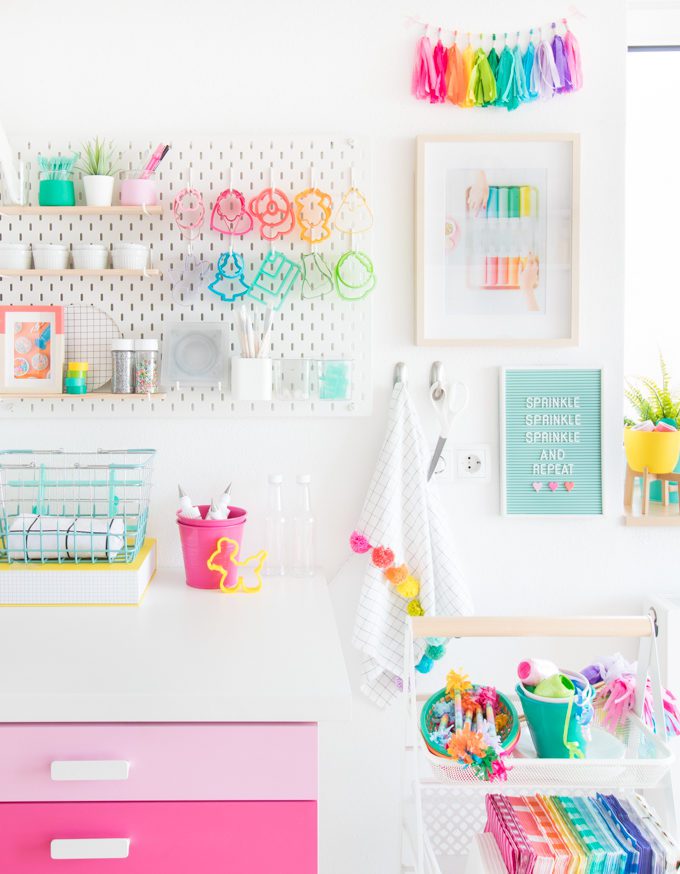
This little bright and cheery area seriously gives me all the happy feels! Because I’m often shooting tutorials my decorating + photography process and items often become one and the same. While I might use a paintbrush to detail a cookie I will also use that same paintbrush to illustrate the step in the photos. So this area has become a little bridge between the two areas where I can grab everything I need to shoot a tutorial and go back to the same place to put it all away. If you haven’t noticed a pattern yet putting stuff away is a big part of the process for me!
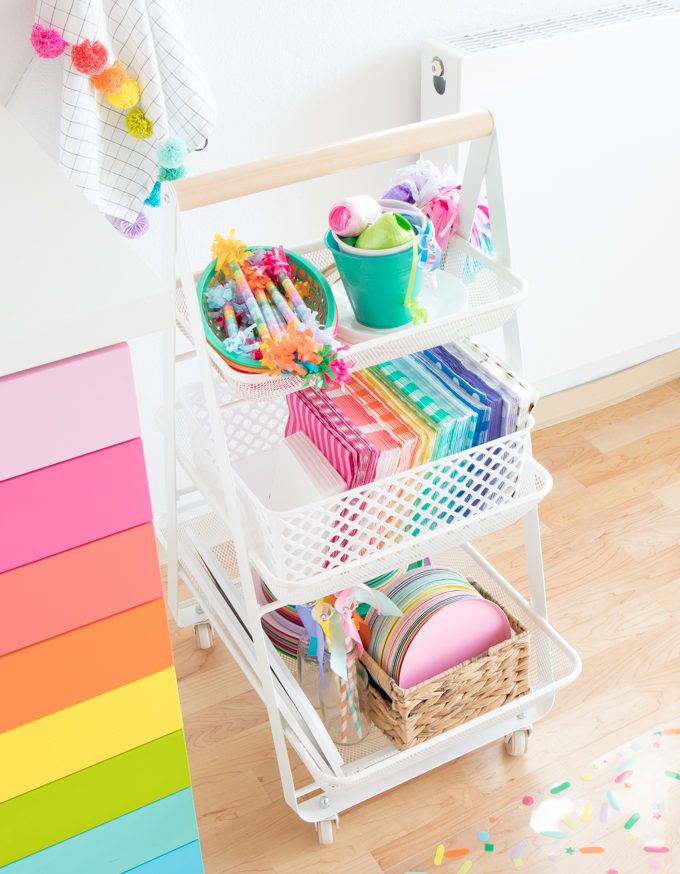
Speaking of putting stuff away. One of the best things I ever did was gather up my most used styling props and place them in this rolling cart. I use to go back and forth to a cabinet in the back of the studio everytime I needed something while styling. Now I just roll this little cart up to wherever I am working. Super duper simple.
THE “STYLING STATION”
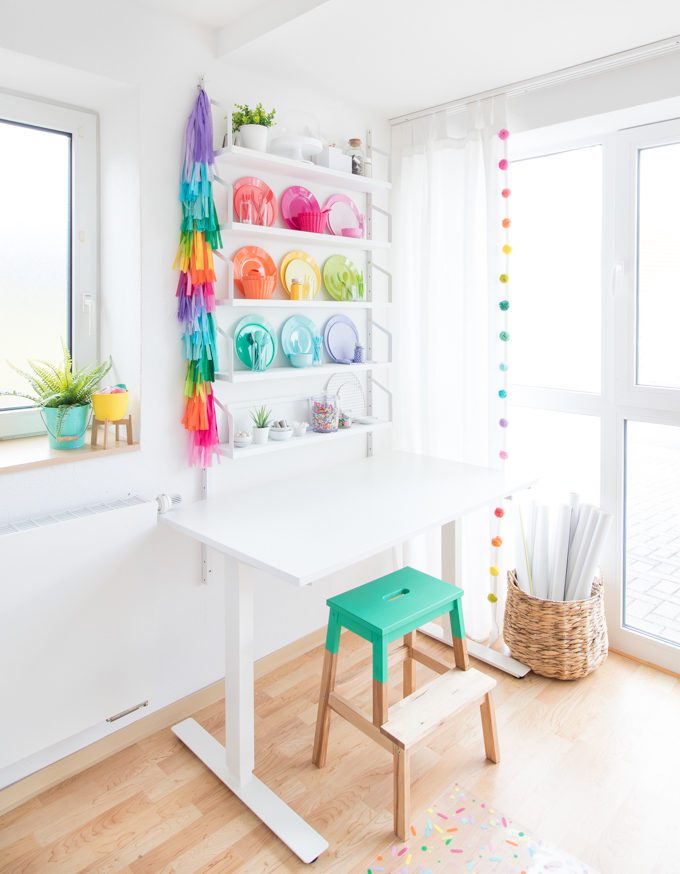
Often I’m rolling my little cart right here to the final part of the room, the styling station! This little area is where I not only take all of my photos but I also decorate cookies + shoot videos. This area probably sees the most action out of the entire room because no matter what I’m doing there’s probably a photo being taken! It actually shares a space right next to the windows with the kitchen. Not an ideal fit but you gotta do what you gotta do to get all that beautiful light from the sun! This table is also from Ikea and it’s most definitely my favorite studio furniture purchase ever (I may have even bought two!). Wanna know why? It raises and lowers with a simple turn of a handle! You guys…this table is a game changer. When I’m decorating cookies I can raise it to the perfect height, no more back pain from being hunched over for hours. When I’m styling photos it can be lowered and raised however is needed depending on the lighting or setup. Frosting a cake or rolling cookie dough? You better believe I crank this guy all the way up. Seriously, I can’t say enough how much I love this table. Since my kitchen had to be fairly small and lacking in counter space, I needed something I could use for all the things. This baby is it!
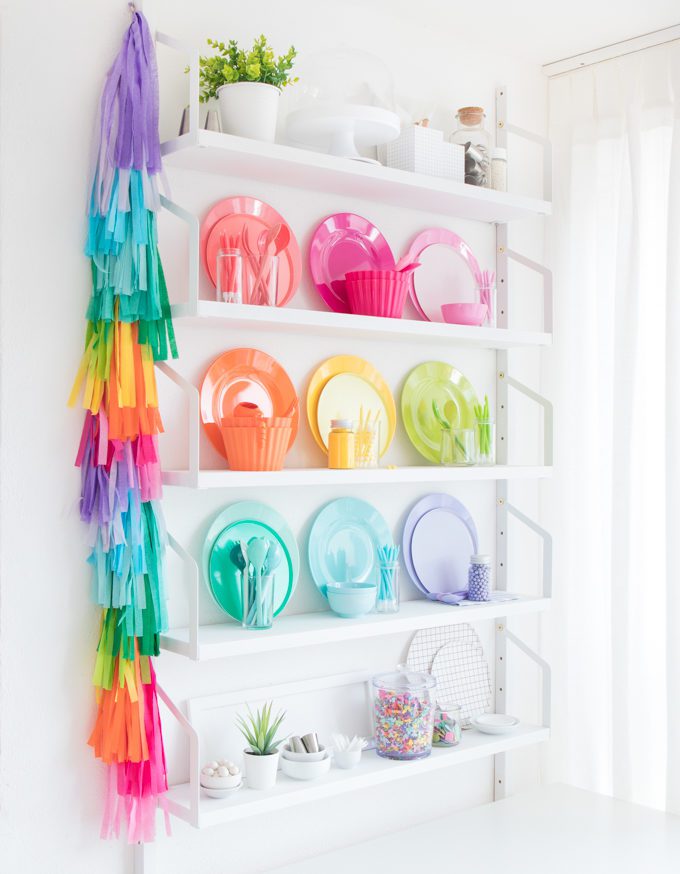
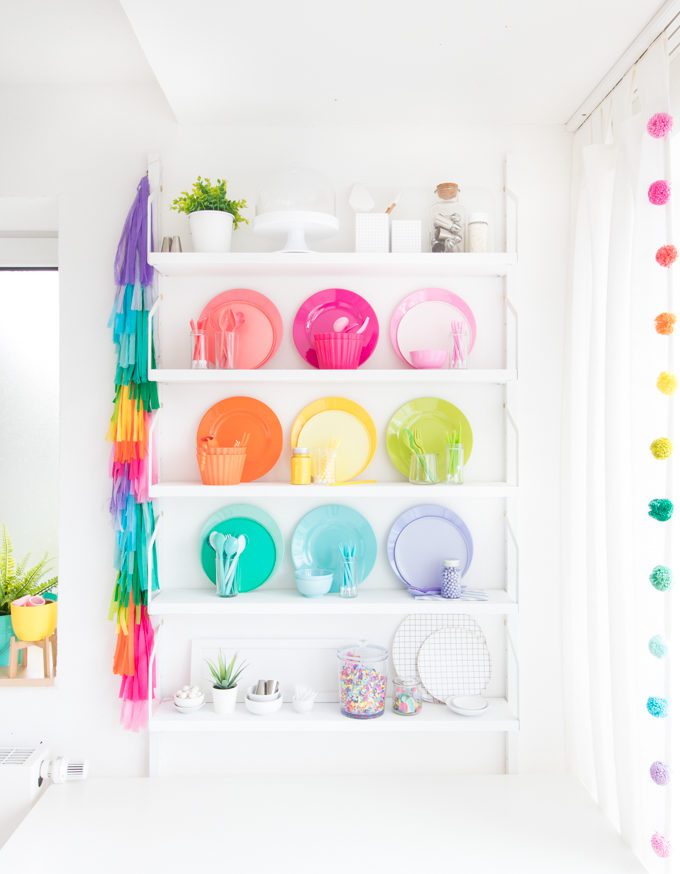
In this area, I knew I needed just a little more storage for my props. Having everything out and accessible makes the process so much faster and keeps my styling consistent. Plus let’s face it I couldn’t just keep that wall white. I really wanted a floor to ceiling attached bookcase but that was just not happening here in Europe. So I did what I always do, and headed to Ikea. I found this shelving system which would work perfectly in the narrow space! After a quick coat of white paint, my styling station was coming together. But wait….what to put on this beautiful white space?
Just kidding, that was obvious. What I needed was a rainbow wall to coordinate with my white + rainbow shelves in the kitchen directly across from this area. When I shared my idea with my friends over at Rice DK they sent over additional plates and utensils to make my rainbow dreams a reality. You guys know how absolutely obsessed I am with their melamine items! I literally stalk their catalogs each release to see what new colors have came out. I figure if I wait patiently enough I’ll have a cake stand in every shade of the rainbow!
Speaking of the rainbow. I knew this space still needed a little something something. So I reached out to the rainbow party queen herself, Lisa, of Lisa Frank Parties. She made not only this beautiful garland, but also the confetti, and several other items you may have spotted in the decoration station (I’ll link below). I can not wait to shoot with my new garland. I’m thinking it’s time for a cake!
Well sweet friends, I think that wraps of this tour of The Sprinkle Factory Studio – Part 2! Let me know what you think below, are you looking forward to seeing Part 3?
SOURCES
SPRINKLE CABINET
- Base Cabinet With Drawers
- Spice Trays
- Alex Desktop Add-On Piece
- Shallow Tall Besta Cabinets
- Shallow Short Besta Cabinets
- Empty Sprinkle Containers
COOKIE CUTTER CABINET
STYLING STATION


