

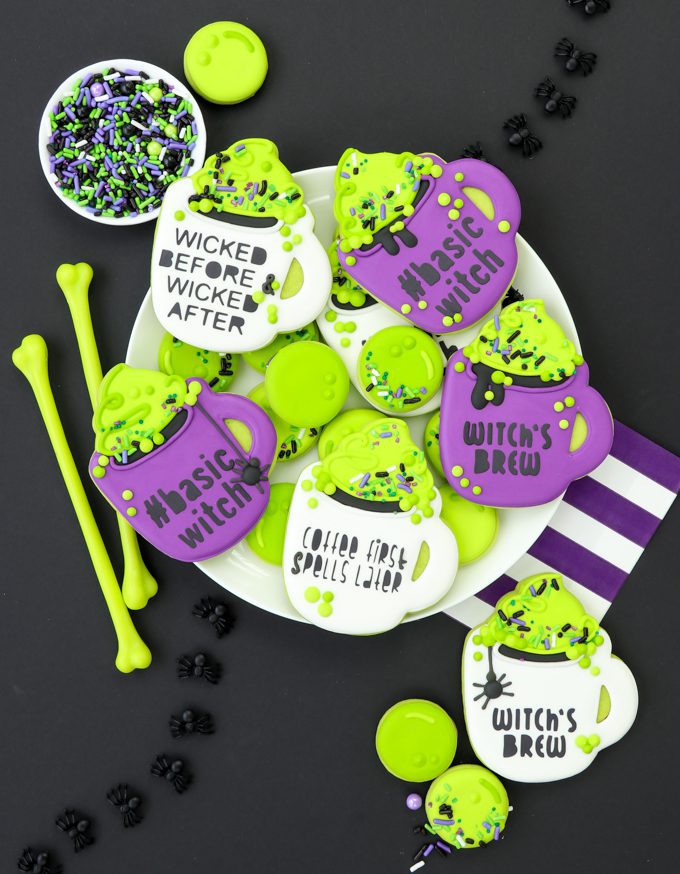
What does a witch drink? Witch’s BREW obviously! And probably diet coke when its warm out. But that has nothing to do with today’s post. So we’ll stick to the brew for now. Which brings me right on to these Witch’s Brew Halloween Cookies. Because if you know me in even the smallest way you know I am all about the coffee, sprinkles, and horrible puns.
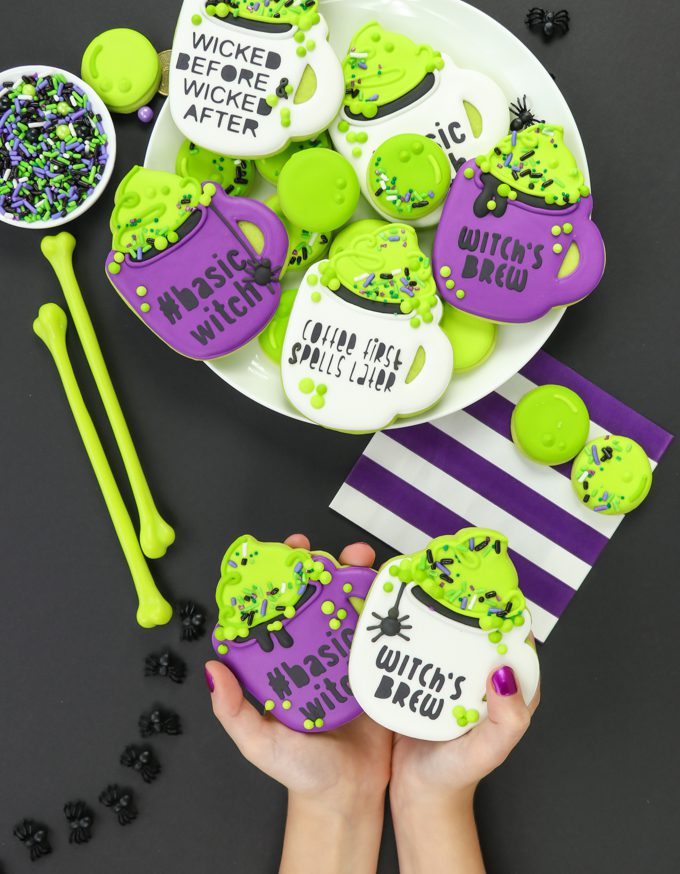
I really made these cookies to practice my cookie stencil making for some up coming projects, and I hadn’t intended on sharing a tutorial. But they came out so darn cute, so the least they can do is serve as some Halloween inspiration right? For these cookies I used Sugarbelle’s mug cutter and Sweets & Treats Dragon Dreams sprinkle mix. I started by dying my dough Americolor electric green because well, I’m just obsessed with that color. It gave me the green pop where the mug handle is. The same effect could be achieved by adding a little green icing with a spatula prior to decorating.
RECIPES
SUPPLIES
- green outline + flood royal icing
- purple outline + flood plus royal icing
- white outline + flood royal icing
- black flood + stiff icing
- edible marker
- sprinkles
TOOLS
- coffee mug cookie cutter
- piping bags
- small round piping tips
- icing bottles (optional)
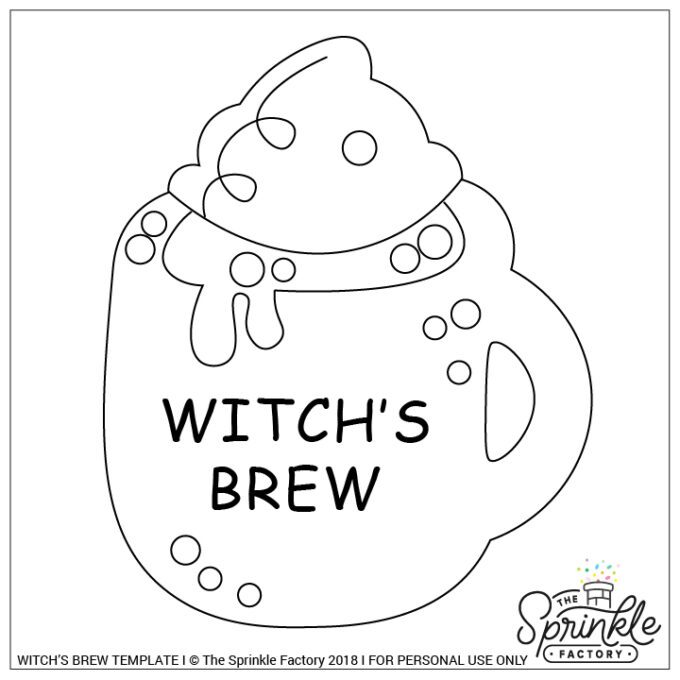
- Witch’s brew stencils
- frosting scraper
COLORS
BAKE COOKIES + MAKE ICING
Step 1: Bake your sugar cookies. I used my favorite recipe which I dyed green for extra awesomeness, but you can use whatever recipe you love. I used this cutter.
Step 2: Make and prep your icing, if you need more info on royal icing check out this post and this post.
DECORATE
Step 3: To decorate use the coffee mug stencil that came with the cutter and an edible marker to mark where the coffee line would go. You can free hand this or use another item to make your lines to keep the cookies consistent. First outline + flood the actual coffee mug. Let them dry over night.
Step 4: Using a stiff black icing and the witch’s stencil with icing smoother (coming soon) stencil on the words. After stenciling on the words with black icing, fill in the coffee and then the green “whipped topping”. Add sprinkles!
Step 5: Complete with a few little spiders and green bubbles.
About that green topping though, perhaps it’s toad flavored? What do you guys think? Toad-ally wicked? So easy it’s practically magic.
Have a cookie decorating projector? Great news! Here’s a projector template to make these cookies a breeze. Just click, save, project!
Heads up! To keep those legal gurus of the world happy, I need to inform you that some of the links in this post are affiliate links. In short – I may earn a small commission from the use of said link with no cost to you! But don’t worry I only link to stuff I use, love, and know you will too!


