

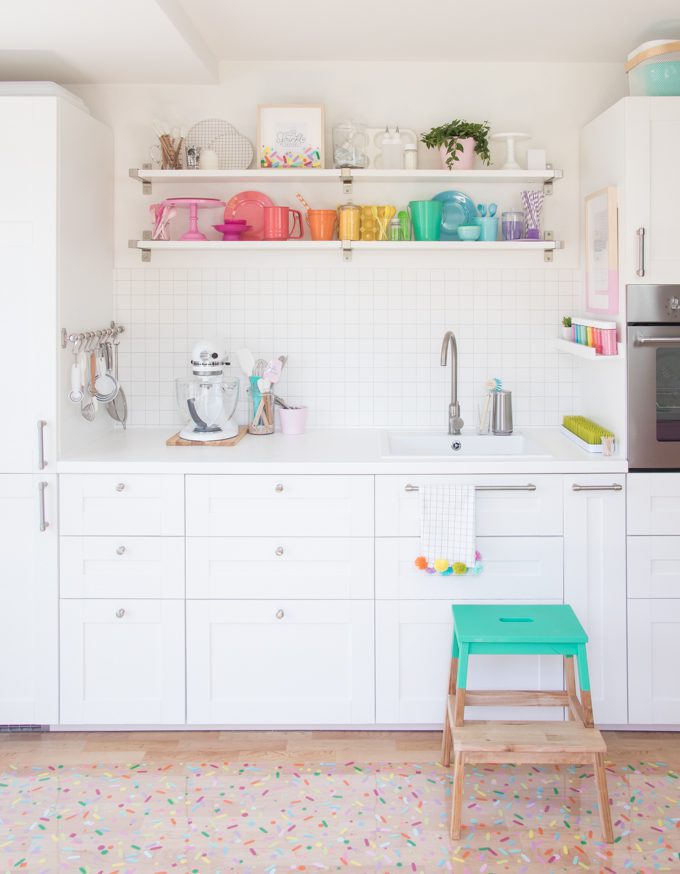
Hey, hey, hey sweet friends! Are you guys ready to change things up just a bit? How about a little crafting, ahem, sprinkle crafting? Yep, today we’re changing gears and stepping out of the kitchen from the normal sweet posts to a really quick, super simple, craft post. But because I would never stray too far from dessert even this craft has sprinkles literally all over it. You got it, today I’m sharing the DIY Sprinkle Floor mat that you guys have been going crazy over ever since I shared it on My Colorful Kitchen Reveal!

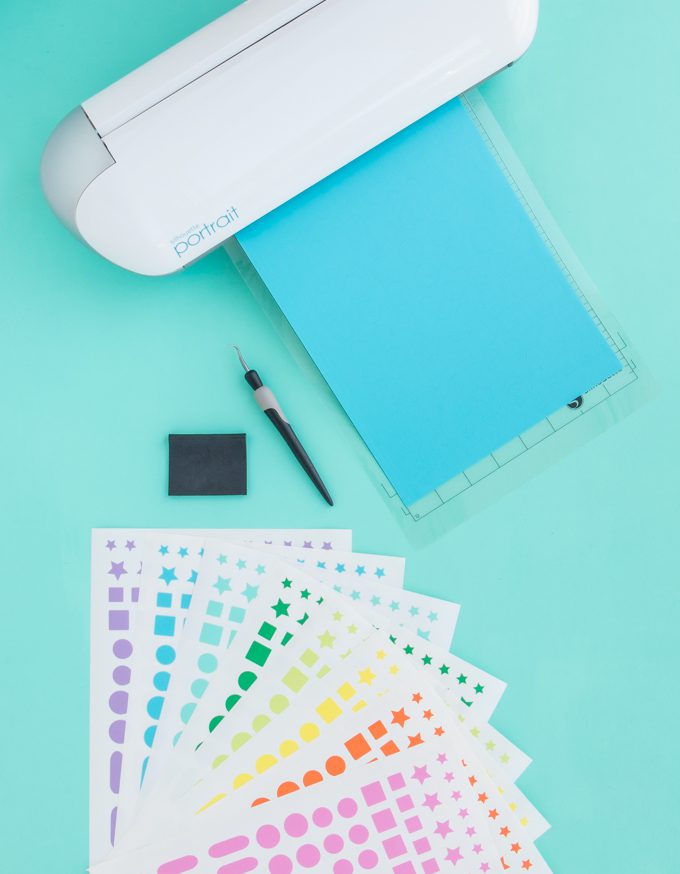
I was seriously stumped when it came to what to put on my studio kitchen floor. It needed something to complete the look, but it had to be super realistic in a baking kitchen. I wouldn’t even try to count the times colorful icing get dropped on this floor. And then there’s always the actual sprinkles, e-v-e-r-y-w-h-e-r-e. I tried a few different mat options and nothing fit just right. Suddenly it occurred to me, why not sprinkles, ON THE FLOOR! Yes! It had to become a reality. The issue was how to make this crazy idea come to life and after a few different ideas it occurred to me I could use my Silhouette to cut out Vinyl sprinkles and simply stick them to a mat! YAY! Now I’ve shared my deep love for my Silhouette machine many times on here. Seriously, it’s crazy to say but it’s one of my favorite tools in the studio. I always seem to come up with different ways to use it with my treats, like making stencils! And because the awesome people of Silhouette are well, awesome, they sent me over some goodies to play with this year. Including new blades which made cutting the vinyl flawless. I easily created some sprinkles in Silhouette Design studio, and within an hour I had cut out sheets and sheets of vinyl sprinkle stickers!
But of course it can’t all be that simple. I had to find the perfect mat! What type of mat would would best, and where would I find it?Amazon of course! With a little creative searching I found the exact mat I was looking for. So I ordered it right away and not so patiently waited for the door bell to ring so I could make my sprinkle floor dreams come true. Once my mat arrived it was as easy as peel and stick. You guys we’re talking toddler level crafting here!
However, I’m currently in Europe I found my mat on Amazon.de so I panicked a little when you all started asking for sources! Who knew you were all crazy enough to want a sprinkle floor too? Mission accepted! After a bit more creative searching on Amazon.com I found the perfect substitute! This product is essentially the same thing. It can be bought in clear or frosted and cut to all different sizes. Also included in Amazon Prime so YAY all around.
Ok are you guys ready to make a DIY Sprinkle floor mat? Don’t blink. You’ll miss the whole thing!
HOW TO MAKE A DIY SPRINKLE FLOOR MAT
Tools + Supplies
Any Silhouette Cutting Machine
Step 1: Cut out vinyl sprinkles using your Silhouette and my cut files. (Blade depth = 2)
Step 2. Peel away the negative vinyl.
Step 3: Stick your vinyl stickers all over the back side of the mat, if the sides differ. Press each sprinkle firmly to make sure it sticks well.
Step 4: Flip over your sprinkle mat and do a happy dance all over it!
Yea guys. It’s that easy. Basically your using stickers here. But before you ask, these guys aren’t going anywhere! I was so crazy impressed at how well they adhered to the mat. I flipped mine over so I could confidently steam mop it over and over again. But I’m pretty sure these guys are stuff for good.
Don’t forget to share you DIY sprinkle mats with me!


