

HIP HIP HORRAY it’s time for another Silhouette Alta 101 post today! Last week we covered an intro to the Silhouette Alta and today, we’re diving in to how to make 3D cookie cutters with the Silhouette Alta.
Like with any new activity we’re going to start with the basics. If you’re anything like me your wanting to dive right in and go crazy but trust me here, let’s learn how to make a simple 3D cookie cutter first, and once you’ve got that down you can go crazy adding all the customizations you want.
HOW TO MAKE 3D COOKIE CUTTERS WITH SILHOUETTE ALTA
CHANGE PREFERENCES TO MILLIMETERS
When 3D printing cookie cutters you’re going to want to start working in millimeters. With thin cutting edges it simply makes things easier. Most likely you’ll need to change the unit of measure in the Silhouette Design Studio and Silhouette 3D to millimeters. In the top left menu select Edit>Preferences then select “Millimeters” in the Unit of Measurement drop down. You will need to do the same for both softwares.
Now onto making cookie cutters with the Silhouette Alta. You’re going to need an outline of the shape you would like your cookie cutter to be. In short you have 4 options for obtaining your shape:
- Drawing the shape yourself in the design studio.
- Purchasing a shape from the Silhouette shop (There are thousands of options for around a dollar each!)
- Importing an .SVG file from an outside source. (A download or created by you in another program, needs to be saved as .SVG)
- Importing a .JPEG and then using the Trace Tool in Silhouette Design Studio to outline the shape.
MAKE A COOKIE CUTTER IN DESIGN STUDIO
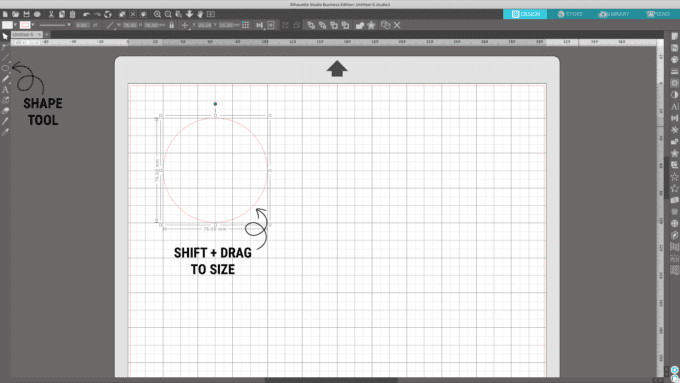
Step 1. Basically your options are endless. For today we’re sticking with the basics so we’re going to simply open Silhouette Design Studio and use the Shape Tool to create a circle. With the circle selected shift + drag to create your circle to the size you would like. Holding the shift keeps the shape in proportion while scaling down or up in size.
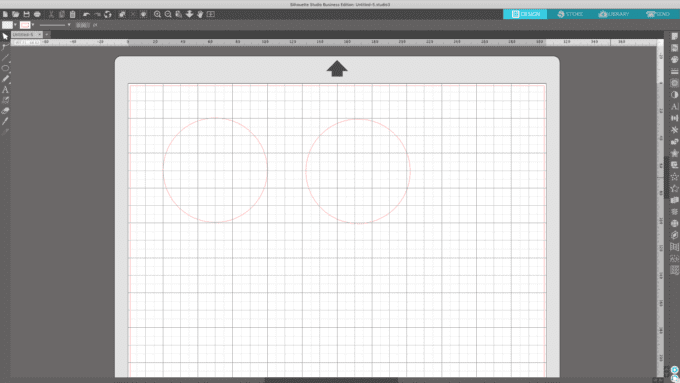
Step 2: Copy and paste your circle and drag them away from each other. You will now have two circles, these are the two pieces of your cutter the handle and the cutting edge.
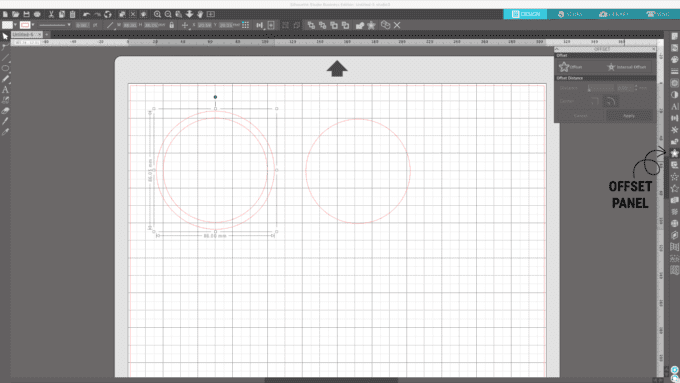
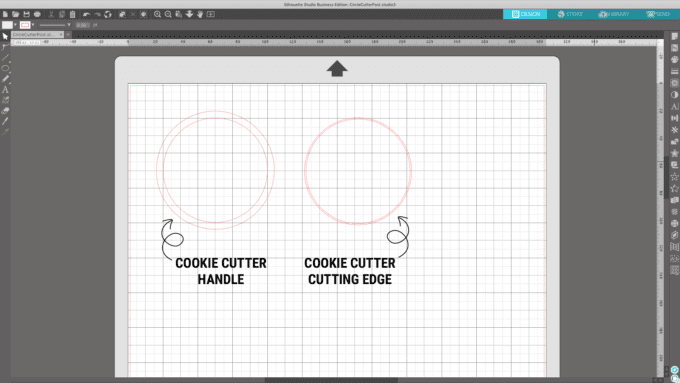
Step 3: Using the Offset Panel click on each circle to create an offset. With the Offset Panel selected click “Offset” the star on the left, and then add your offset distance in millimeters. Your offset distance will be how wide each section of your cutter is. With time you can create your own preferences and even add another smaller cutting edge to the top if you’d like but for today let me suggest you make your cutting handle 5mm and your cookie cutter edge 1mm.
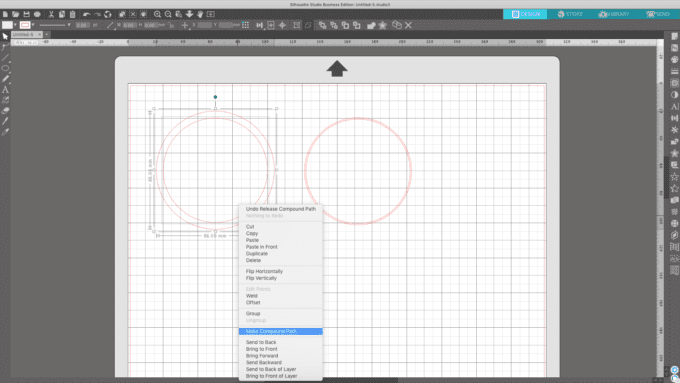
Step 4: Drag over the set of circles and right click>make compound path. This tells the software that it’s now an outline of a circle and not a solid circle.
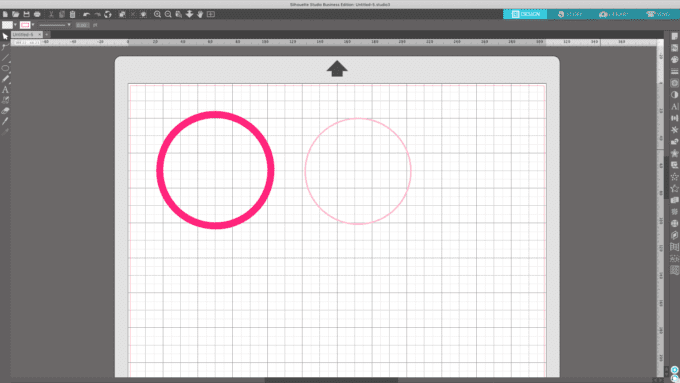
I used the Fill Panel to color the layers just so you can see them better for the next step. Totally optional, however this does help me double check that they are a compound path. If not it will not show up as a filled in circle.
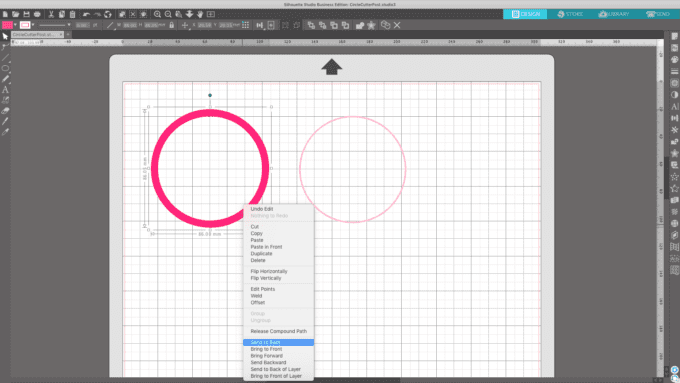

Step 5: Now we need to layer our circles so the 3D software will read them properly. On the cutter handle circle, right click>move to
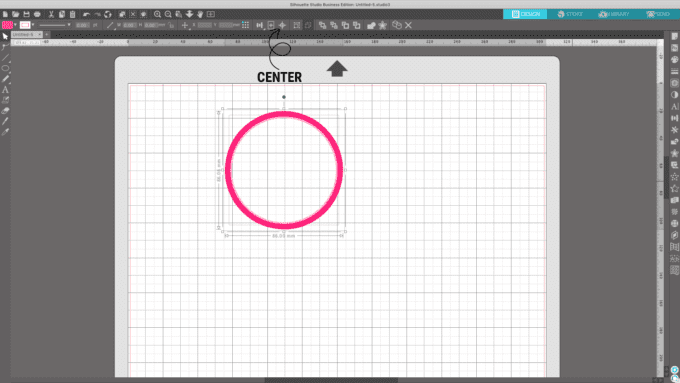
Step 6: Drag your selection tool over both circles and click the “center” option in the top menu. Save your circle cookie cutter using the default Silhouette option.
PRINT YOUR COOKIE CUTTER IN SILHOUETTE 3D
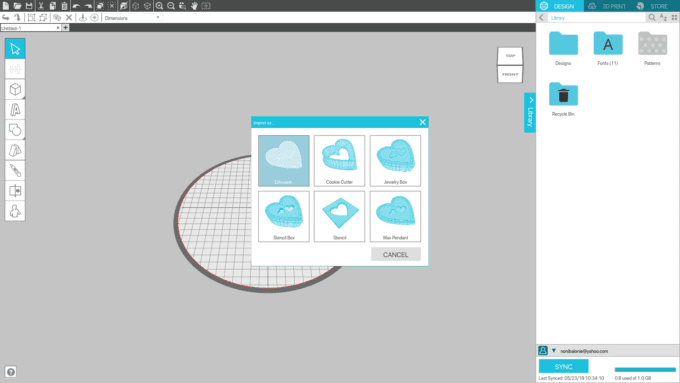
Step 7: Open the 3D software. Then open your cutter file (File > open) and choose your saved file. The import options will pop up. I know it seems obvious to pick cookie cutter but don’t! Instead, you want to choose the Extrusion option. This is how your cutter will look below. You can see the two layers you just created in Design Studio.
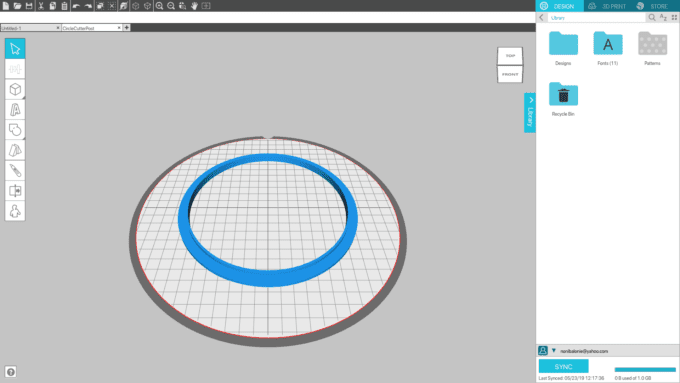

Step 8: Now we will add the correct height to each layer. Right click>ungroup. Select the cutting edge and put 16mm in the height box. Select the Level To Bed Option. Finally select the handle of the cookie cutter and set the height to 3mm and Level To Bed Option again. It’s SUPER important to select Level To Bed after each height adjustment. I’m not honestly sure why, but after you adjust the portion the piece kind of hangs in
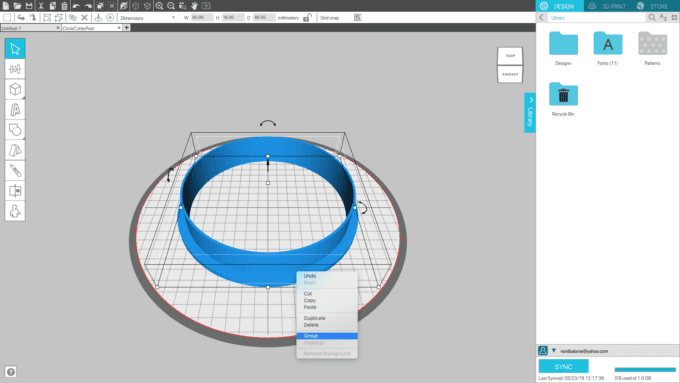
Step 9: This is what your final cutter will look like! Now drag your selection tool over both of the pieces so they are highlighted then right click>group. It’s important that the items be grouped so the printer knows to print them as one whole item.
PRINT SETTINGS
Step 10: It’s time to print! Select the PRINT tab on the top right of the page. There are lots of default settings to print with, but you’ll want to pay attention to three: DRAFT, STANDARD, and HIGH QUALITY. The names pretty much explain the outcome. What you’ll want to note in these changes is as you go up in quality, the print will result in…
- Thinner layers/smoother print
- Use more filament
- Adds time to the print
I don’t mind seeing the layer lines at all. My bottom line is to get a good, sturdy custom cookie cutter in a small amount of time. I don’t stress filament usage but if you’re looking to really cut costs, it’s something to consider. Once you select your print quality the Silhouette 3D software will render what the final print will look like. You can even play it so you can see exactly how it’s going to print, layer by layer.
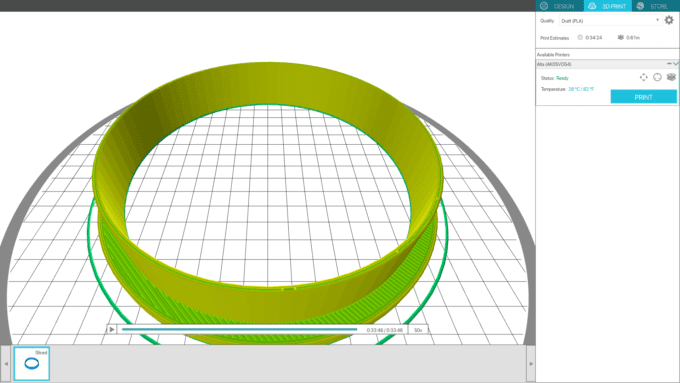
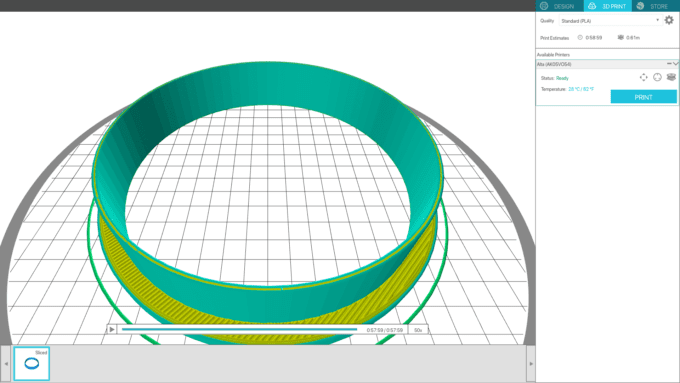
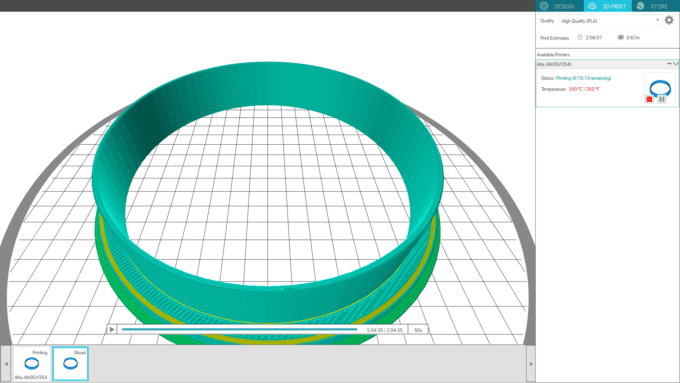
You can see how each option looks in the next three images. Notice how the cookie cutter becomes smoother and the estimated print time goes up.
Draft Print Setting
Standard Print Setting
High Quality Print Setting
There is one more thing I would like to add about the

Step 11: Make sure your filament and platform
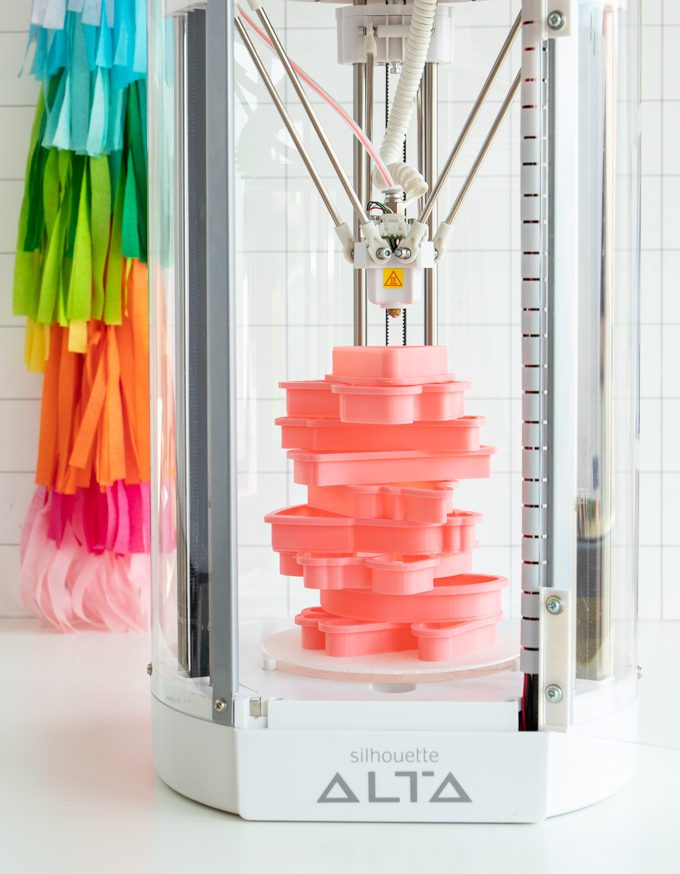
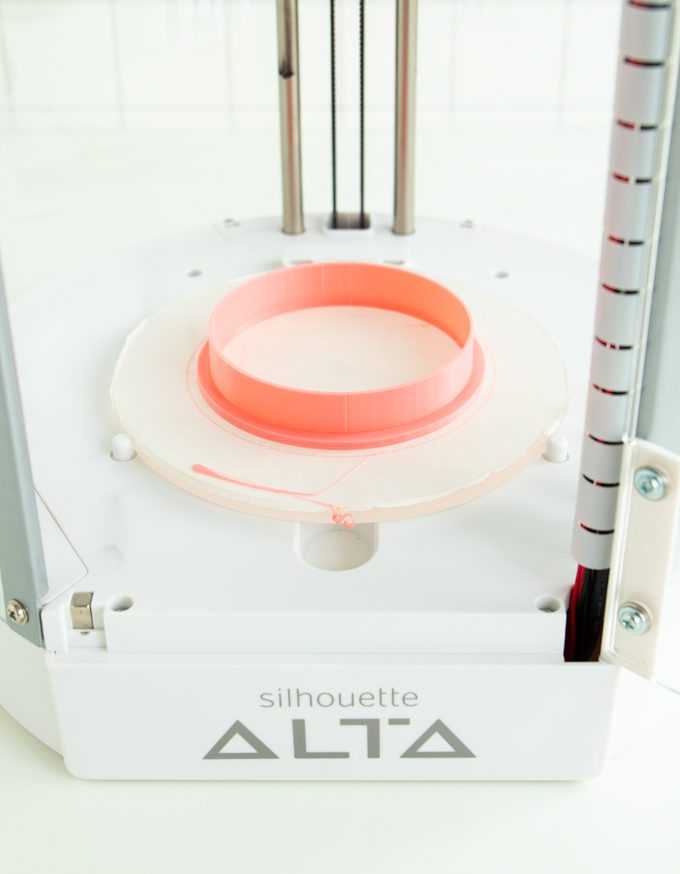
Here’s what my cookie cutter looked like when it was finished printing.
Because I’m as extra as they get. I even printed out one of each default print settings so you can see the difference. It’s is hard to see but if you zoom in there is a difference in quality. It’s up to you which one you prefer!

A FEW ADDITIONAL NOTES FOR MAKING 3D COOKIE CUTTERS WITH SILHOUETTE ALTA
I really hope you now have the confidence to create your own cookie cutters with the Silhouette Alta. In my next post for this series I will cover troubling shooting your print jobs because unfortunately troubleshooting comes with the territory of 3D printing. However, there are 2 things I want to address now. First, even though the 3D program allows you to resize your cutter – right in the 3D software, know that it will possibly cause print issues. Upon some
Can I Use My Cricut Software With The Silhouette Alta
In short, no. At the present


