

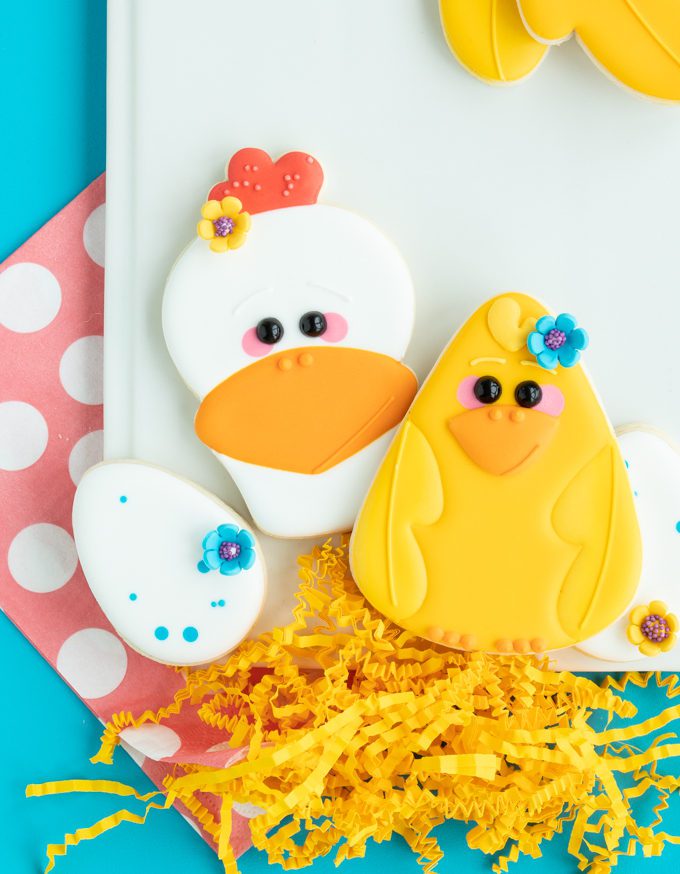
Last week I shared some cute spring chick cookies made using my all time favorite candy corn cookie cutter and I hinted I had lots more bird cookies coming in my candy corn series, but there’s a second cutter that always has me keeping birds on the brain, Easter Basket cutters! So today I’m back to share the mama of the spring chick cookies, thanks right easy chicken cookies from an Easter baster cookie cutter!
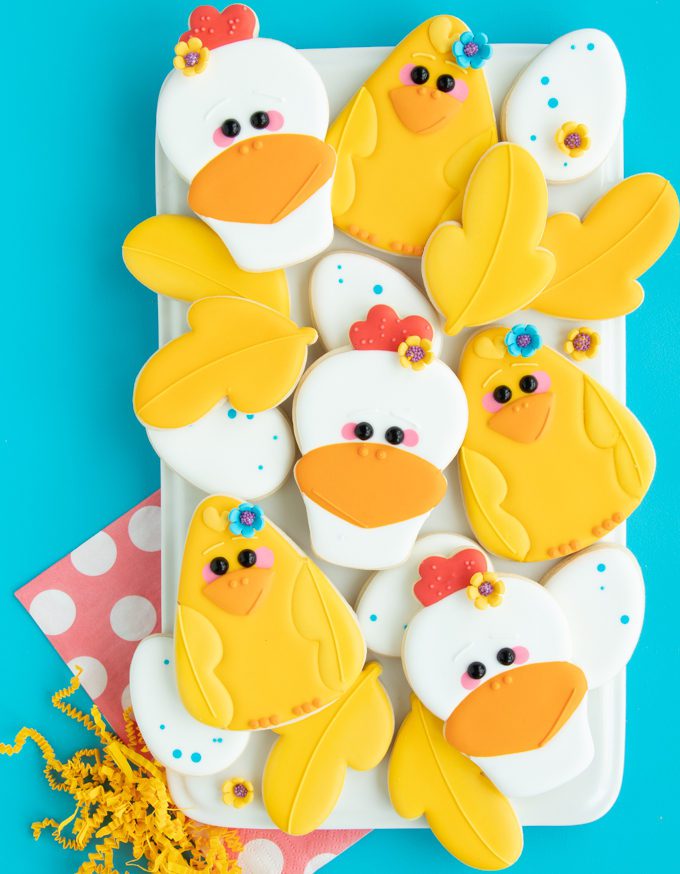
CHICKEN COOKIES USING AN EASTER BASKET CUTTER
Now you might be thinking hey wait a minute, I’ve seen this design before. This design originally made its debut as a turkey cookie at Thanksgiving. As a matter of fact, I used three different Easter basket cutters to make a whole family of turkey cookies. But the truth is the moment I held Sugarbelle’s Easter Basket cookie cutter I saw a duck cookie, but you know those guys hatch in spring. But don’t worry these chicken cookies could easily transfer to any ole Easter basket cookie cutter you have. Now let’s make some chicken cookies!
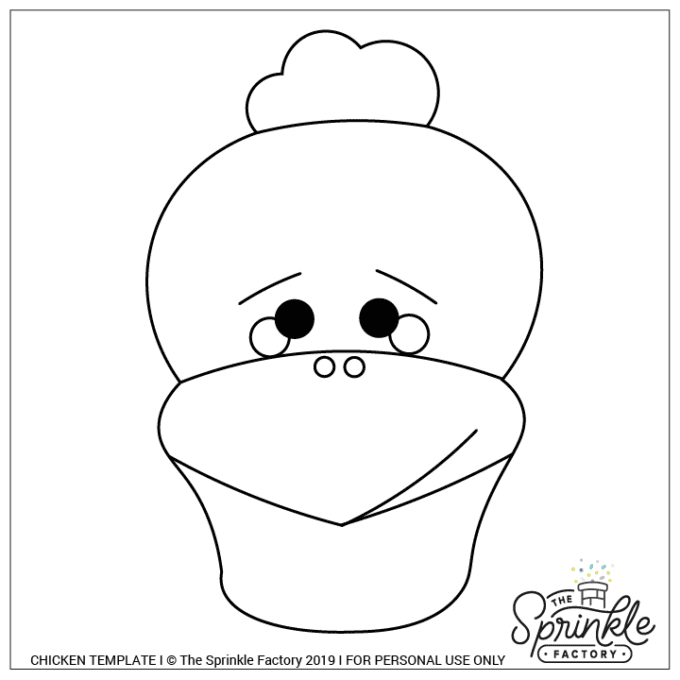
CHICKEN COOKIES PROJECTOR TEMPLATE
Have a cookie decorating projector? Great news! Here’s a projector template to make these cookies a breeze. Just click, save, project!
HOW TO MAKE CHICKEN COOKIES WITH AN EASTER BASKET CUTTER!
NEW TO COOKIES? BE SURE TO CHECK OUT THESE POSTS FOR THE BASICS:
ROLLED COOKIES 101 + ROYAL ICING 101
TOOLS
- Easter basket cutter
- edible marker
- tweezers
- piping bags
- #1 tips
- #2 tips
- icing bottles
- couplers
SUPPLIES
- white outline icing + white flood icing
- black sugar pearls
- light pink flood icing
- orange outline icing + orange flood icing
- yellow outline icing + yellow flood icing
- red 20-second icing
- edible decorative flowers (optional)
- red
non-pareils (optional)
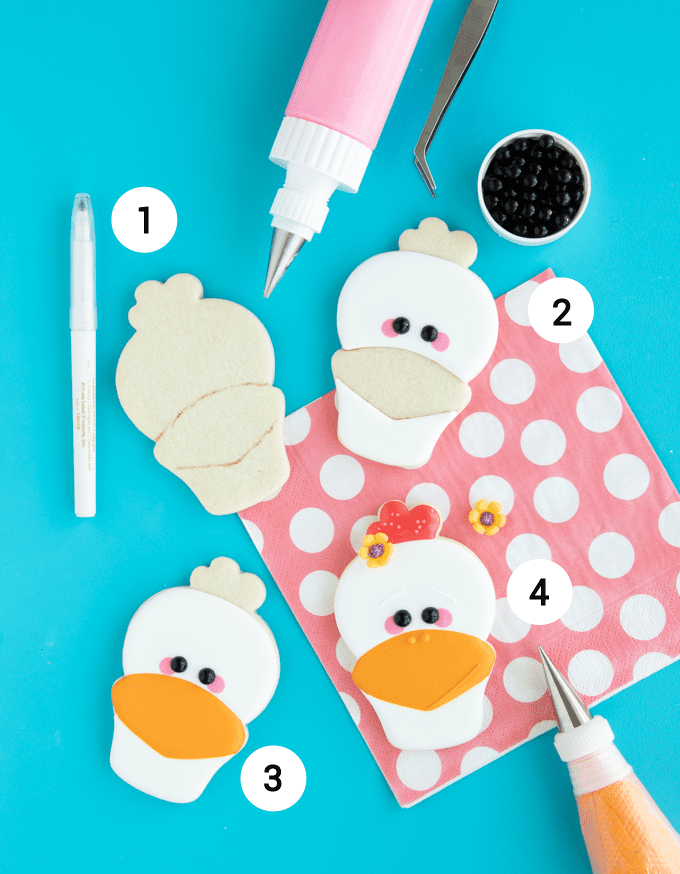
Step 1: Use templates to outline the beak with an edible marker.
Step 2: With white outline + flood icing ice the main parts of the chicken cookies. While the icing is still wet pipe pink dots on for the cheeks and
Step 3: Outline and fill the beak with orange
Step 4: Start by outlining and flooding the red feathers of the chicken cookies. Add a little red sprinkle for texture if you’d like. I also “glued” on sugar flowers using white outline icing. For the final details, I like to switch my tips to #1, #2 would work if that’s all you have. That’s up to you! Add simply eyebrows using white outline icing, and a beak line + nostrils using orange outline icing.
And that’s it for your chicken cookies! Stay tuned for my next post in this bird cookie series. Seriously once I started I couldn’t stop hatching new chicken cookies!
WANT TO CHECK OUT A FEW MORE BIRD COOKIE TUTORIALS?
- Flamingo Cookies From A Candy Corn Cutter
- Turkey Cookies From An Easter Basket Cutter
- Toucan Cookies From A Candy Corn Cutter
- Spring Chick Cookies From A Candy Corn Cutter
Heads up! To keep those legal gurus of the world happy, I need to inform you that some of the links in this post are affiliate links. In short – I may earn a small commission from the use of said link with no cost to you! But don’t worry I only link to stuff I use, love, and know you will too!


