

A few weeks ago my not so little cupcake turned 10. Would you believe when I started this blog she was a toddler? A TODDLER! We had a little-belated celebration this week due to the location being booked solid in December. (Which totally bought me a few extra weeks during the holidays, winning.) Naturally, the celebration called for cake, more specifically a Cookies and Cream Cake.
When it was time for her to put in her golden birthday cake request I cringed a little because I already knew what she wanted. As a matter of fact, I always know what she wants because she requests the same thing every…single…time.
Oreo Cupcakes.
Specifically my Oreo cupcakes from my book, Cupcakery. Now one might say this is a good problem as the recipe is obviously a keeper. But others (ok just me) might say I’ve made those silly cupcakes so many times I might explode if I have to bake them again. So I do what I always do, a sugar negotiation. Which ended up an Oreo inspired cake frosted in her fav color which we refer to as mint-blue. Mint Cookies and Cream Cake? Deal and done. This is where I should probably mention that’s also my fav color tied with a light pink as well. Which resulted in a new family favorite cake recipe. Winning all around.
BAKE THE CAKE
I wish so much I had a pic of the inside of the cake, your gonna have to trust me on this one! I used my favorite black cocoa powder to alter my favorite chocolate cake recipe (below) to really mimic the flavor of an Oreo cookie. That’s the magic trick to getting the cake to look and taste like the cookies part of this Cookies & Cream Cake. Really the cake will surprise you how much it reflects the last of the chocolate cookie shell it does me every time! After baking I let the cakes cool and then gave them a nice trim with a cake leveler to get them ready to stack. I doubled the recipe to make 4- 8in cakes, as I had a lot of people to serve.
MAKE THE FROSTING + DECORATE
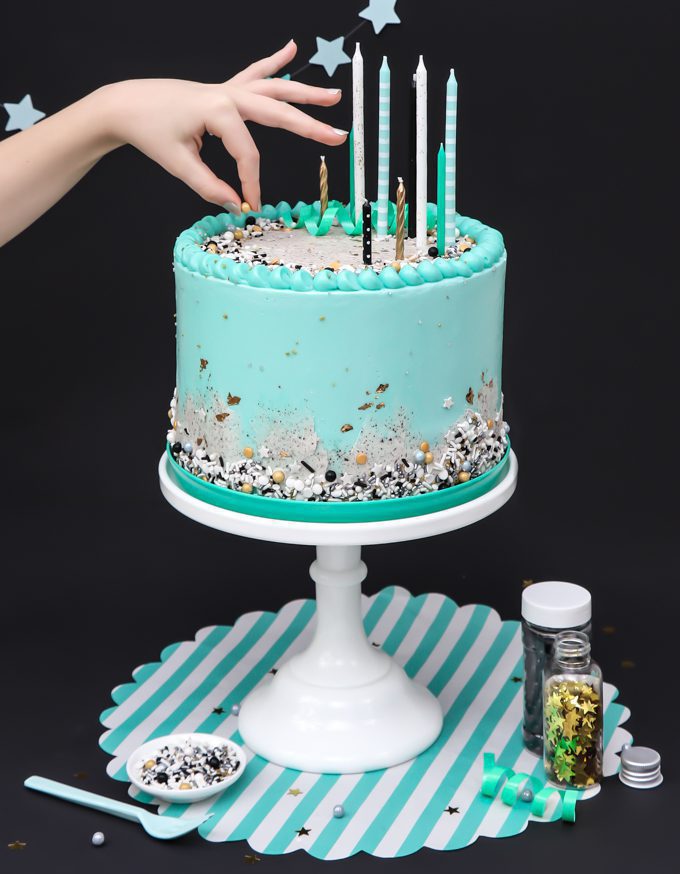
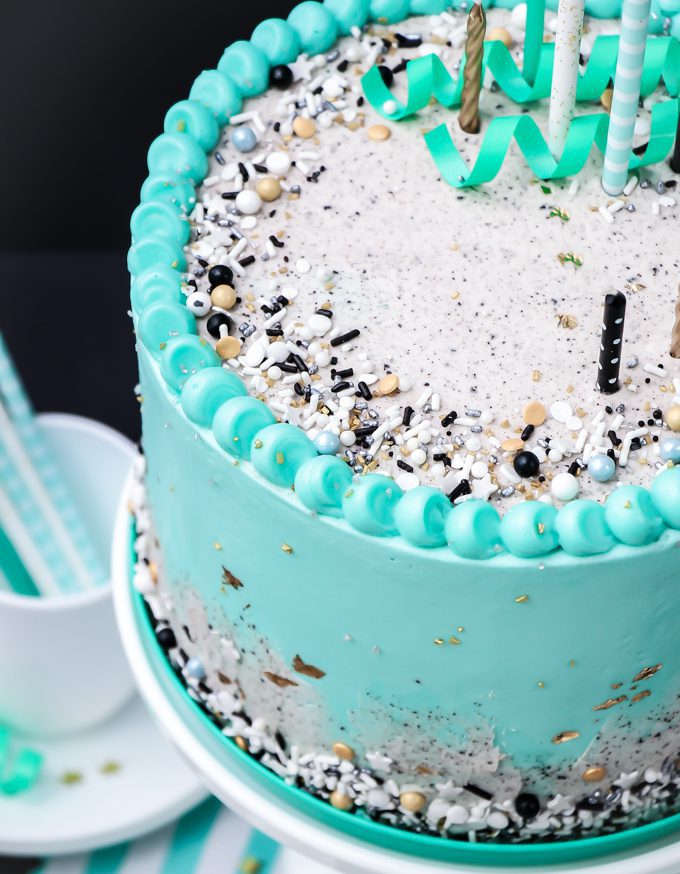
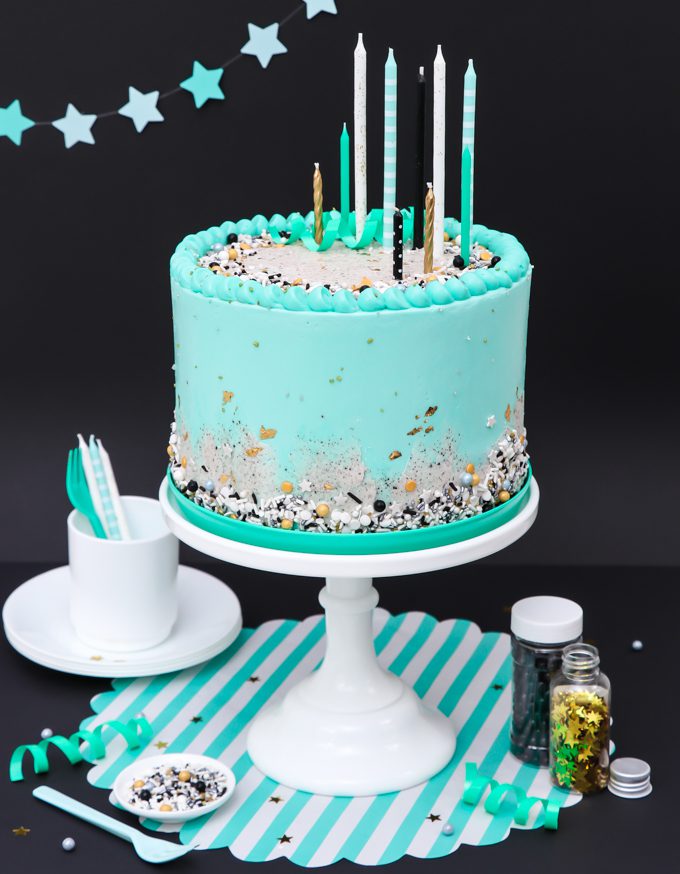
If you didn’t notice there are two frostings on this cake. I filled and stacked and even crumb coated the cake with a simple cookies & cream buttercream and frosted the outside in a vanilla swiss meringue buttercream colored “mint-blue”. Then to bring the cookies and cream to the outside I did a thin layer of cookies and cream buttercream on the top and on the bottom rim. I decorated the cake with these sprinkles (I added a few stars and gold round quins), some fun candles, a little edible gold leaf, and ribbon. The cake came together so well. In all reality, you could possibly omit the buttercream and separate some swiss meringue before coloring it to add the cookie crumbs too. You will need about a 1/2 cup per layer. I tend to go a little nuts on the frosting so I simply like to have extra just in case. There is nothing worse than not having enough frosting at the end of the cake! Making a small batch of buttercream for the second frosting is a lot easier than making an entirely new batch of swiss meringue again, also I feel the texture of it was even better for the cookies and cream part. Totally up to you and your desires!
The kiddo was so thrilled – mission accomplished. Now the real question is what will she request next year?!?! I’m putting a safe bet on something Oreo filled.
Heads up! To keep those legal gurus of the world happy, I need to inform you that some of the link in this post are affiliate links. In short – I may earn a small commission from the use of said link with no cost to you! But don’t worry I only link to stuff I use, love, and know you will too!
COOKIES AND CREAM CAKE
OREO CAKE
- 2 cups sugar
- 1-3/4 cups all purpose flour
- 1/4 cup cocoa powder
- 1/4 cup black cocoa powder
- 2 teaspoons baking powder
- 1 tsp. salt
- 2 large eggs
- 1 cup milk
- 1/2 cup vegetable oil
- 2 teaspoons vanilla extract
COOKIES & CREAM BUTTERCREAM FILLING
- 1 cup unsalted butter
- 1 teaspoon vanilla
- 4 cups powdered sugar
- 3-4 tablespoons milk or heavy cream
- 3 tablespoons crush Oreo cookie
VANILLA SWISS MERINGUE BUTTERCREAM
- 9 large egg whites at room temp
- 2 cups granulated sugar
- 4 sticks unsalted butter softened but still cool and cut into small chunks
- 1 tbsp good quality vanilla
- 1/4 tsp salt
OREO CAKE
-
In a large mixing bowl, or the bowl of an electric mixer, mix together sugar, flour, cocoa, baking powder, baking soda, and salt until fully combined.
-
Add in eggs, oil, and vanilla extract and mix until combined. Pour in milk and whip on high for 2 minutes. Pour into 2-8in (or 3-6in) greased + floured baking pans. For an even easier cake removal add a parchment paper circle lining to the bottom of the cake pan.
- Bake at 350 for 25-30 minutes or until toothpick comes out clean. Let cool 10 minutes before removing from pan.
COOKIES & CREAM BUTTERCREAM FILLING
-
Whip butter until smooth. Add in vanilla and whip until combined. Slowly add in powdered sugar mixing slowly between additions.
-
One tablespoon at a time, add in milk whipping in between each addition stopping when you have reached desired consistency. Once your buttercream is the consistency that you would like, add in Oreo crumbs and give it a final whip.
- NOTE: It’s important to remember your using this buttercream to fill a stacked cake. I always error on a more firm icing (aka less milk) for buttercream fillings.
VANILLA SWISS MERINGUE BUTTERCREAM
- Step 1: Combined the egg whites and the sugar in a metal or glass bowl of an electric mixer. Whisk together until combined. Make sure there is NO egg yolk in the egg whites. The fat content in the yolk could possibly ruin the frosting.
- Step 2: You’ll need to set up a water bath to now heat the egg white/sugar. Add about 1 inch of water to a small pot or saucepan that allows you to set the mixing bowl on top of it without touching the water. Heat the water to a simmer and set the mixing bowl on top. Continue slowly whisking the egg whites to be sure the eggs don’t begin to cook. After a few moments, you’ll see the sugar has begun to melt making the mixture smooth. When the mixture is hot to the touch test it by putting a little between your index finger and thumb. If you can no longer feel the grit of the sugar it’s done heating. Be careful! Don’t let the mixture get TOO hot before testing, ouch!
-
Step 3: Set the bowl on the mixer, using the whisk attachment, and turn it to medium-high. Set the timer for 15 minutes and let it do its thing! At 15 minutes check to see if the bowl is now cool and the egg whites have turned into a fluffy stiff meringue. When you pull the whisk out it should have a shiny peak of frosting standing on the top. If it’s not quite there yet turn then mixture on for another 5 minutes and check again. Sometimes mine takes up to 25 minutes before the bowl is cool and my meringue is down. You want to pay attention to the cooling part because if it’s not cool it will wreck havoc on your butter in the next step. If for any reason your bowl is still not cool at 25 minutes you can pop it in the fridge to chill for a few minutes before moving on.
-
Step 4: Turn the mixture on medium and begin adding in the butter. Whip it on medium-high again until it has turned into smooth, beautiful buttercream. Sometimes the butter can turn the frosting into a runny mess. After whipping for a few minutes if it doesn’t turn back into beautiful fluffy buttercream place it in the fridge for 10-15 minutes until cool then re-whip again until it’s beautiful fluffy meringue buttercream. If you would like to color your swiss meringue now is the time!
- Step 5: Beat in the vanilla and salt.
- Once your cakes are cool and you have both frostings complete it’s time to bring it all together! Trim the “domes” off your cakes so they are nice and flat. Fill your cake with your cookies and cream buttercream. I also used it as a thin crumb coat as well. Chill the cake with just the filling and crumb coat for 15 minutes then frost the outside once more with your final vanilla swiss meringue. Decorate as you please!


