

90’s kids rejoice! I have the cake for you, a Buttercream Pom Pom Cake! This cake is basically what it would look like if Lisa Frank, Grunge, and a Koosh Ball were all baked into a cake. (Please tell me you remember what a Koosh Ball is?) Fast forward to 2018 and although they aren’t exactly Koosh Balls, Pom poms are so on trend right now, and it’s not hard to see why. A few months ago I had this idea to bring that trend to the sweets world with some pom pom cupcakes. They were actually for a little neighbor girl’s birthday and I never got around to blogging them. They were such a hit on my Instagram feed and so many of you had asked for a tutorial. So naturally I had to take them one step further and put them on a cake. Today we’re bring this Buttercream Pom Pom Cake to the blog!
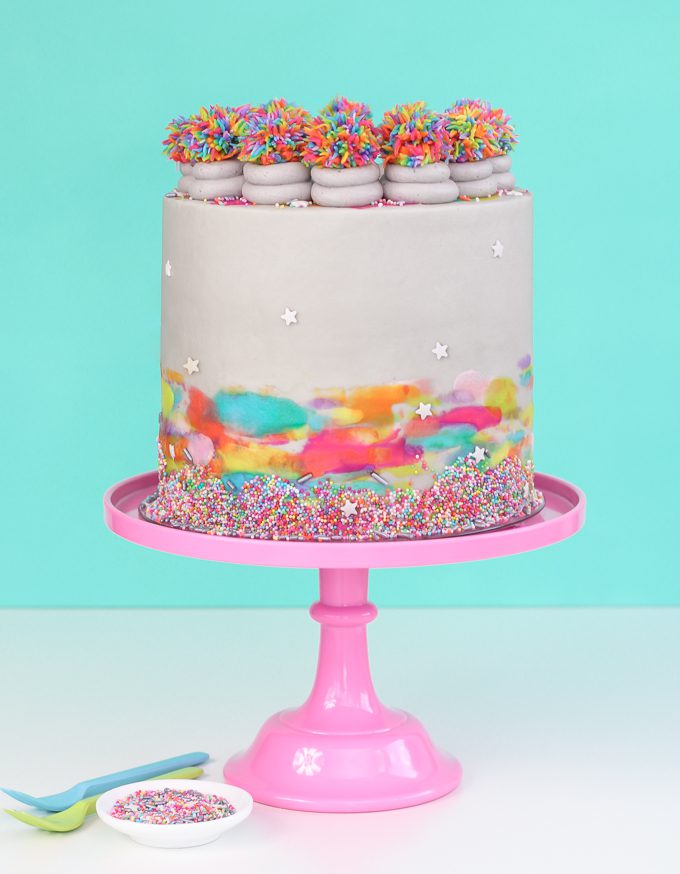
This cake certainly has a look all of it’s own, an I am so down with that. Sometimes I have an exact plan in place for my creations and other times they evolve as I go. I had no intention on making this cake grey, but as I was mixing the buttercream this urge came along and next thing I know I had grey frosting. In the end I just love how the neutral grey buttercream allows for the rainbow of colors to just pop!
How To Make A Buttercream Pom Pom Cake With Watercolor Effet
Recipes
Tools
- Cake Scraper
- Wilton Grass Tip
- Boo Boo Stick OR Similar Tool
- Tooth Pick OR Pointed Tool
- Coupler
Supplies
- Gel Colors (to color buttercream)
- Sprinkles
- Plastic Wrap
- Piping Bags
- Small Parchment Squares
- Clear Piping Gel
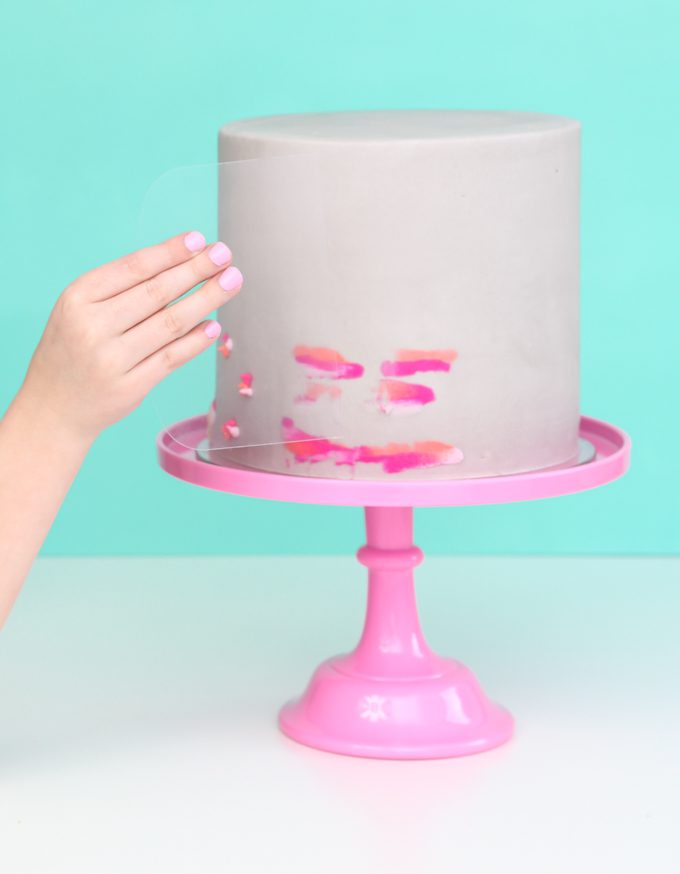
Step 1: Starting with a frosted + chilled cake. Pipe or use a spatula to apply dots or blobs of buttercream on to the cake. The size of buttercream spot you put on the cake will effect the outcome. If you want large watercolor spots you ay want to apply some buttercream on with a frosting spatula. I wanted small thing spots of water color look so I used piping bags to apply small dots.
DECORATOR’S TIP: To make sure my colors flow, I strategically place my colors next to colors that blend well together. So if I am starting with orange I would place yellow spots right next to the orange, and then green next to the yellow. This really helps the end result look well put together.
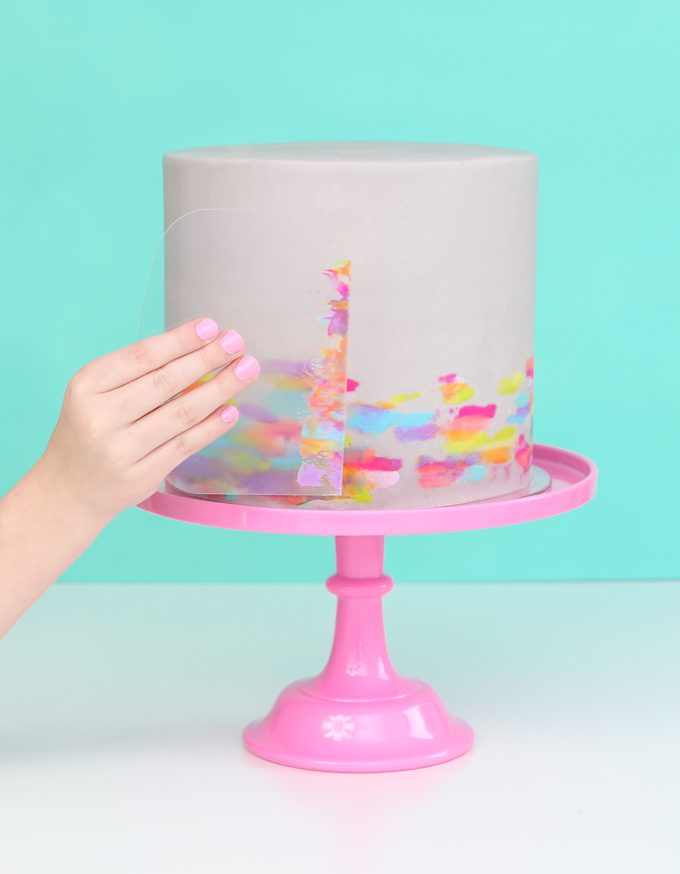
Step 2: Use a cake scraper to then smooth out the buttercream spots. I recommend doing one section of the cake at a time. Buttercream will crust over so you want to smooth it out as soon as possible. The longer you drag the scraper the longer your spots will look. I was going for long and skinny here. Remember to clean off your cake scraper each time. Speaking of, I absolutely love this clear flexible cake scraper for this job.
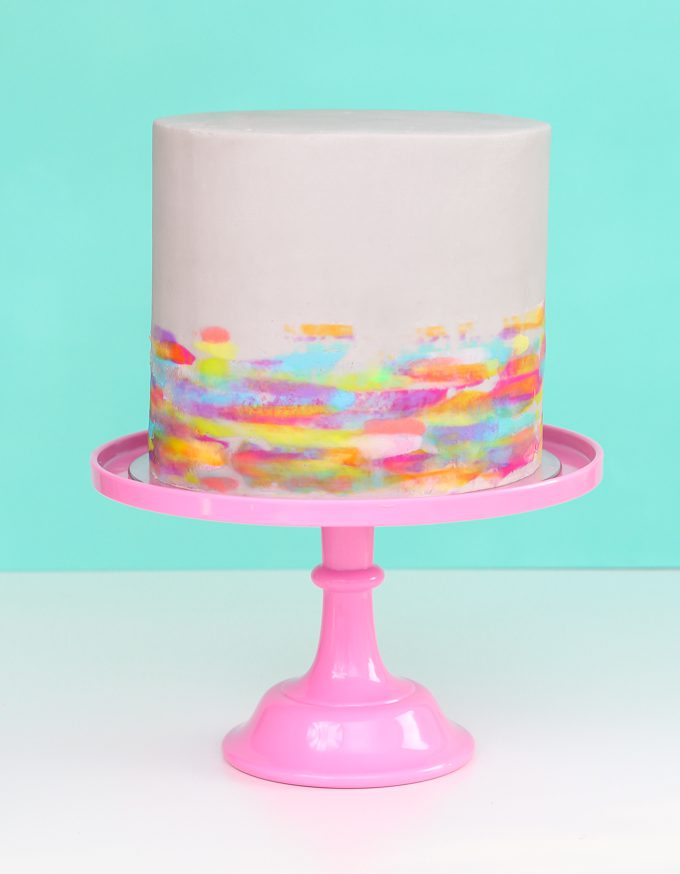
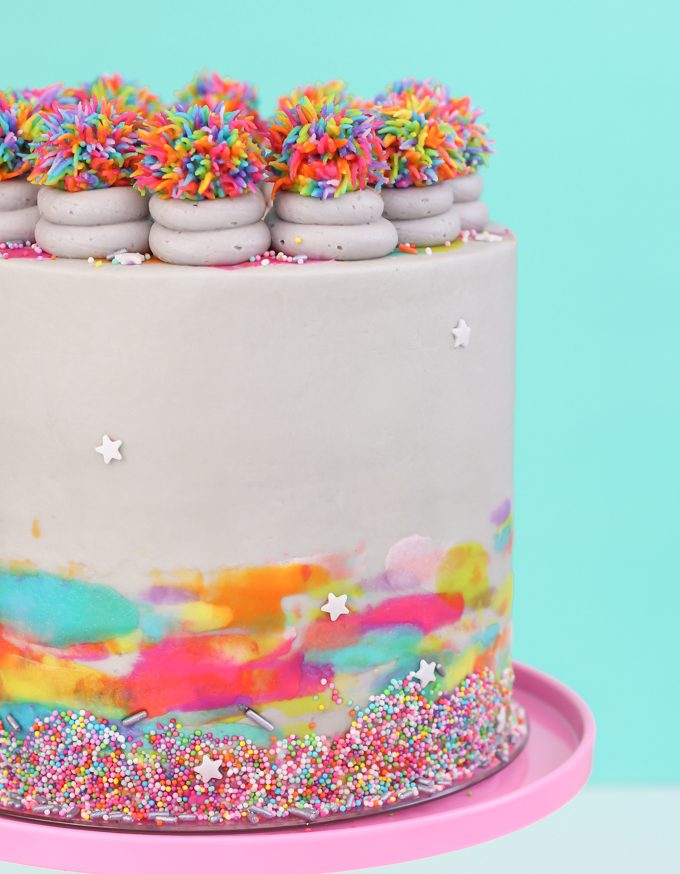
Step 3. Once you’ve gone around the cake completely if you feel it still needs some spots filled in place it in the fridge to chill for about 15 minutes then finish up. This will keep your frosting from getting too muddy. I added a little extra buttercream here and there to give layers. I also added a little watercolor effect to the rim of the top of the cake.
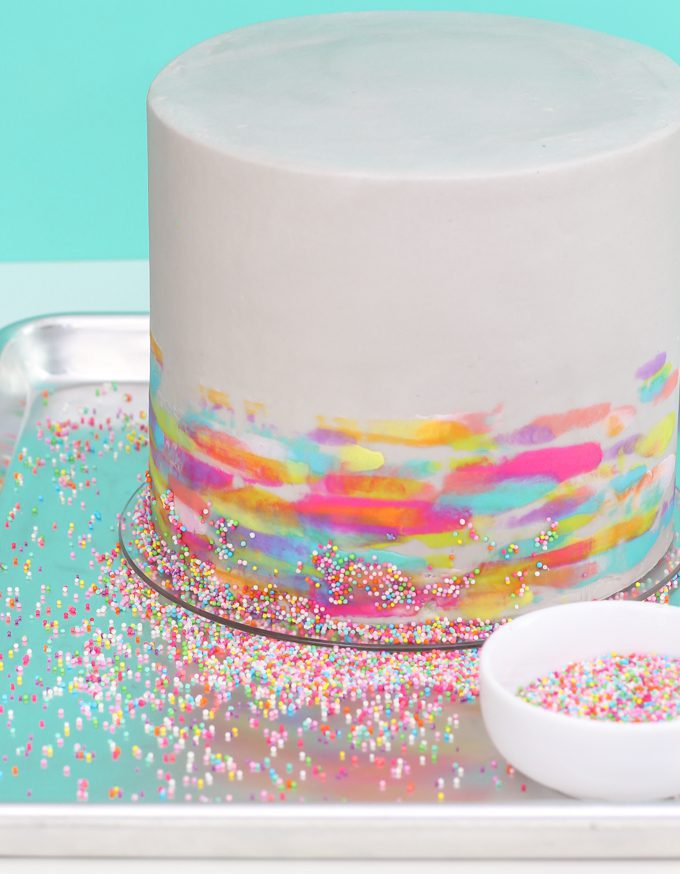
Step 4: Now it’s time for the sprinkles! If your frosting is still fresh you can stick them right on the cake. If it has been chilled or already crusted over brushing a thin layer of clear piping gel on the bottom rim makes the perfect sprinkle glue!
Make Rainbow Buttercream Pom Poms
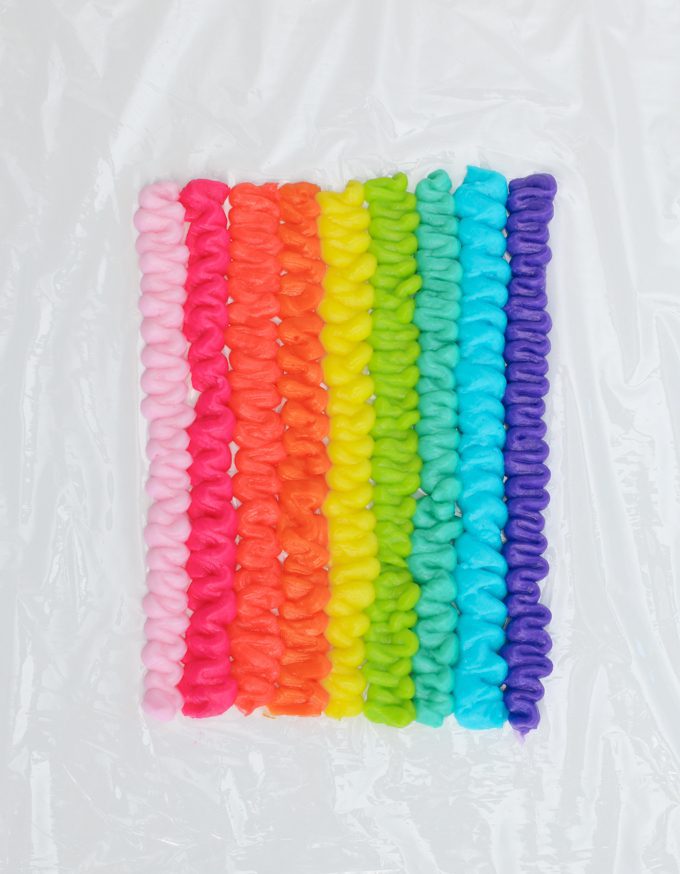
Step 5: Begin by piping your rainbow frosting on to clear plastic wrap sheets. The frosting should be about 5-6 inches long in total. To complete this cake I recommend making four of these rainbow bags from the start. Making multiple smaller rainbow bags helps keep the frosting from getting mudding in the bag. Especially when your working with something like the grass tip where the bag is in your hand and getting warm a lot longer then usual.
Step 6: Gently roll up the sheet of plastic allowing the frosting to create a sausage shape, be gently with it! Twist the ends, tying one off. Insert the first buttercream rainbow bag into a piping bag with coupler and complete with Wilton Grass Tip.
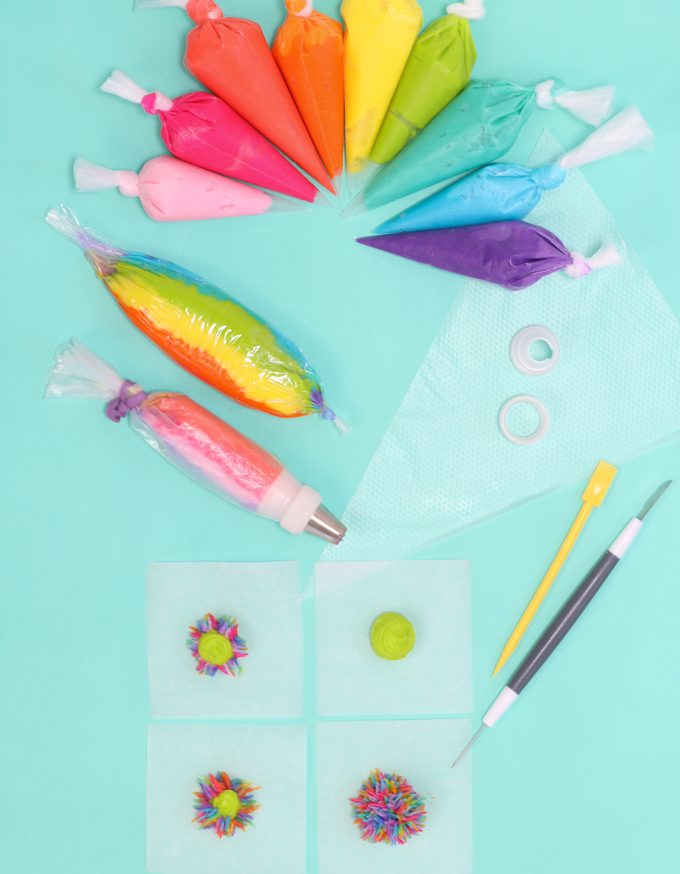
Step 7: If you are making pom pom cupcakes you will be able to pipe the buttercream pom pom right on to the cupcake easily. But putting them on top off the cake was a bit more of a challenge (think angle and proximity). My way around this was to pipe the buttercream pom poms on parchment paper squares, freeze, then place on the cake. Ta-da! Worked Like a charm. To pipe the buttercream pom poms start of with a mound of buttercream ( I used my leftover piping bags so I wasn’t using all of my rainbow bags). Then holding the parchment paper in your hand start off in the center of the mound and push and pull with the grass tip. You want to let the frosting fall from the middle down to give it a round look, or they will look flat. Continue working your way up the mound until you’ve covered your pom pom. If you mess up don’t worry! These are super buildable. If my buttercream looked a little funky in one spot I could just frost right over it to cover it up. After a pom pom of two you’l have the hang of it for sure. Place your buttercream pom poms in the freezer for 15 minutes.
Step 8: If you would like, use your grey or cake color buttercream to pipe swirls on the tot of the cake. I liked how this gave the pom poms a little platform. Next use a little boo boo + needle tool to gently move your pom poms from the parchment paper to the cake, then press down with the needle to not crush the pom pom.
And that’s it guys! Wasn’t that so fun! I can hardly wait to see how you guys use Buttercream Pom Poms on your treats!
Heads up! To keep those legal gurus of the world happy, I need to inform you that some of the links in this post are affiliate links. In short – I may earn a small commission from the use of said link with no cost to you! But don’t worry I only link to stuff I use, love, and know you will too.


